DocMagic's eSign Console allows the Lender to easily manage loandocument packages and initiate the eSign experience.For a downloadable PDF version of this guide, click here.
|
|
|
1 .
|
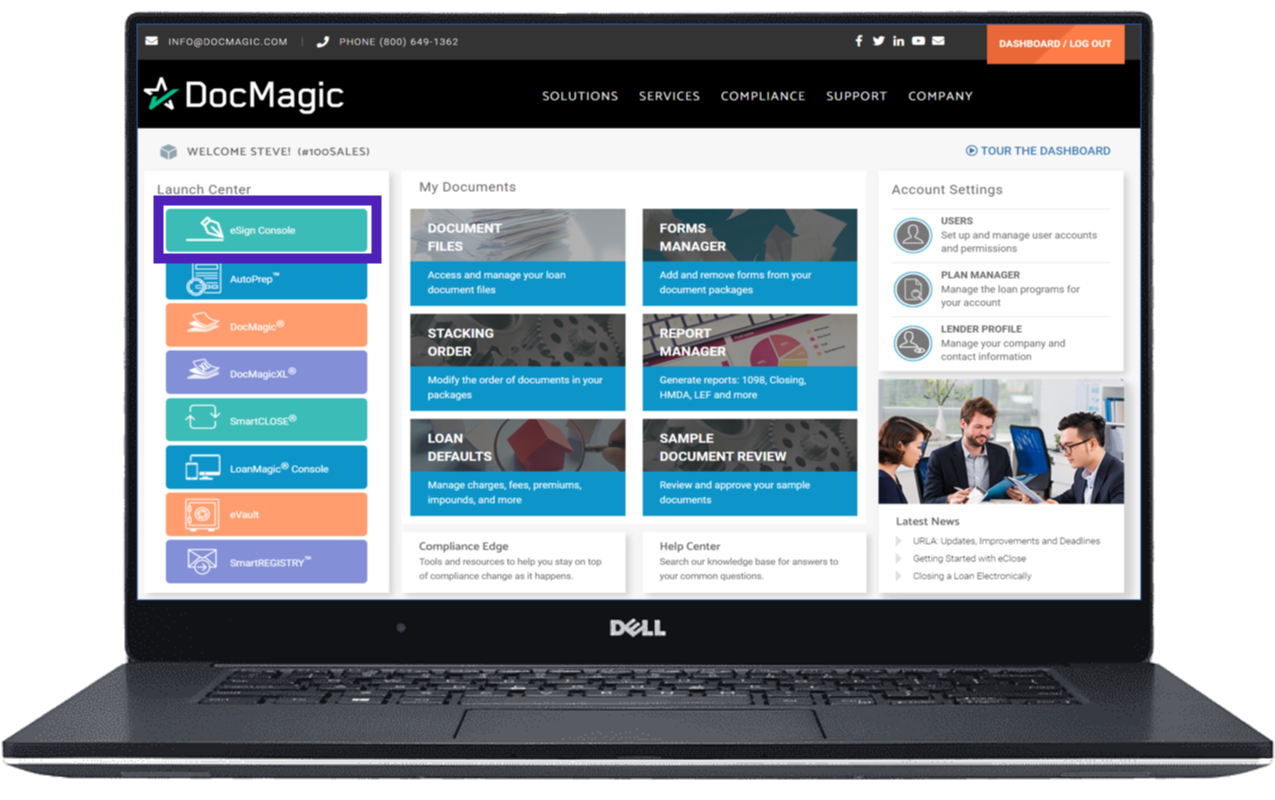
Start by logging into our website. Go to the dashboard and open the eSign Console from the Launch Center on the left.
|
|
|
|
|
2 .
|
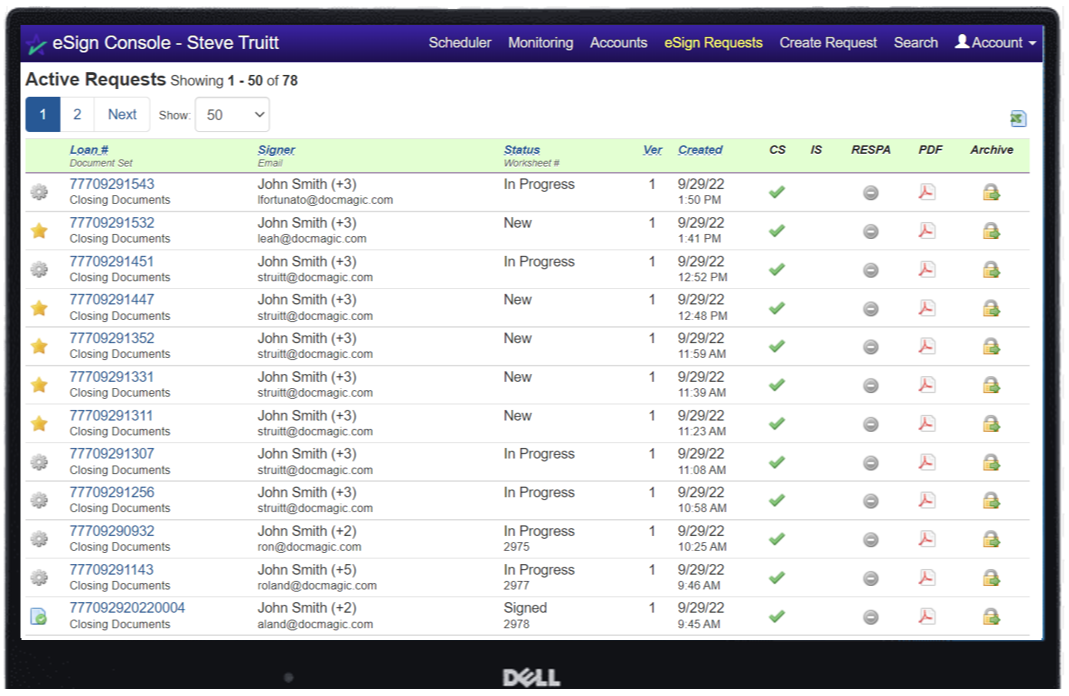
You'll be greeted with a list of document sets that have been processed within the past 90 days. It is critical to note that these loan packages will only be stored on this console for 90 days after they are generated. After all signatures are collected, it's a good idea to download all signed documents to your desktop. Directions will be explained later in the guide.
|
|
|
|
|
3. |
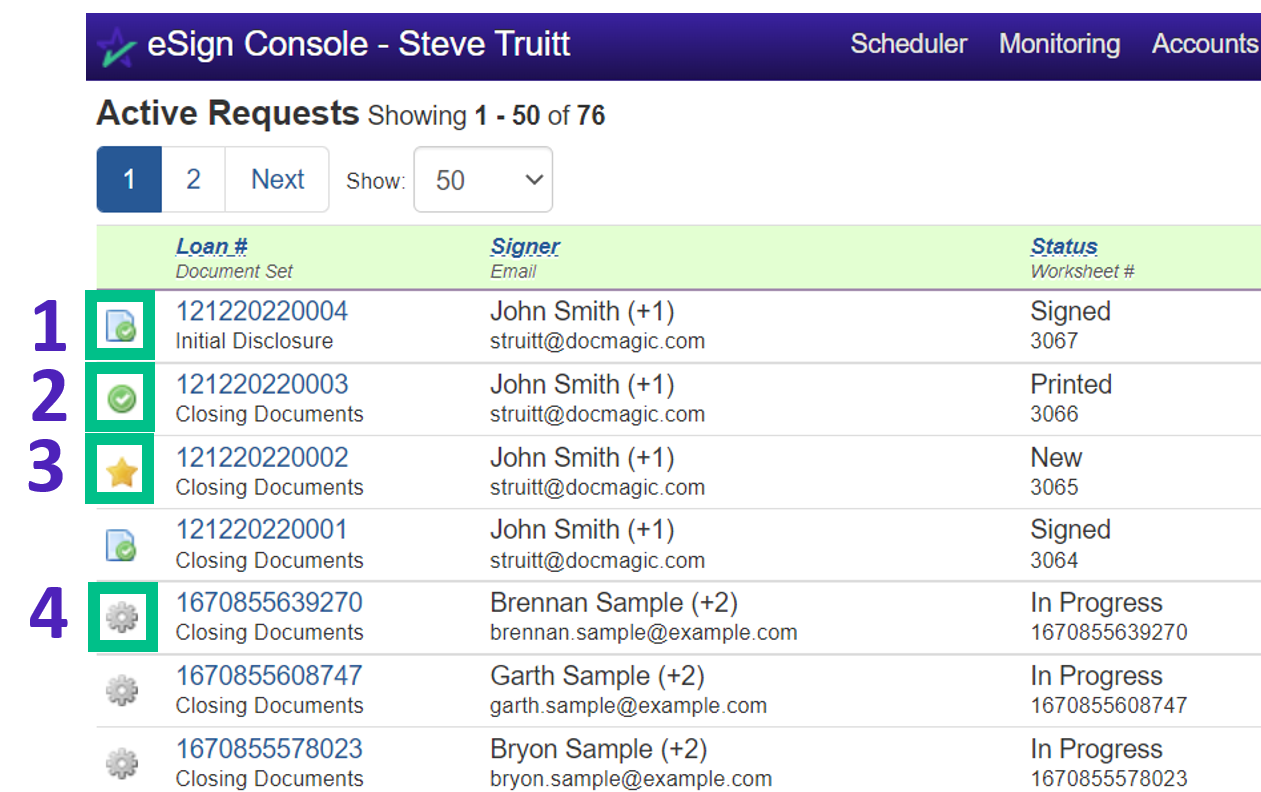
The icons on the left indicate the processing status of the document set.
|
|
|
|
|
4. |
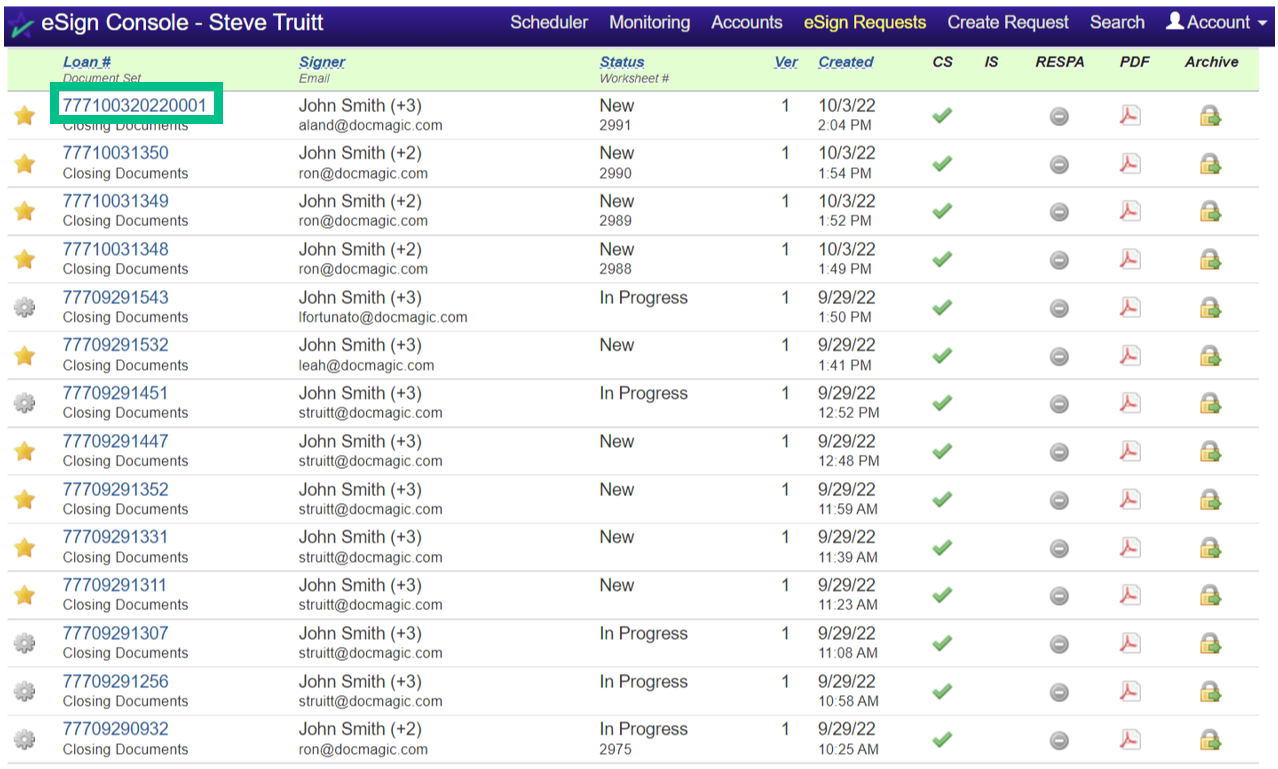
Click on a loan number to see details about that document set.
|
|
|
|
|
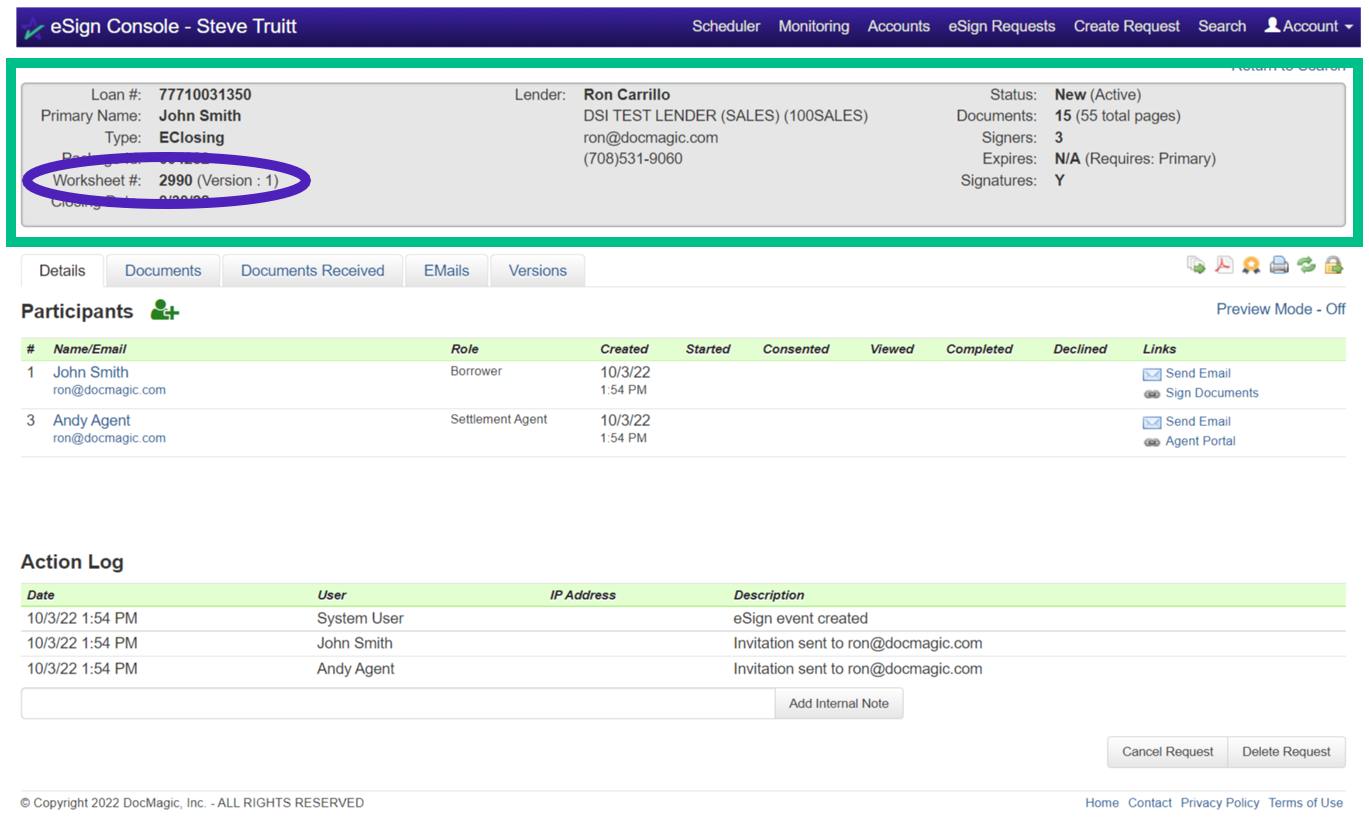
5. |
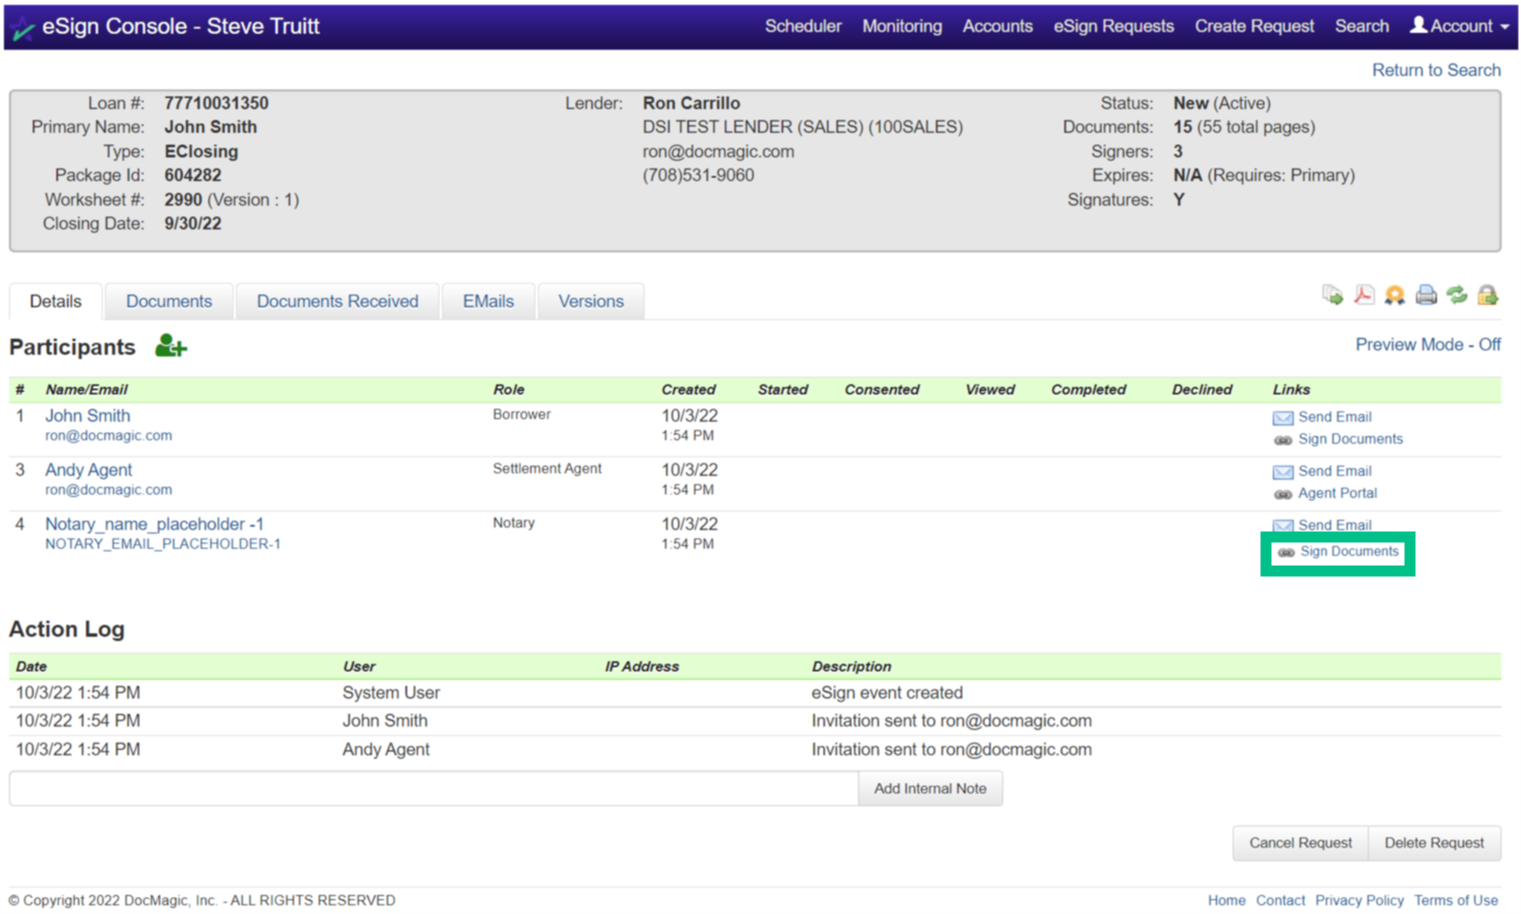
At the top of the page, you can see the details of the loan, the lender, and the status of the process. If you have an issue where you'll need to contact DocMagic's Customer Service department, they'll always ask you for the worksheet number (circled).
|
|
|
|
|
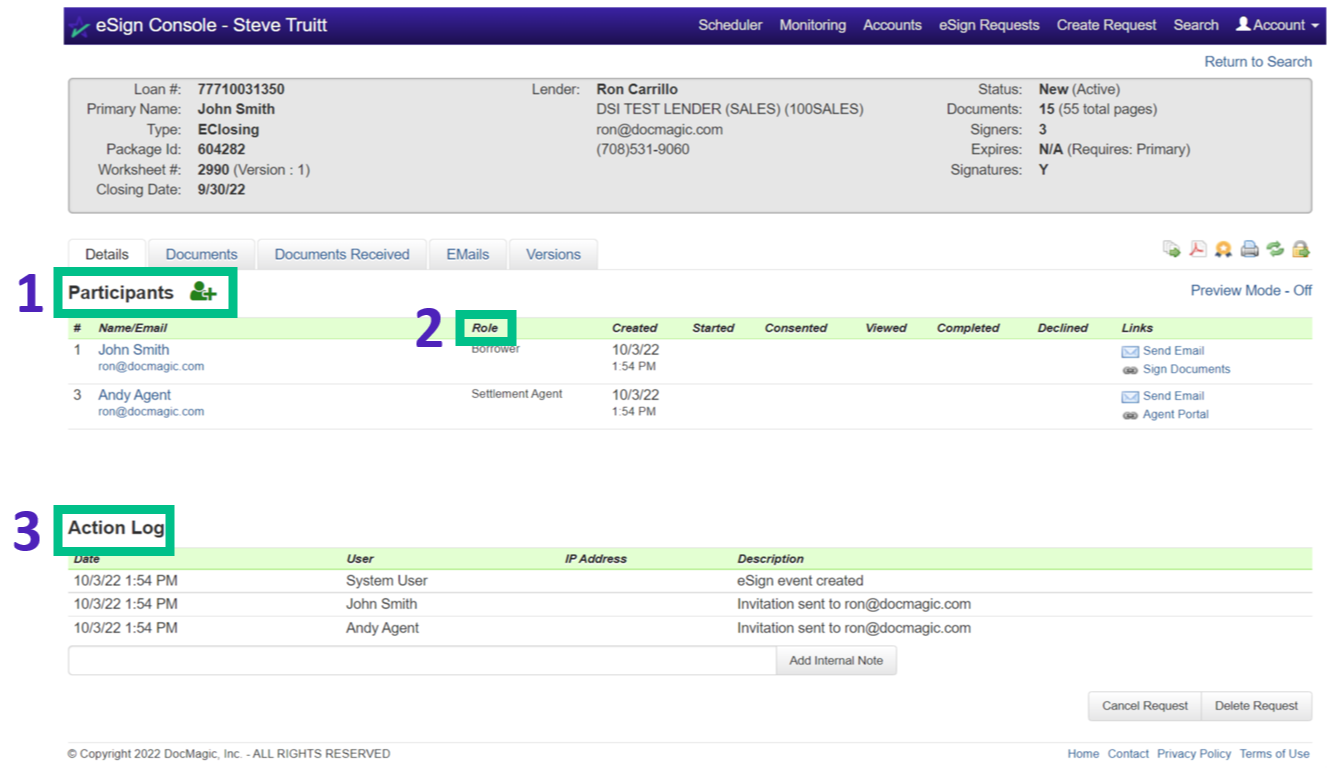
6. |
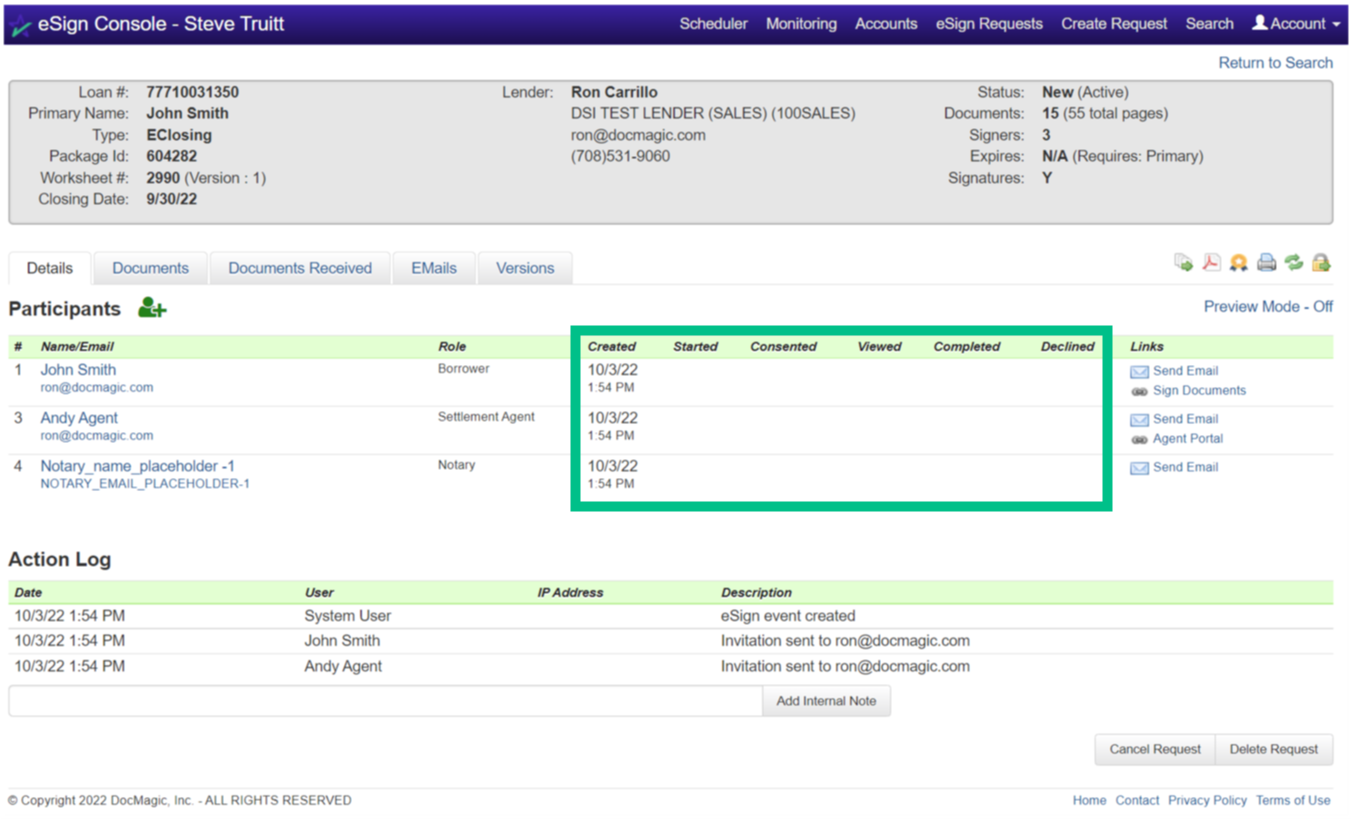
Under the Details tab, you can find the Participants (1) and their respective roles (2). Further below, the Action Log (3) tracks every step taken with this document set.
|
|
|
|
|
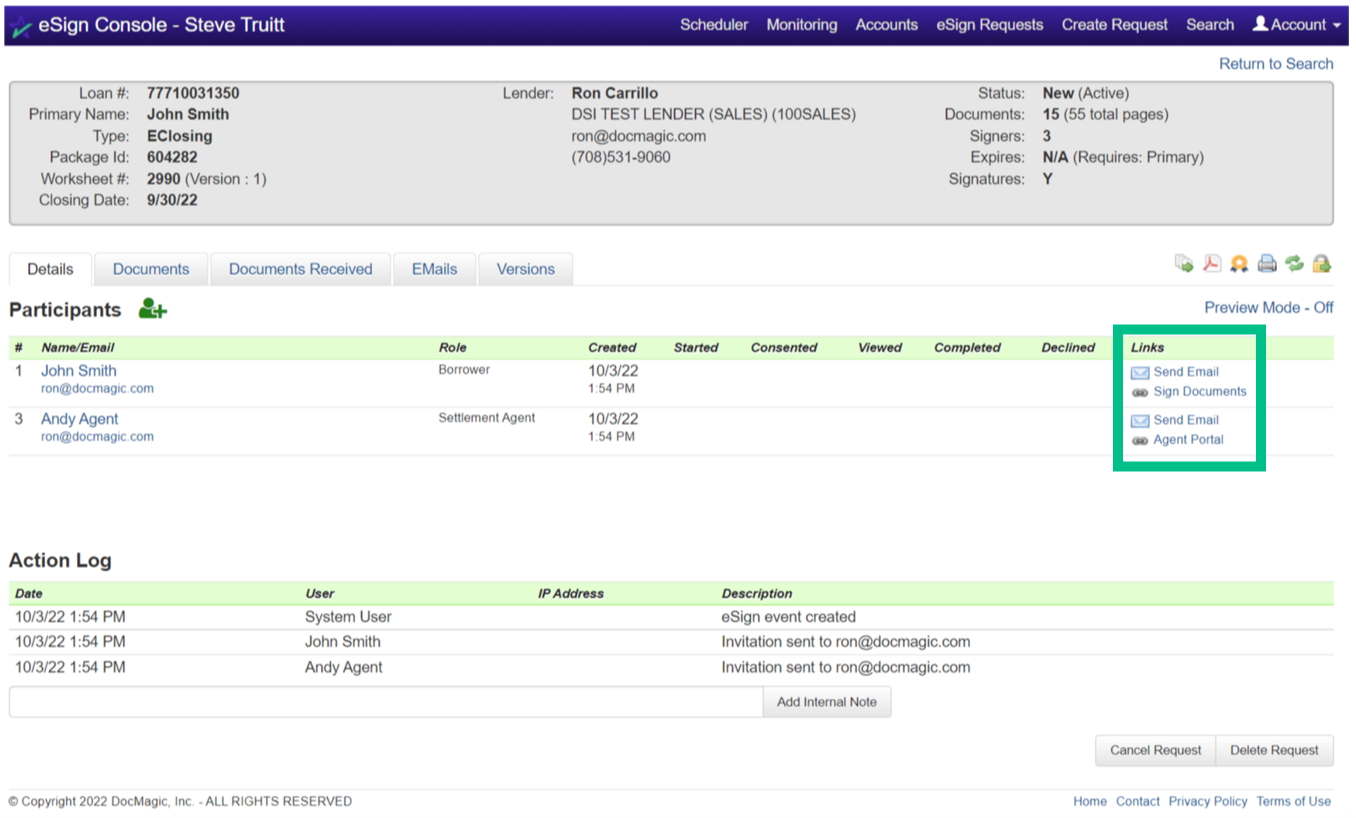
7. |
Under the Links column on the far right: "Send Email" sends the borrower a reminder email to sign the documents if they have not yet done so. "Sign Documents" allows you to open that Participant's signing experience. This assumes that the participant is with you - clicking the link will open the signing experience in another tab. "Agent Portal" allows you to enter the Settlement Agent portal if a settlement agent is participating.
|
|
|
|
|
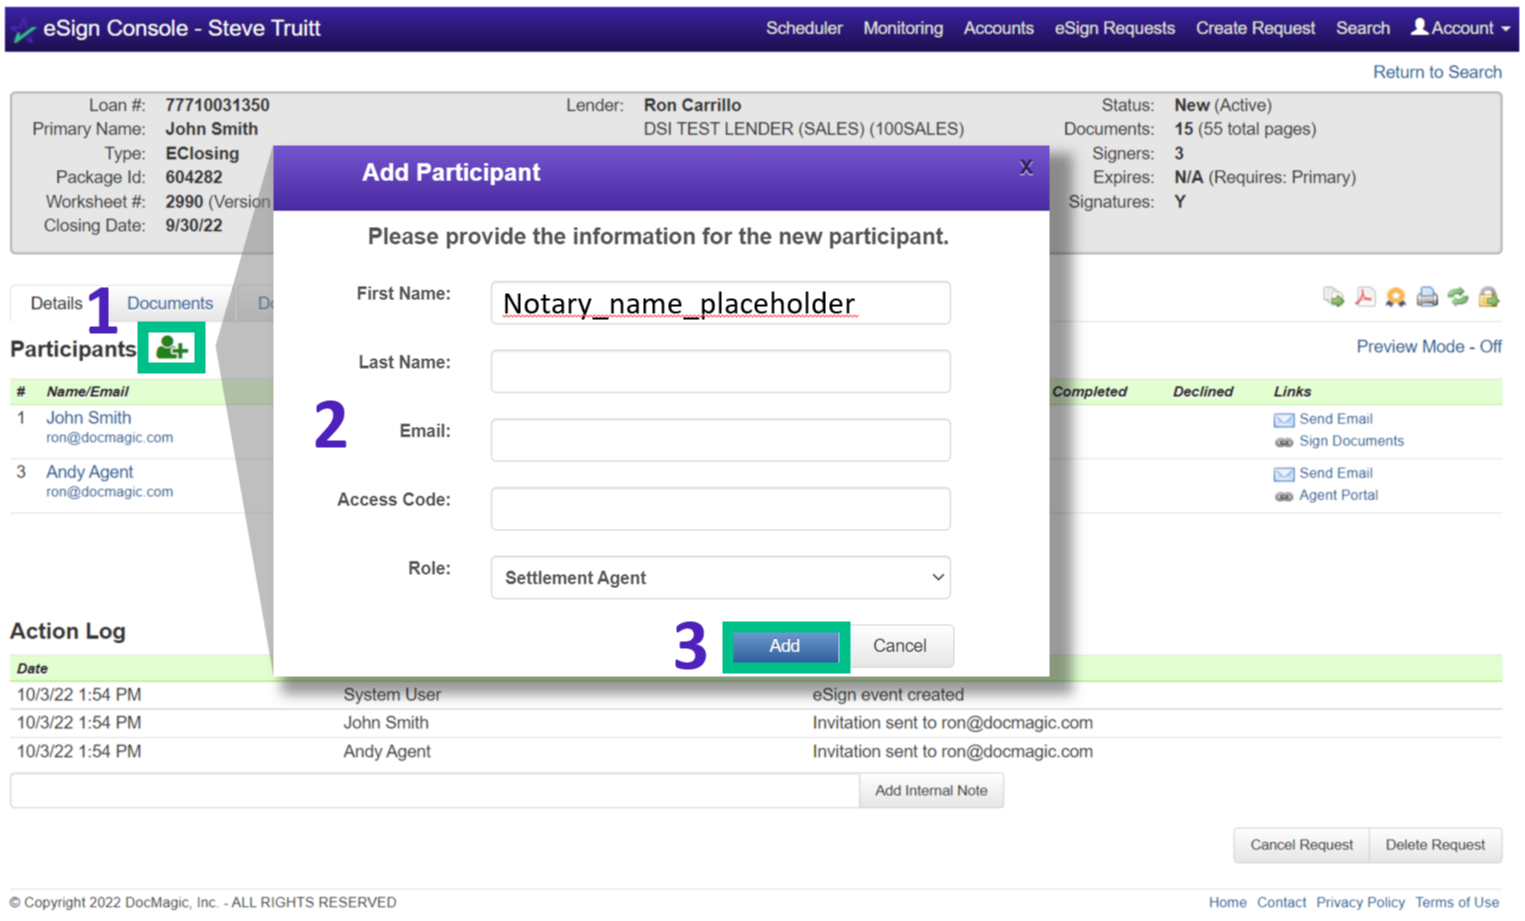
8. |
1. Click here to add participants. 2. Populate the fields in the window that appears. Be sure to give them an Access Code and choose the correct role from the dropdown menu. 3. Select Add when done.
|
|
|
|
|
9. |
If there are signatures that are designated for the new participant, you would be able to go in and sign by clicking Sign Documents.
|
|
|
|
|
10. |
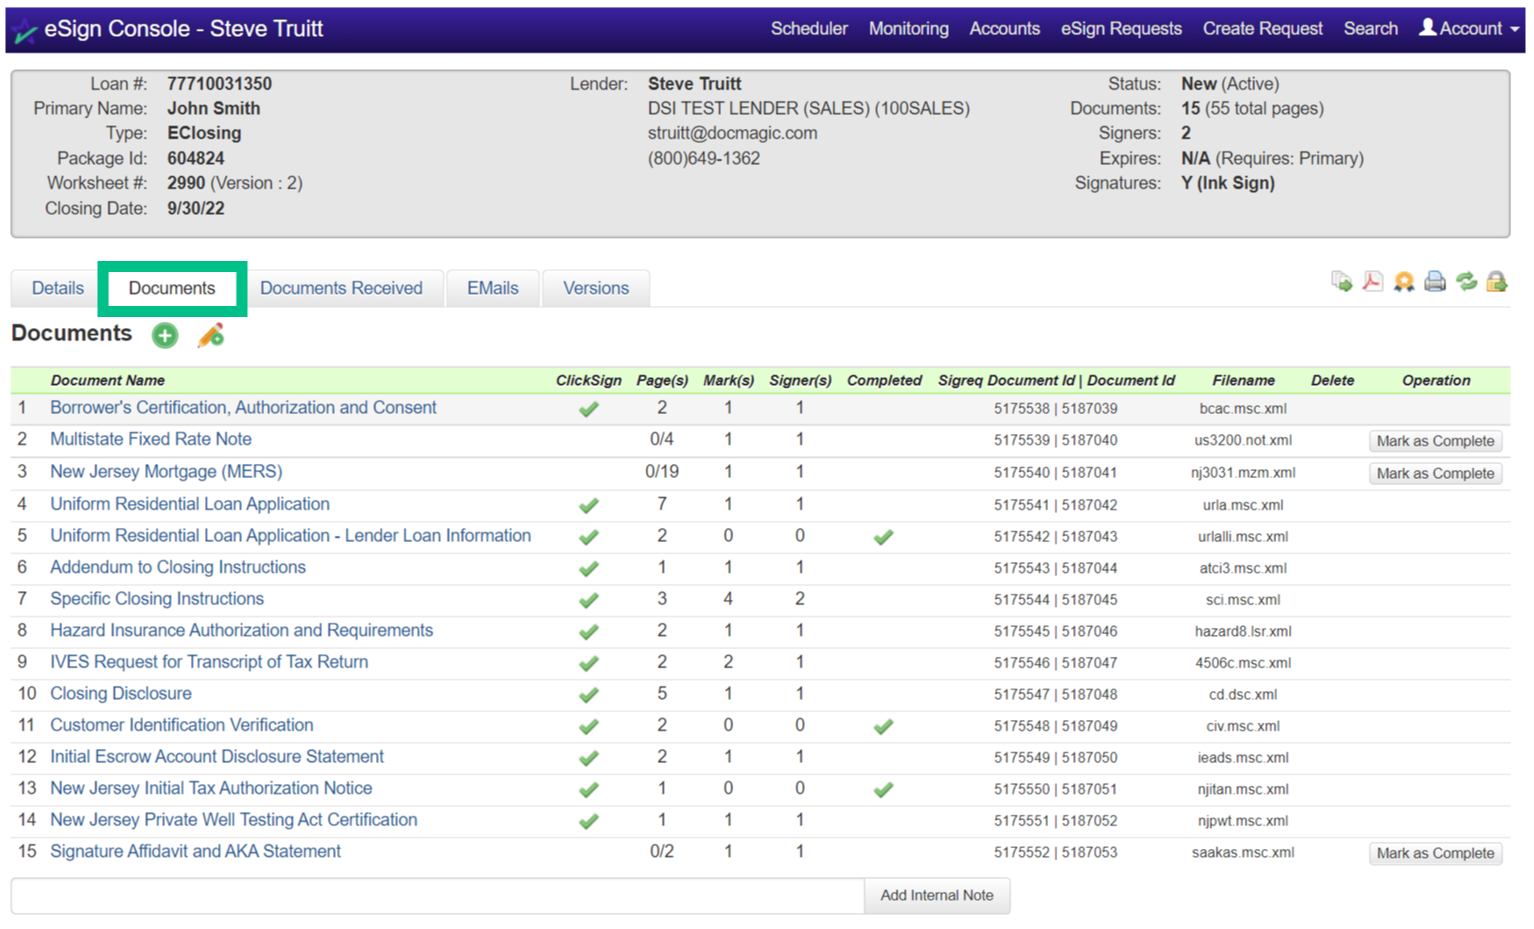
The Documents Tab displays a breakdown of the individual documents that are to be signed as part of the document package. Click on a Document Name to download a PDF copy of the document.
|
|
|
|
|
11. |
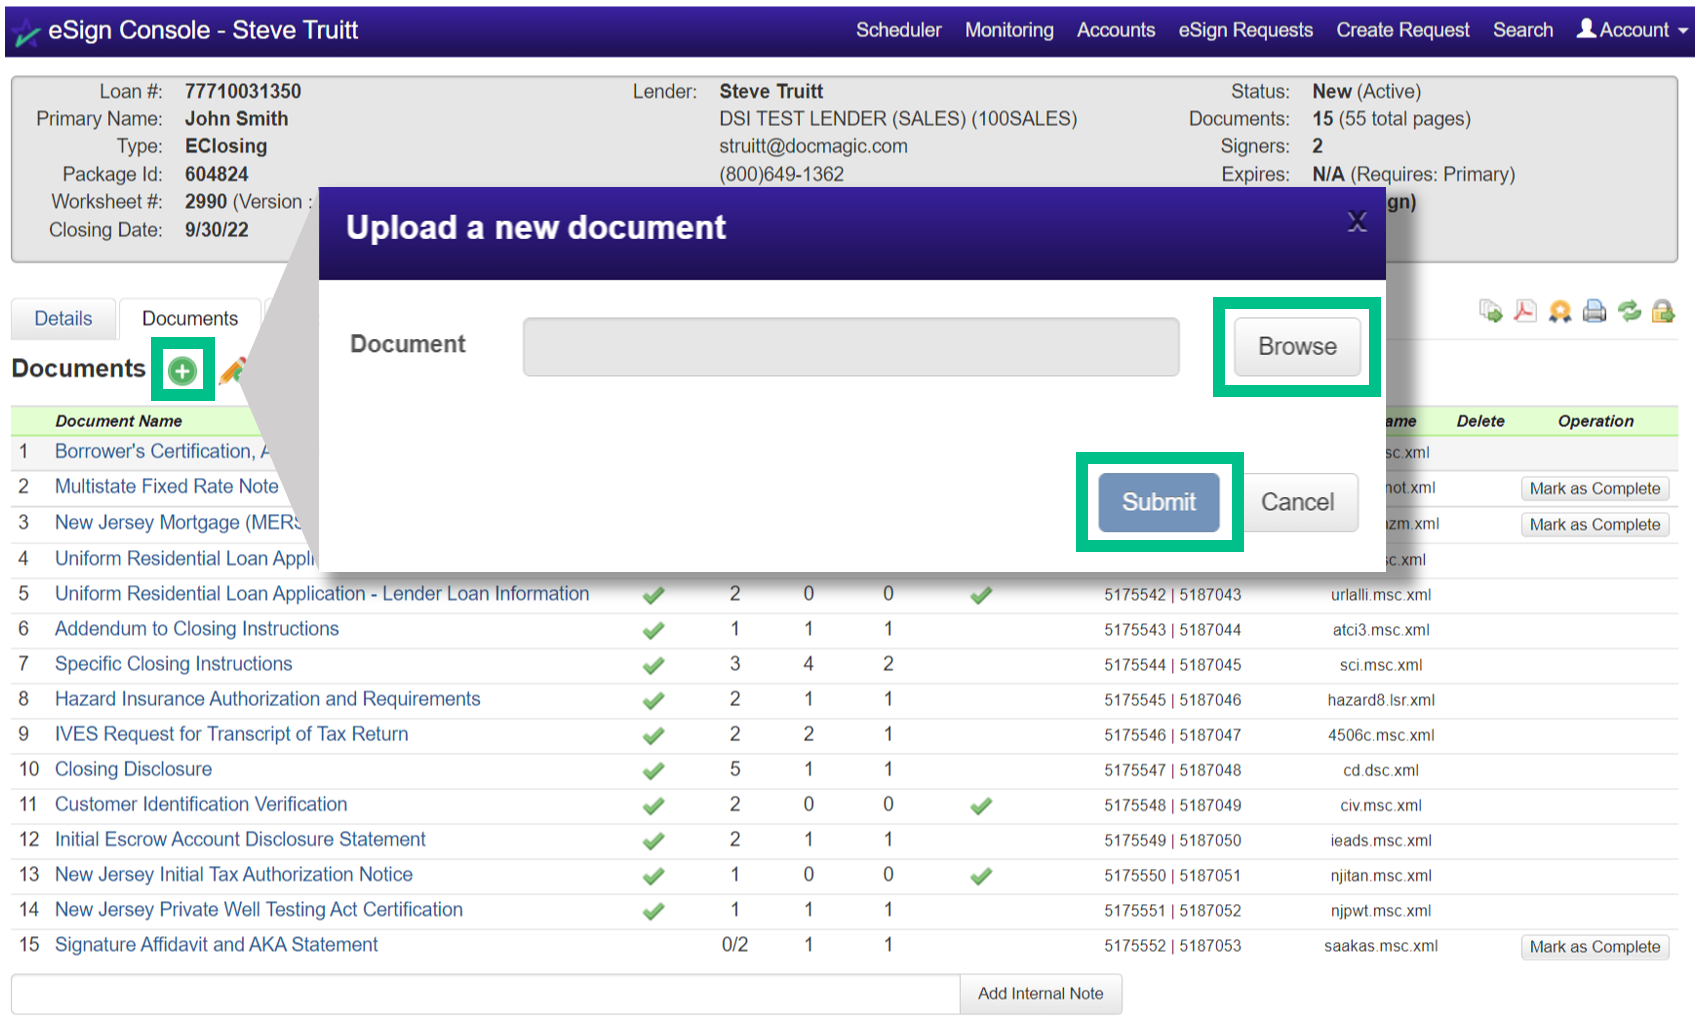
To add documents to the package, click the green plus button. A window will appear. Hit "Browse" and select a document from your computer. Click Submit to add your document to the package.
|
|
|
|
|
12. |
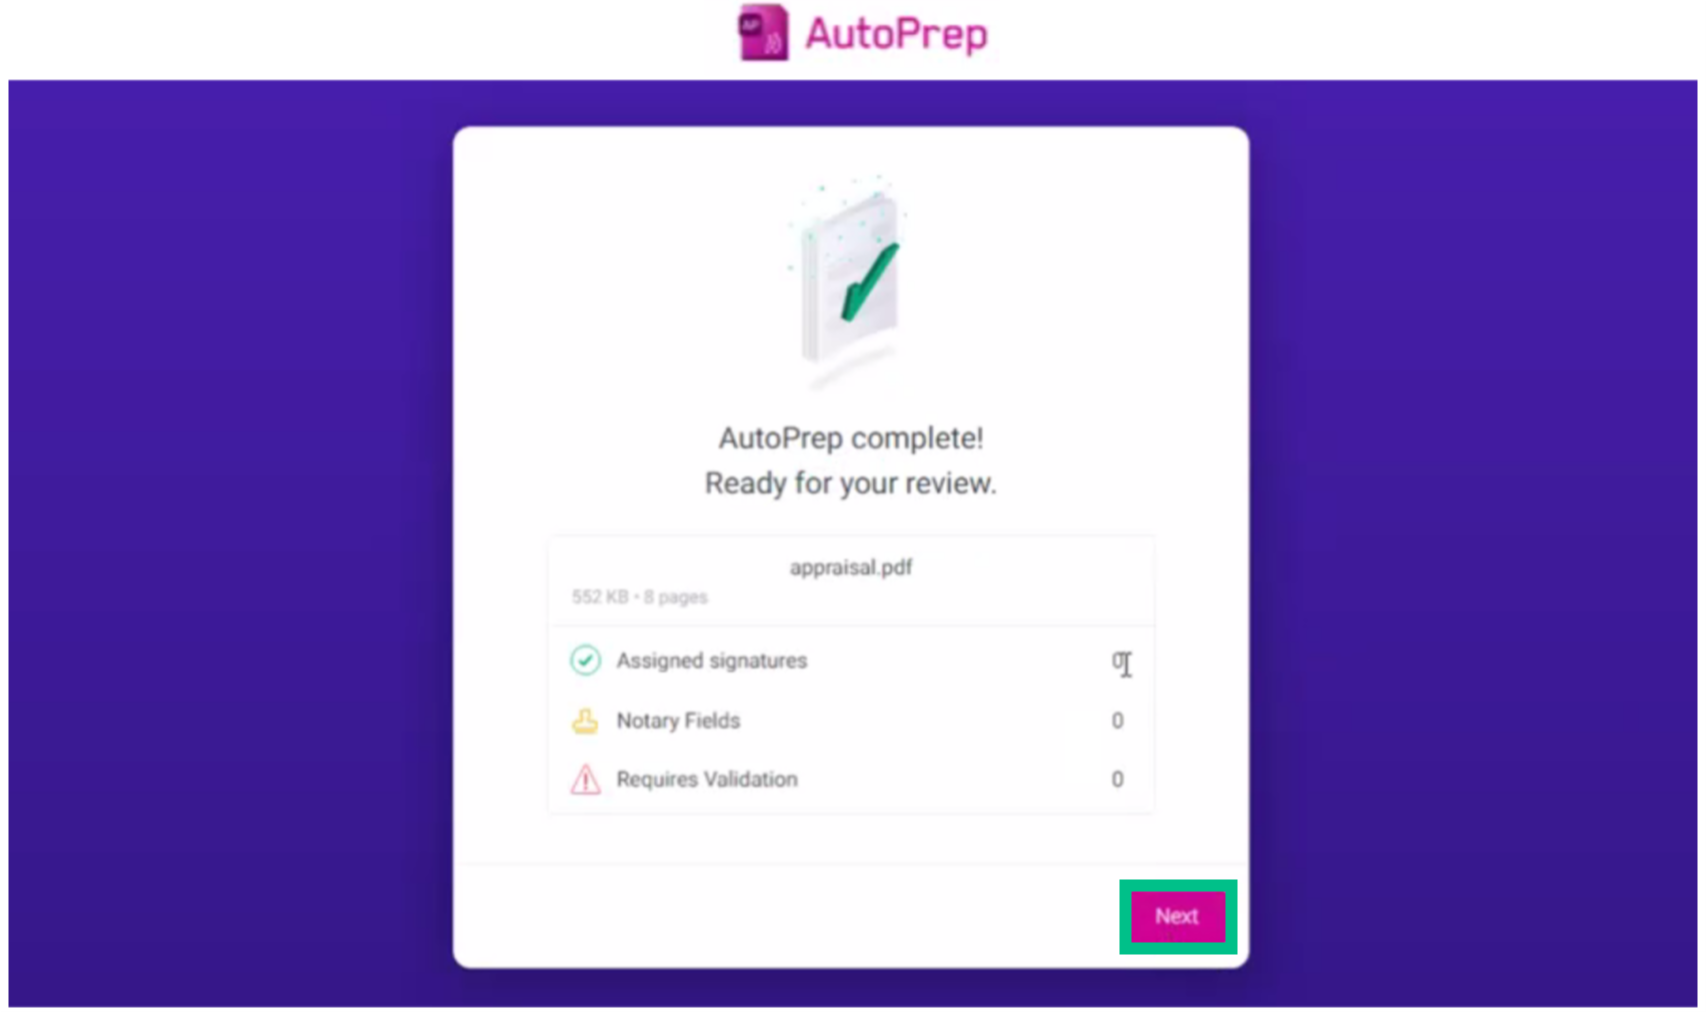
AutoPrep is our proprietary software that utilizes optical character recognition and artificial intelligence. After you submit, AutoPrep will trigger automatically and start tagging the document. It will detect signature lines and other items that need to be filled out. Click Next.
|
|
|
|
|
13. |
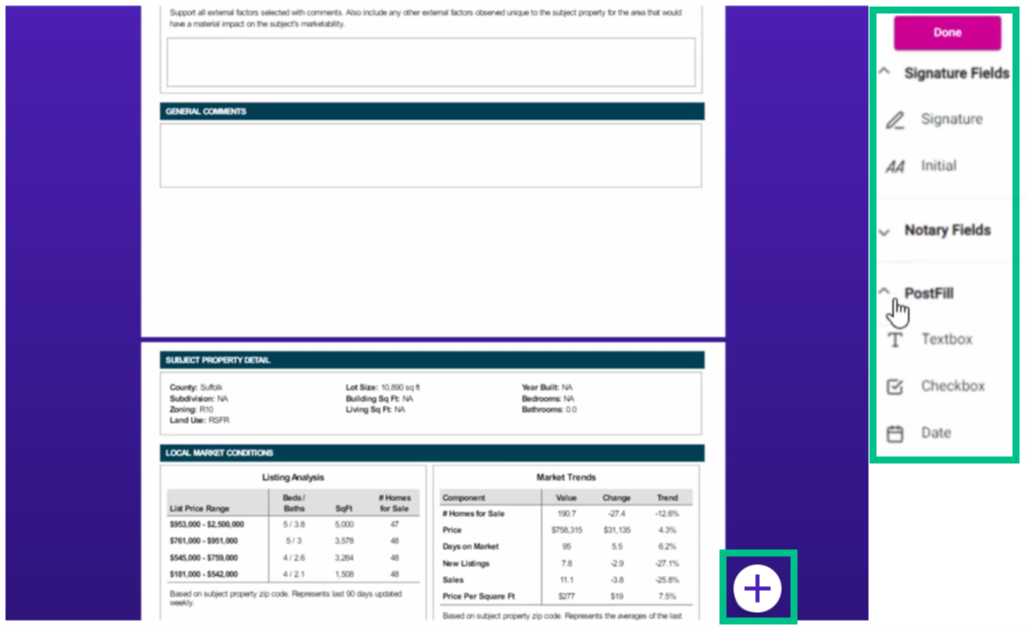
To open your toolbox (on the right), click the plus button towards the bottom of your screen. Here, you can add and assign additional fields that AutoPrep may have missed. Drag in the appropriate field from the right and place them in the correct spot on the document. When you're finished, click Done to save your changes.
|
|
|
|
|
14. |
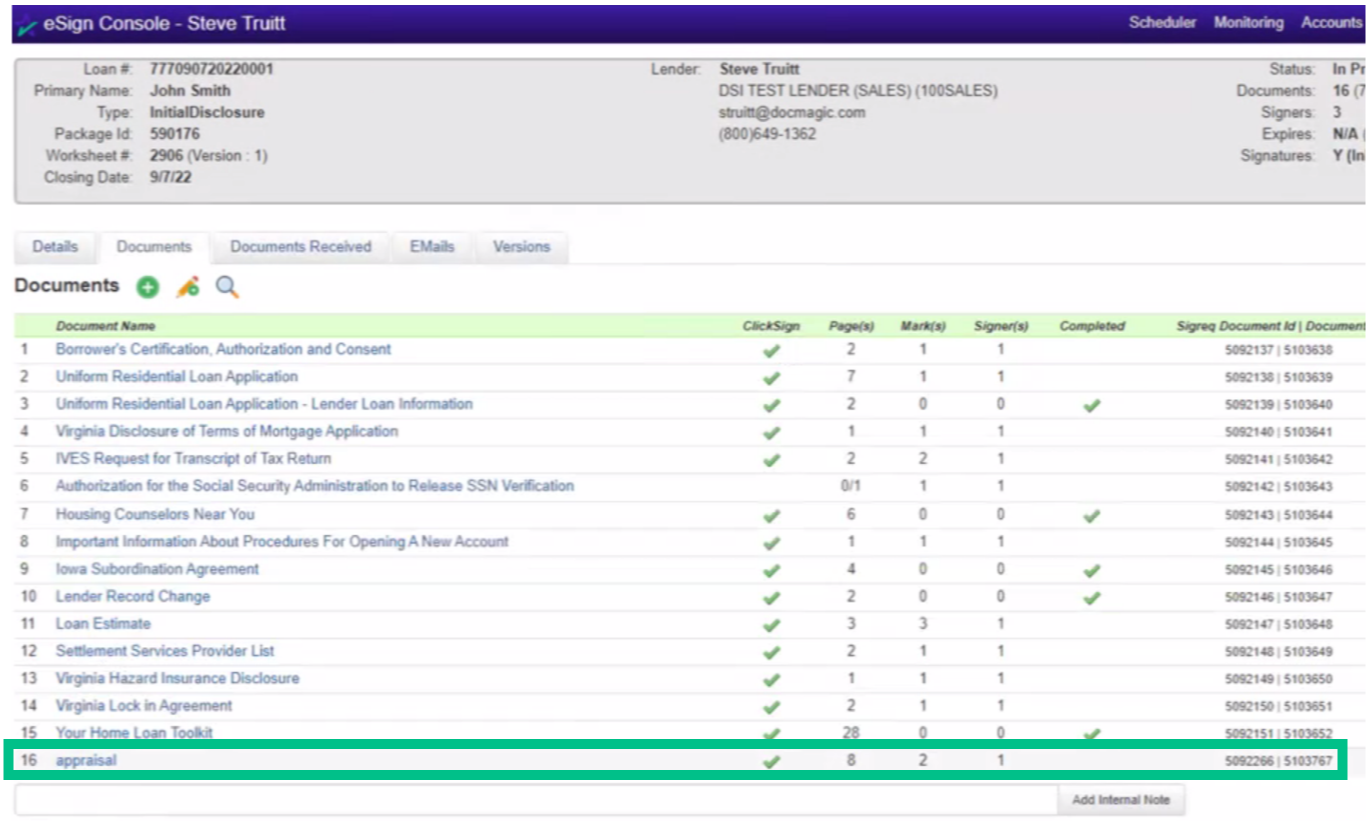
Clicking Done will take you back to the Loan. Refresh your page on the Documents Tab. The document that you added will appear at the bottom.
|
|
|
|
|
15. |
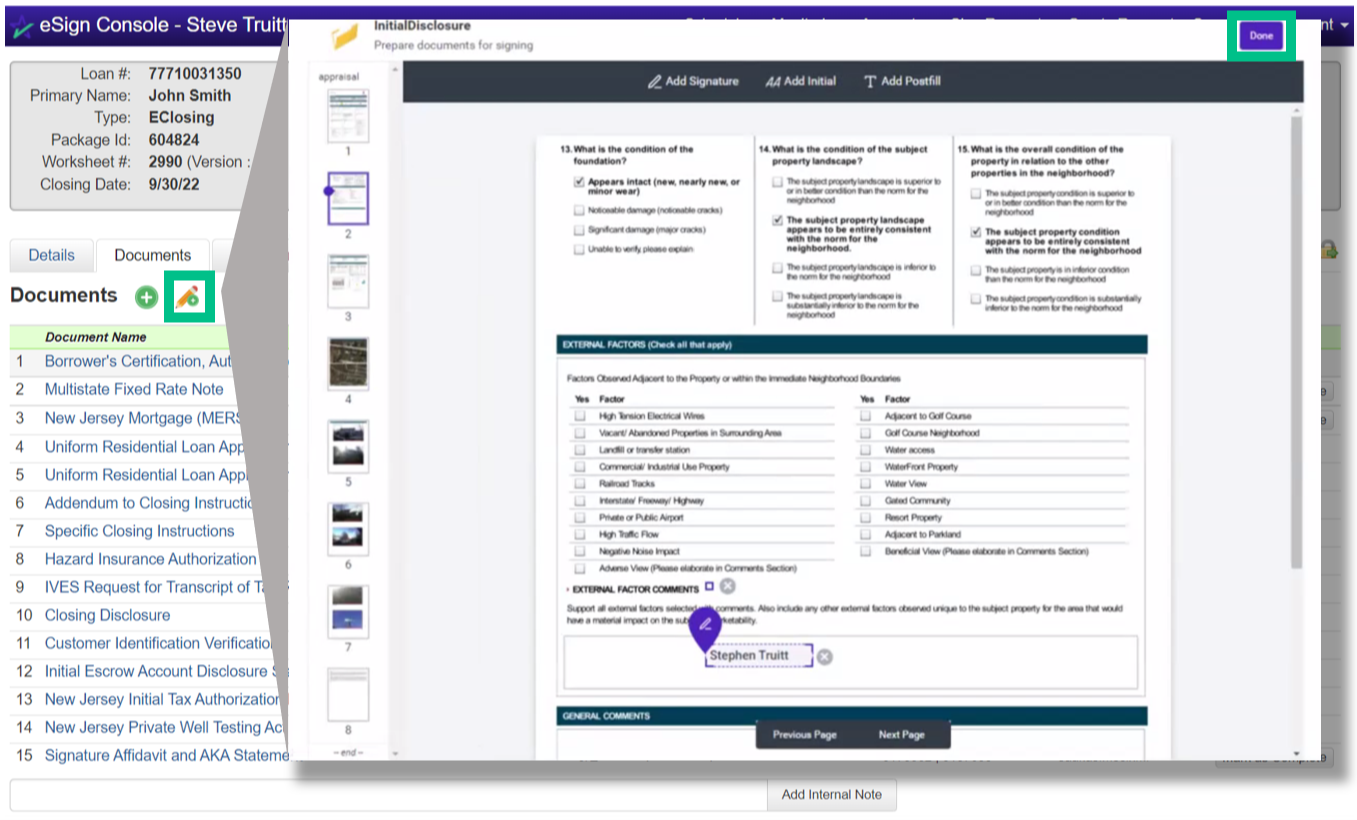
The pencil icon allows you to edit a document. A window will appear where you can go through every document and edit. Click Done at the top right when finished.
|
|
|
|
|
16. |
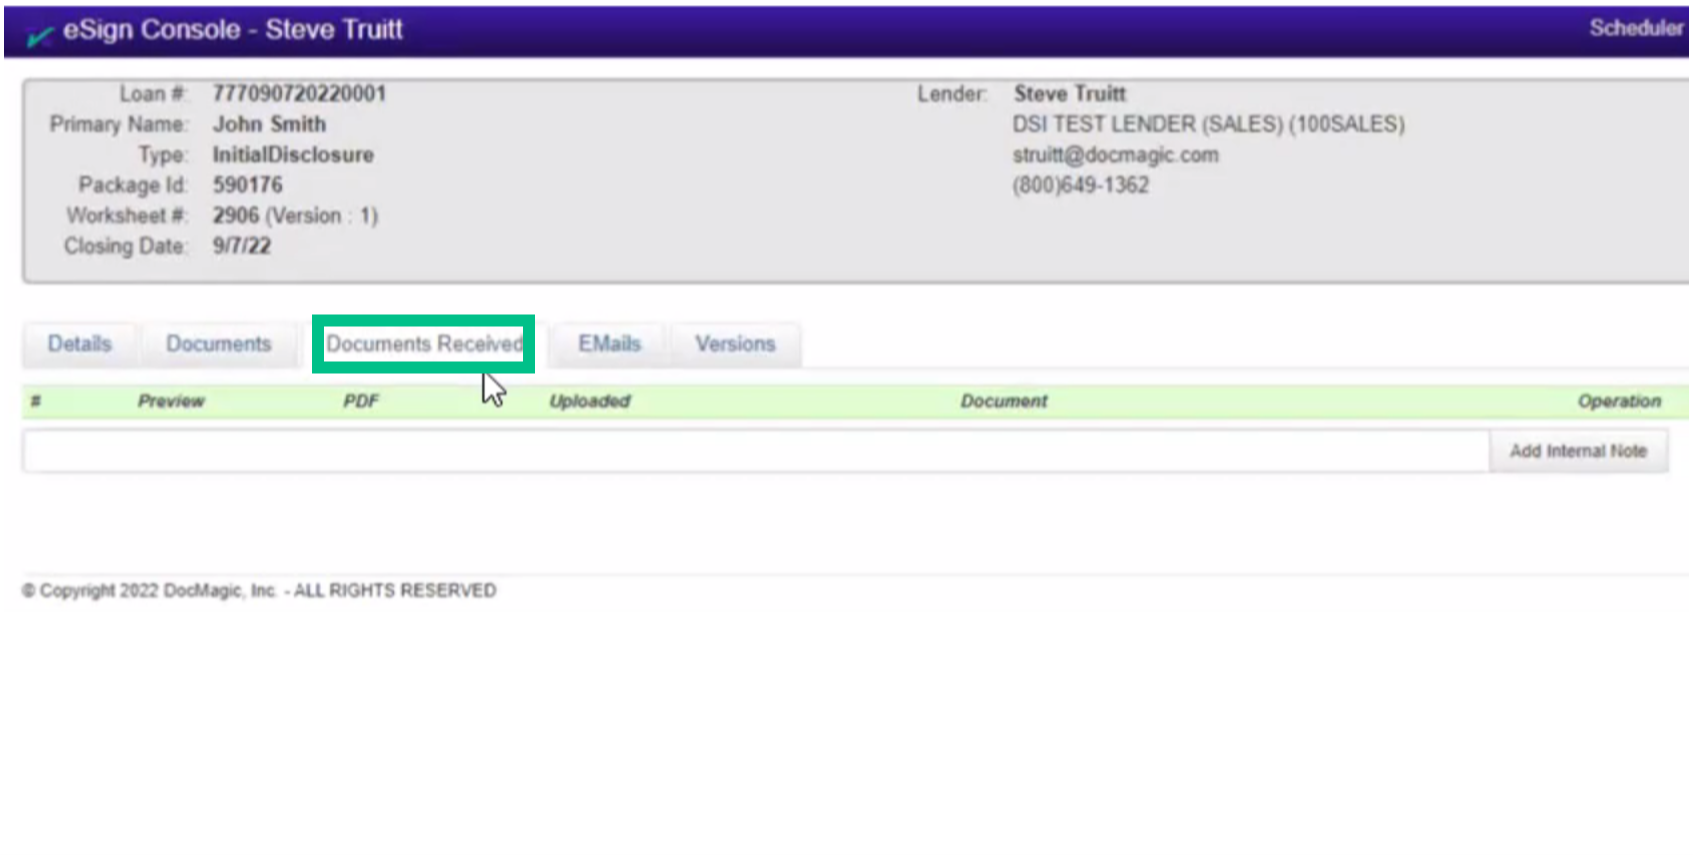
The Documents Received tab is only for closing packages. If there are any notarized documents that the notary has uploaded back into the portal, they will show up here.
|
|
|
|
|
17. |
The Emails tab contain the invitations that you've sent out already.
|
|

|
|
|
18. |
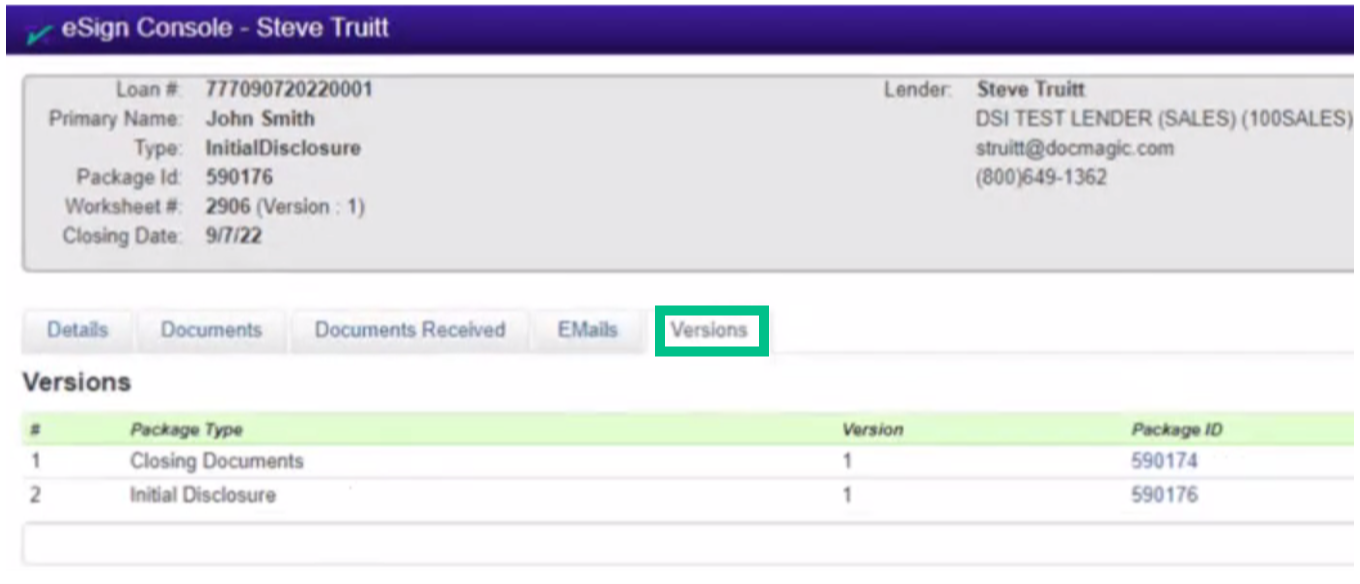
If you have different versions of the loan package, they'll be found in the Versions tab.
|
|
|
|
|
19. |
This highlighted area shows the date and time that each milestone was completed for the participants. The timestamps will populate as the participants start the process, give their consent, view the documents, and then either complete their signing or decline to sign.
|
|
|
|
|
20. |
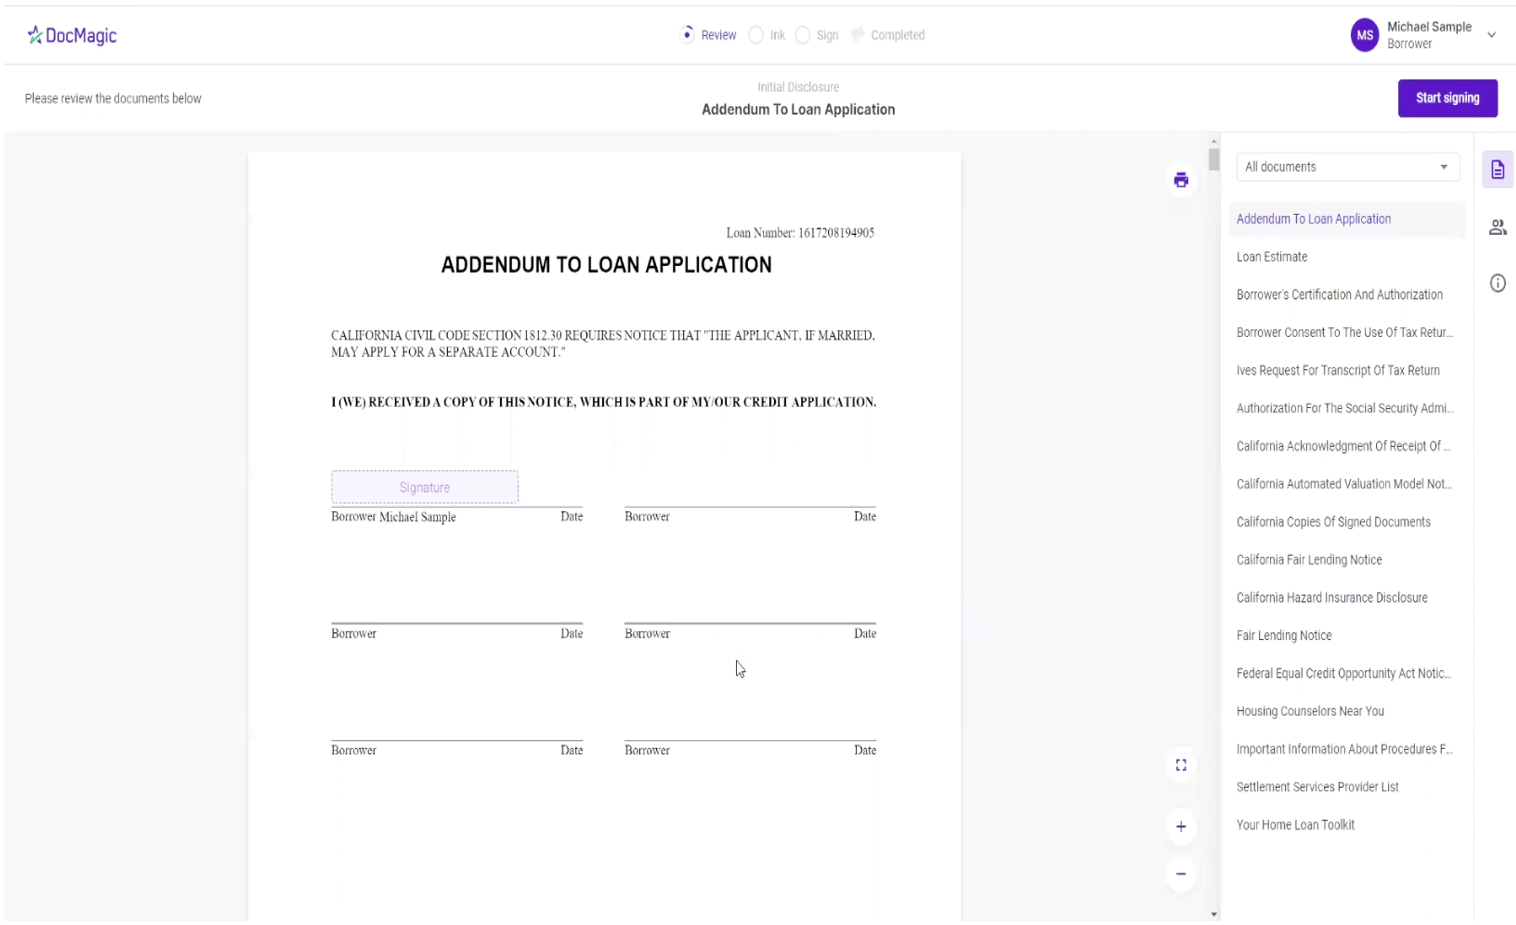
When the borrower clicks on the link in the invitation email, they will be taken to DocMagic's signing experience displayed below. Here, the borrower will be able to sign the necessary documents. If you have a DocMagic account, you can find more information on the borrower's signing experience by visiting our Product Training Page.
|
|
|
|
|
21. |
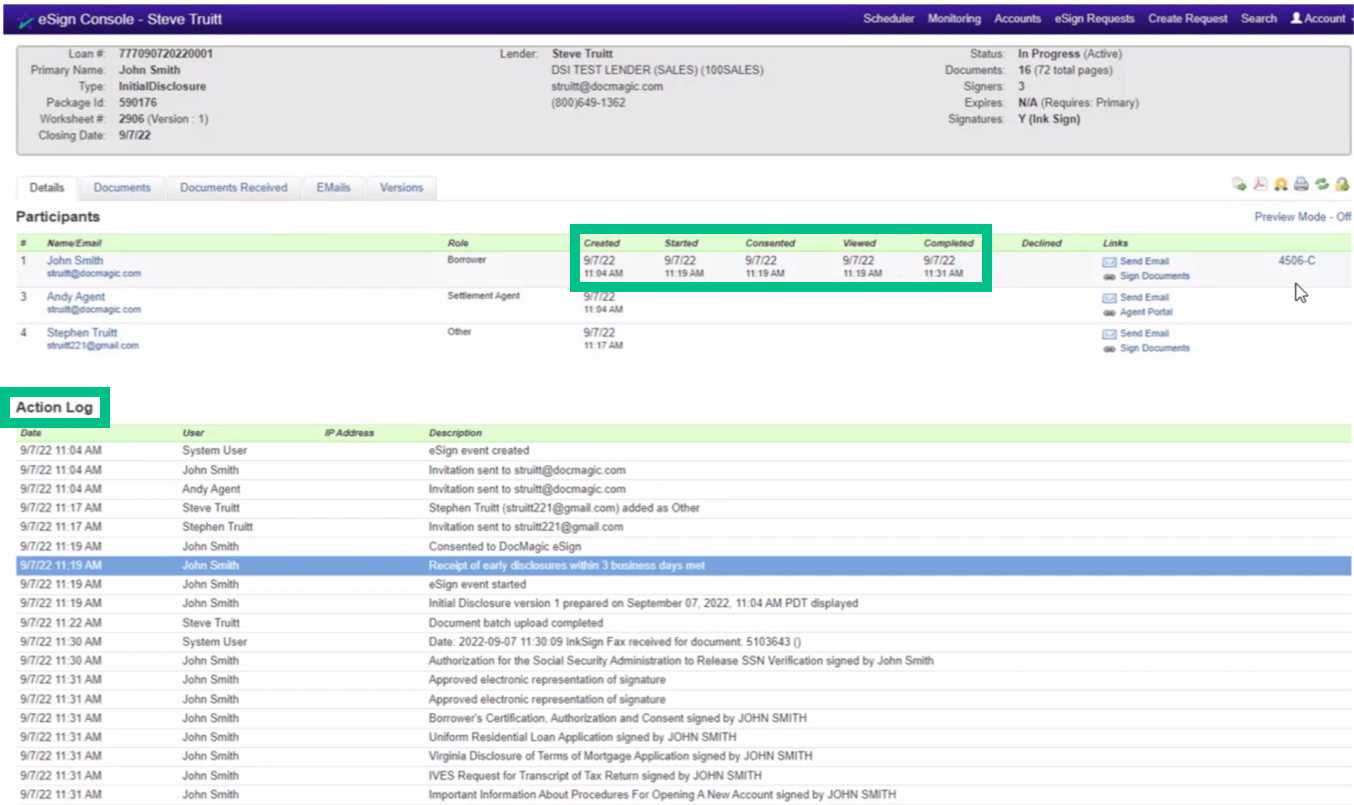
After the borrower completes their signing experience, you'll be able to see the row of date and time stamps highlighted below. Refresh the web page if you don't see the changes at first. The Action Log, a little further below, documents all the changes that occur.
|
|
|
|
|
22. |
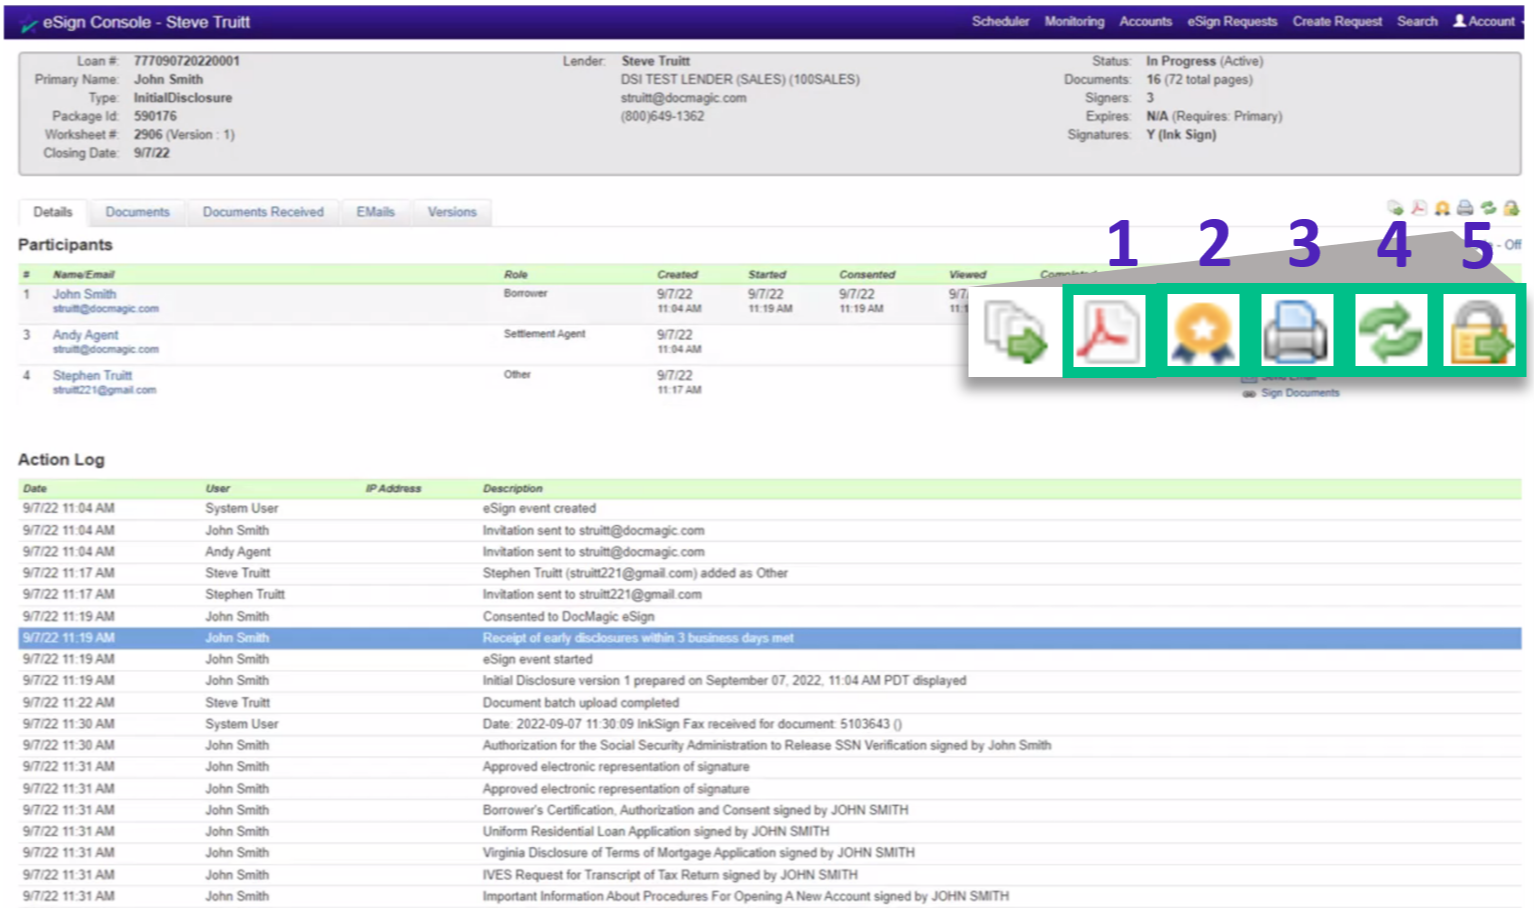
You can find some useful icons at the top right of the page. 1. The PDF icon downloads the entire list of signed documents (including the eSign certificate). We recommend that you save the document sets after all signatures are collected, as you will only have a loan document set in the portal for 90 days. 2. You can view the DocMagic eSign certificate by clicking here. This will download as PDF. 3. The printer opens your printing options. 4. You can reset the PDF by clicking here - this makes all the fields blank again. 5. The lock allows you to archive the package.
|
|
|
|
|
23. |
If there are documents that you want to send separate, click "Create Request" in the top right corner of the window. Fill out the necessary information and attach your documents(s). Clicking Prepare your document sends your document(s) through AutoPrep. Hit the Submit button at the bottom when finished.
|
|

|
|