Gavias Blockbuider Settlement Agent Tutorial
DocMagic’s Total eCloseTM console for Settlement and Title Agents offers a user-friendly platform to easily review, assign and sign required documents securely, quickly, and efficiently.
For a downloadable PDF version of this guide, click here. Live training is also available. Please email training@docmagic.com for details.
Below are the steps for using DocMagic's Total eCloseTM Portal for Title Agents.
1. The Settlement Agent ("You") will receive an invitation email with a link when the lender creates the eClose event. This link, along with the email, is specific to this particular transaction.
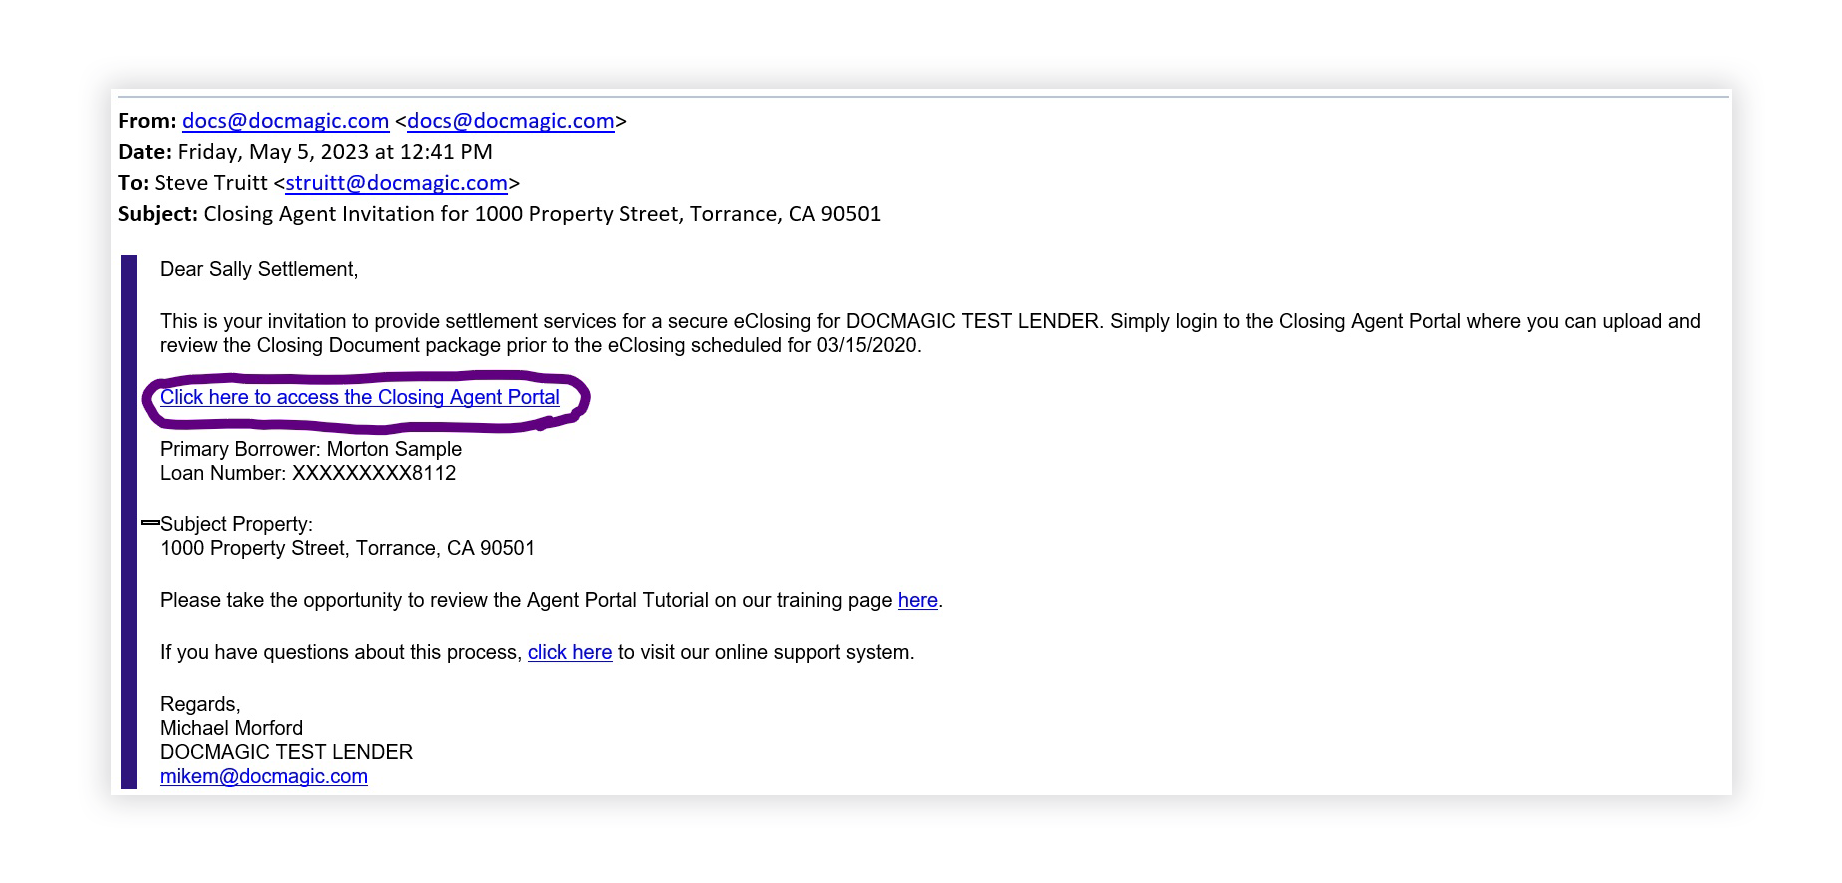
2. Clicking the link in the invite email brings you to this verification page where you'll need to enter the Viewing Code displayed before accessing the portal.

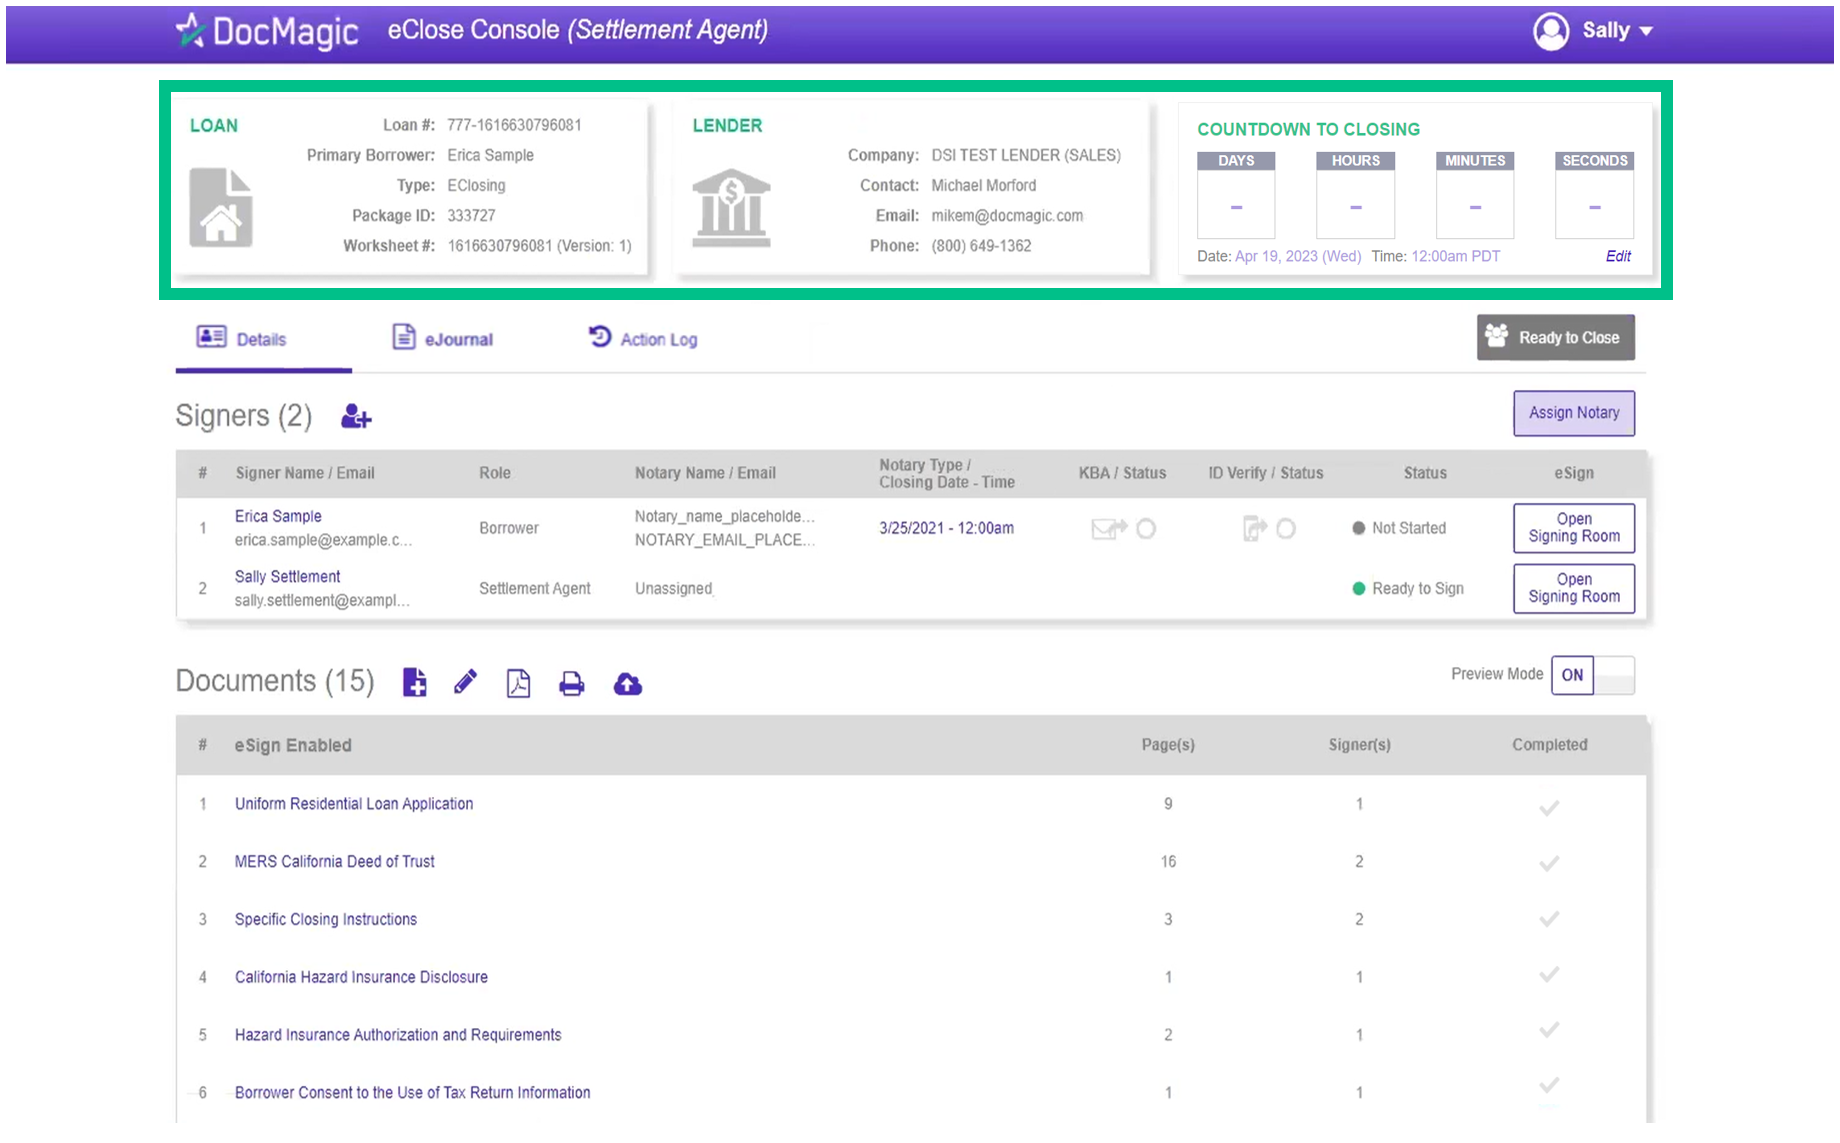
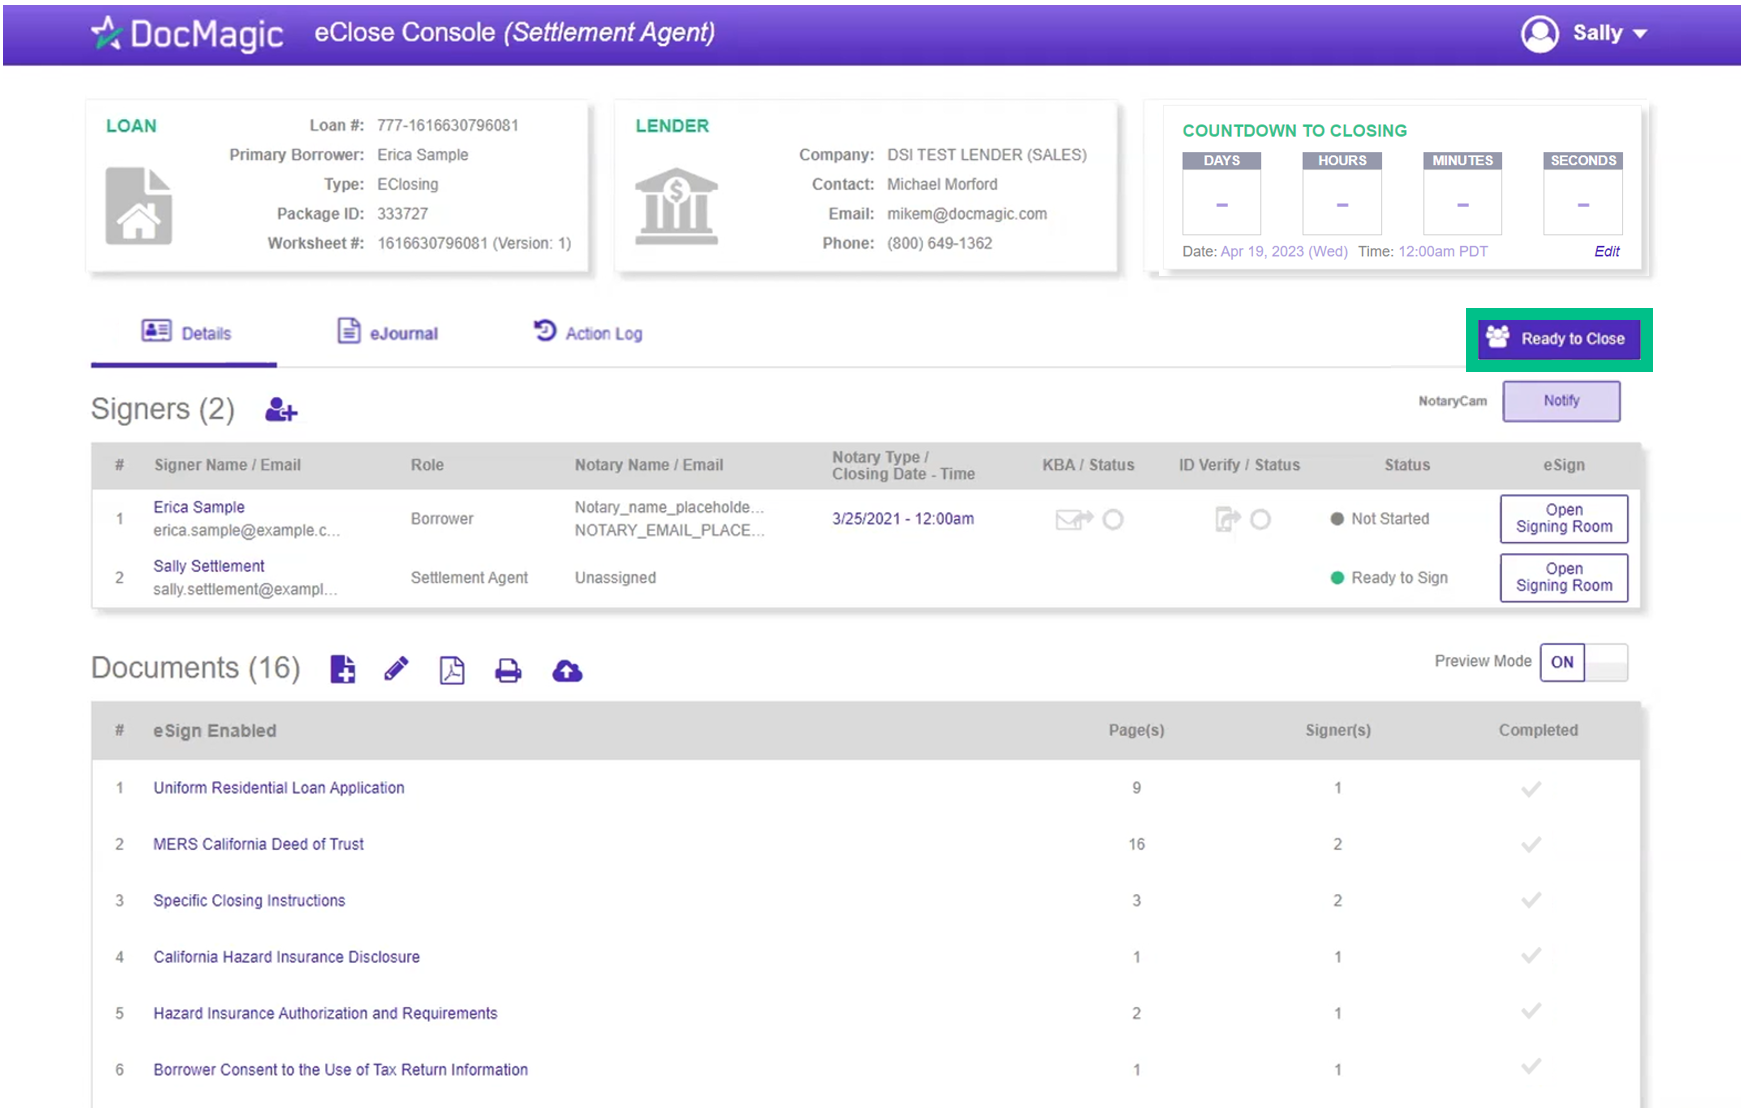
3. This is the Settlement Agent's portal where you can check documents, assign signers, and verify the process as you go. All pertinent loan information is at the top of your screen.
- The Loan section contains key loan information and the primary borrower.
- The Lender section tells you who the lender is.
- The Countdown to Closing is a live timer that continuously counts down right up to the moment of closing. The edit button at the bottom right of the Countdown Clock allows you to edit the closing time for all participants
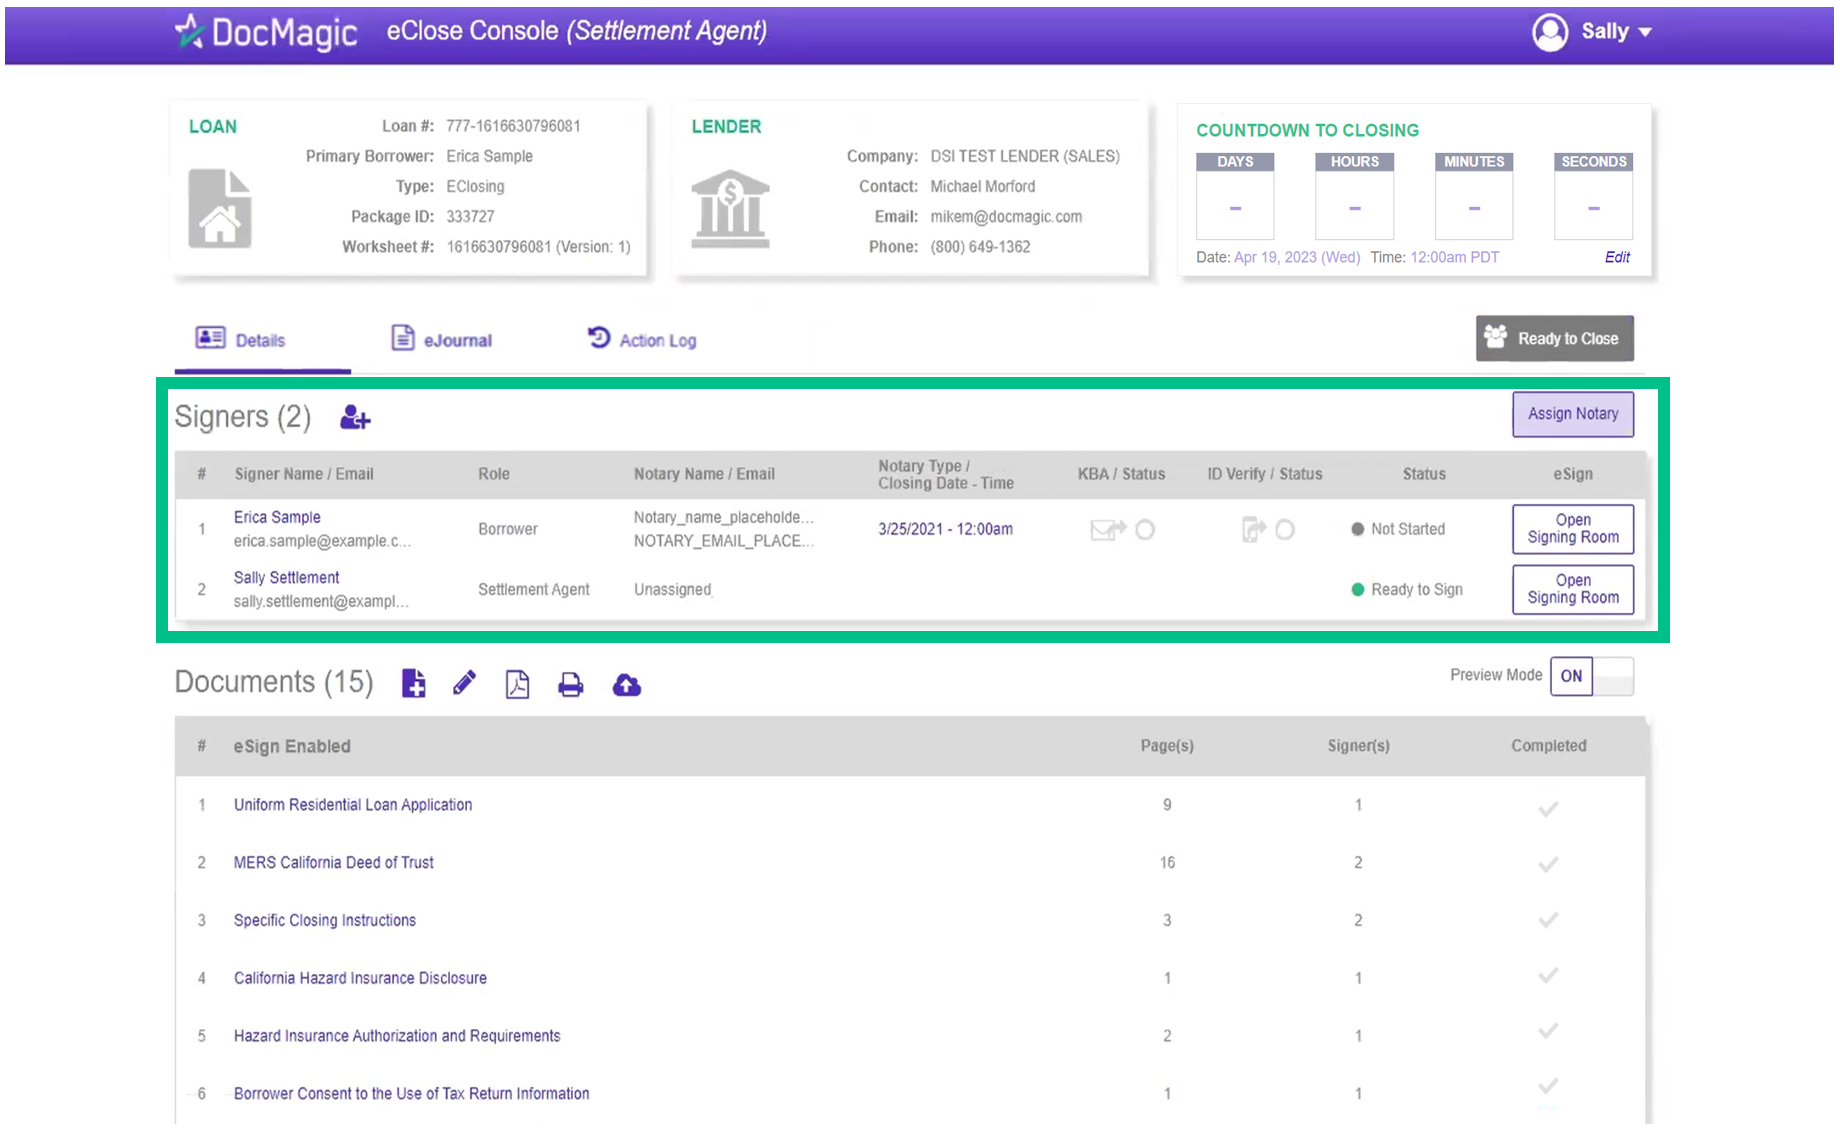
4. The Signer's area highlights the information of all closing participants.
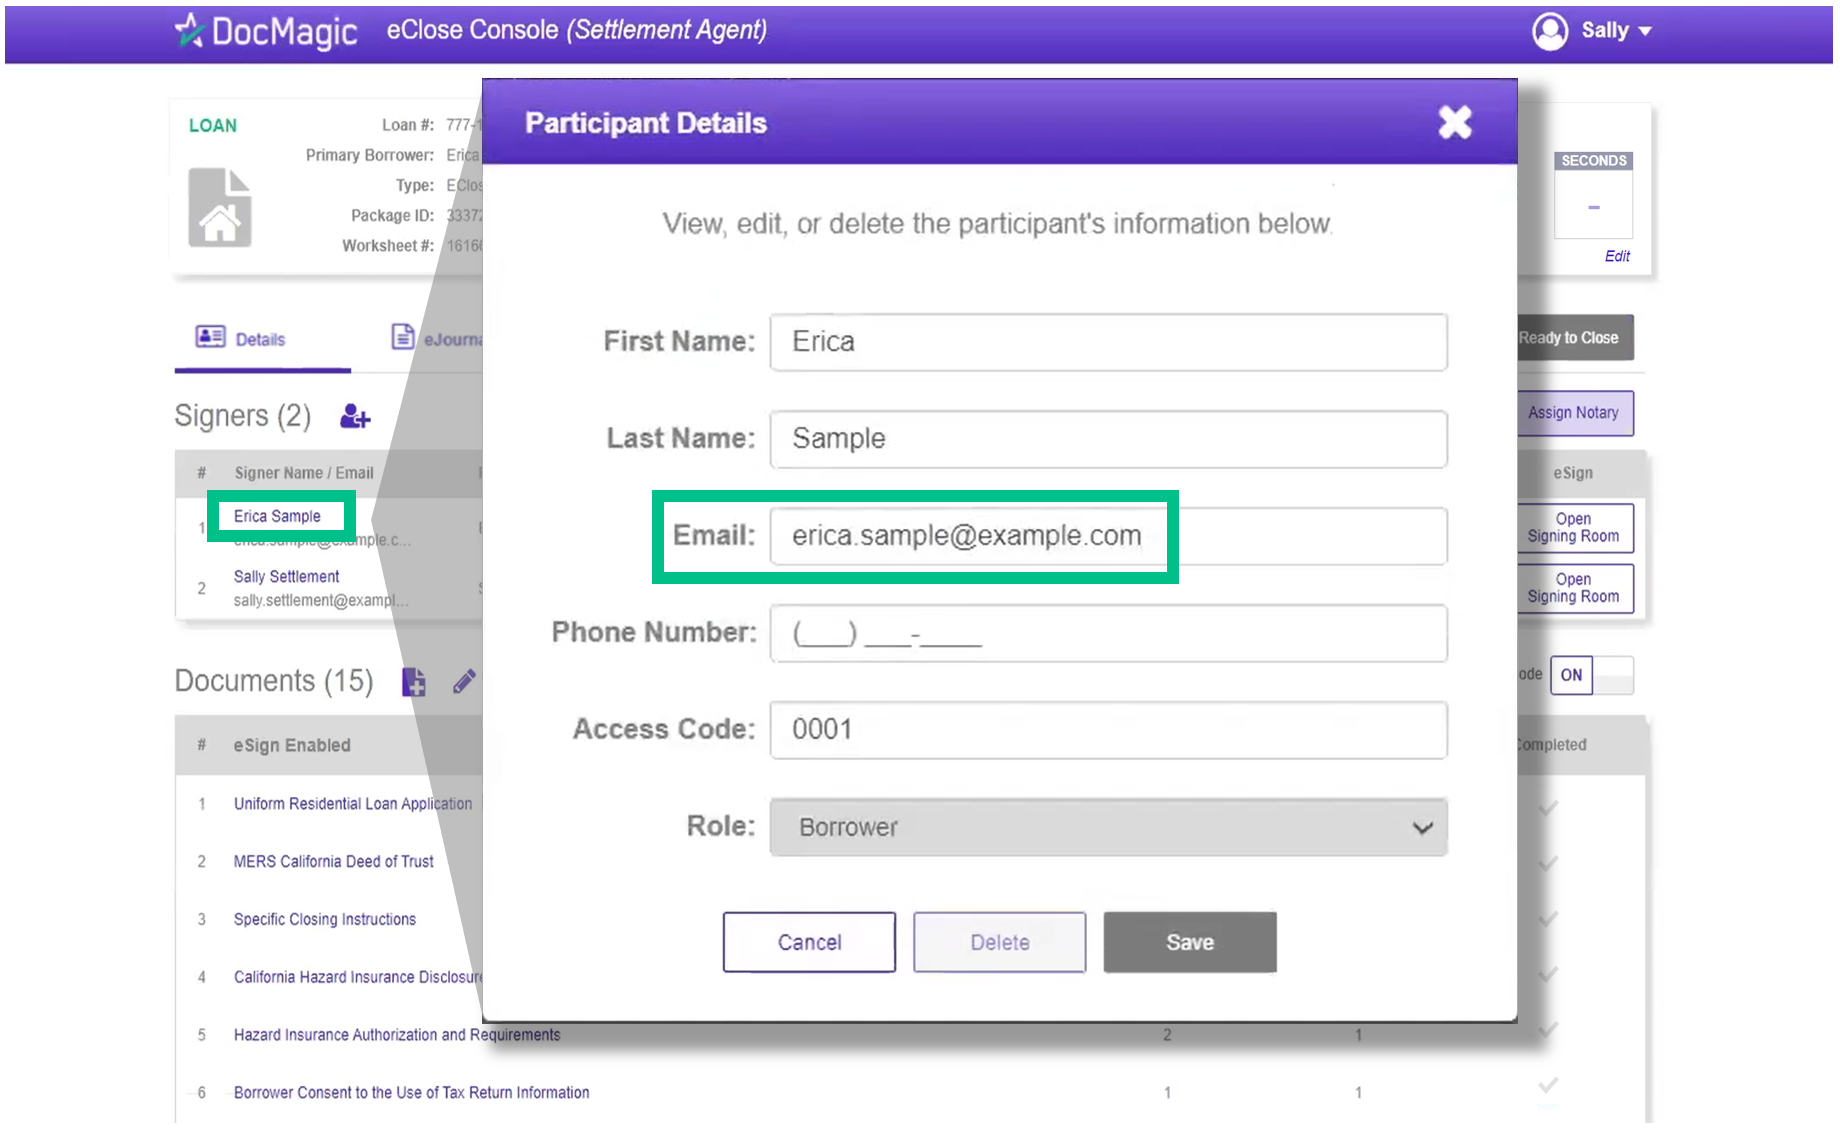
5. Click on a signer's name to view, edit, or delete participant information. Make sure there is an email listed.
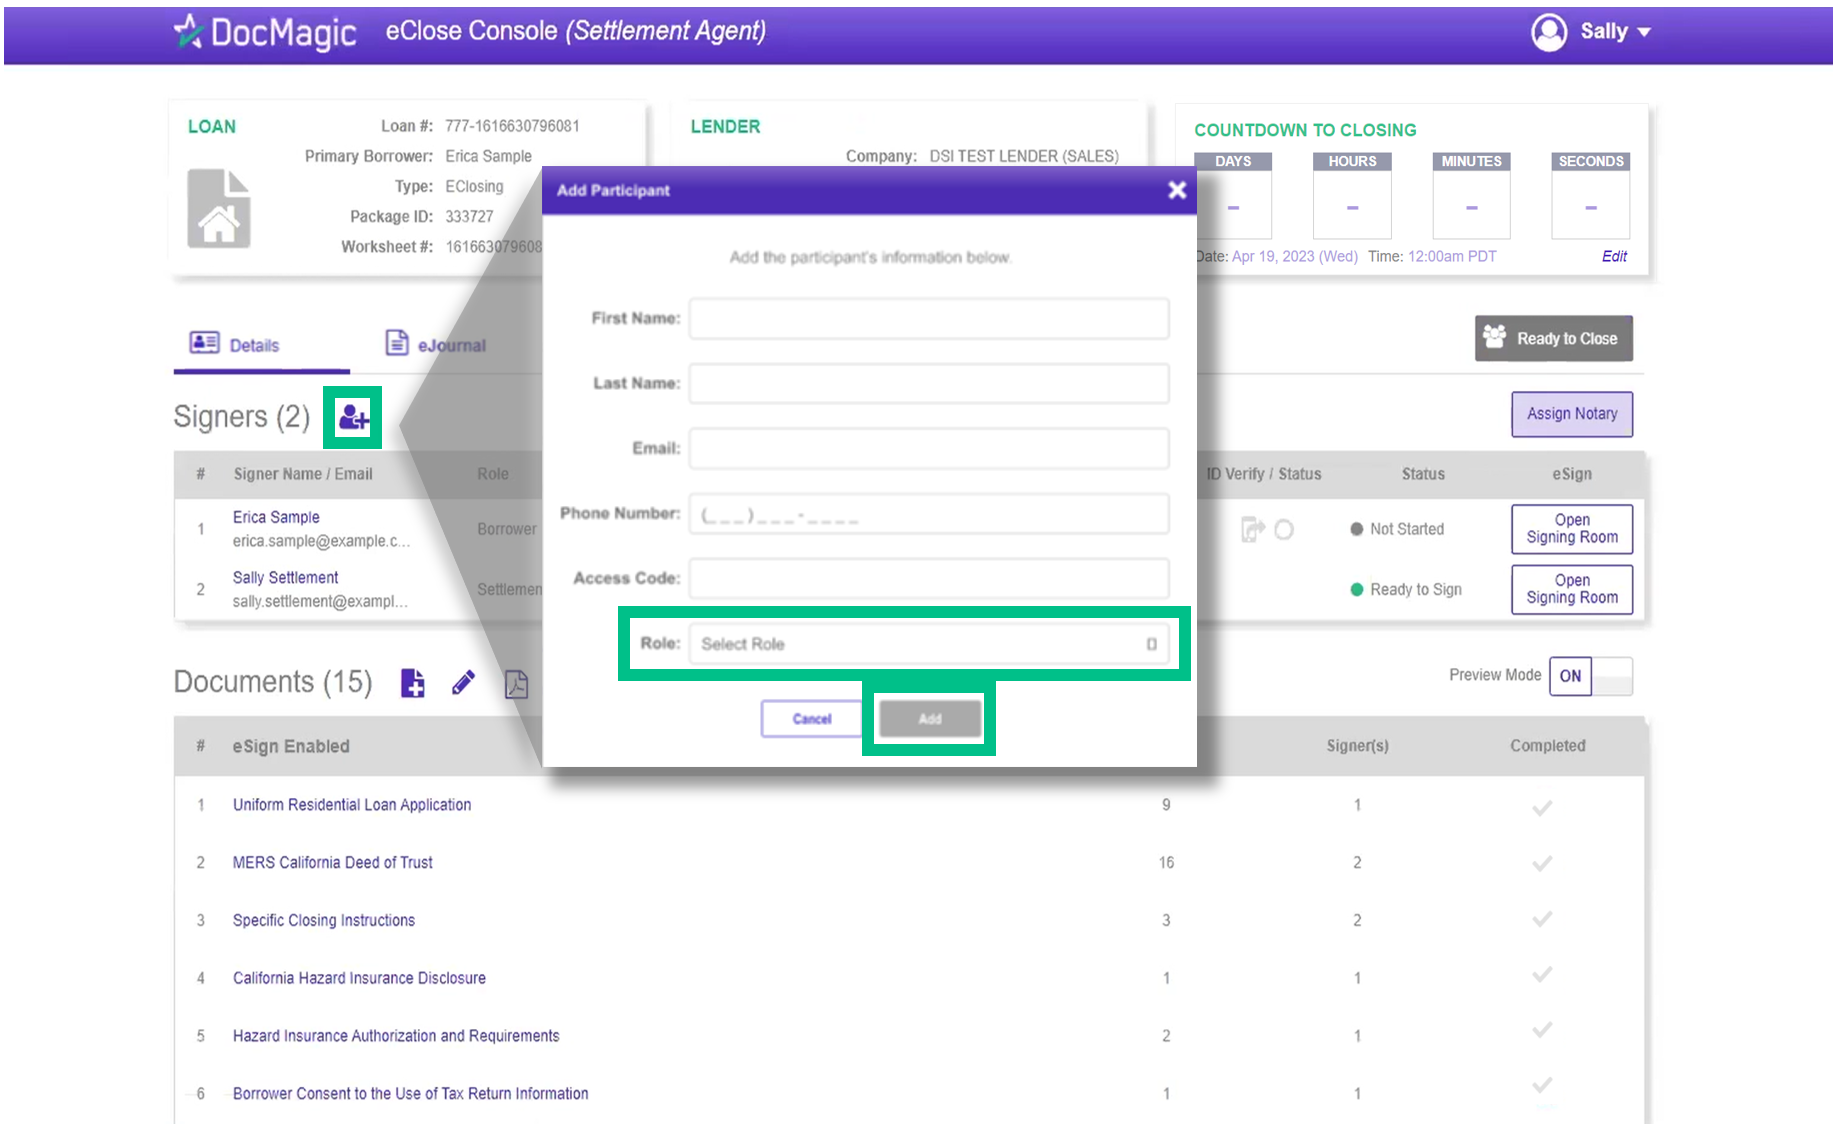
6. You can also add participants (this is where you would add additional Settlement Agents):
- Start by clicking on the silhouette icon next to Signers.
- Fill out every line in the window that appears. Be sure to select a role (ex. settlement agent) for the participant.
- Click Add at the bottom when completed. They will be saved to the participants list.
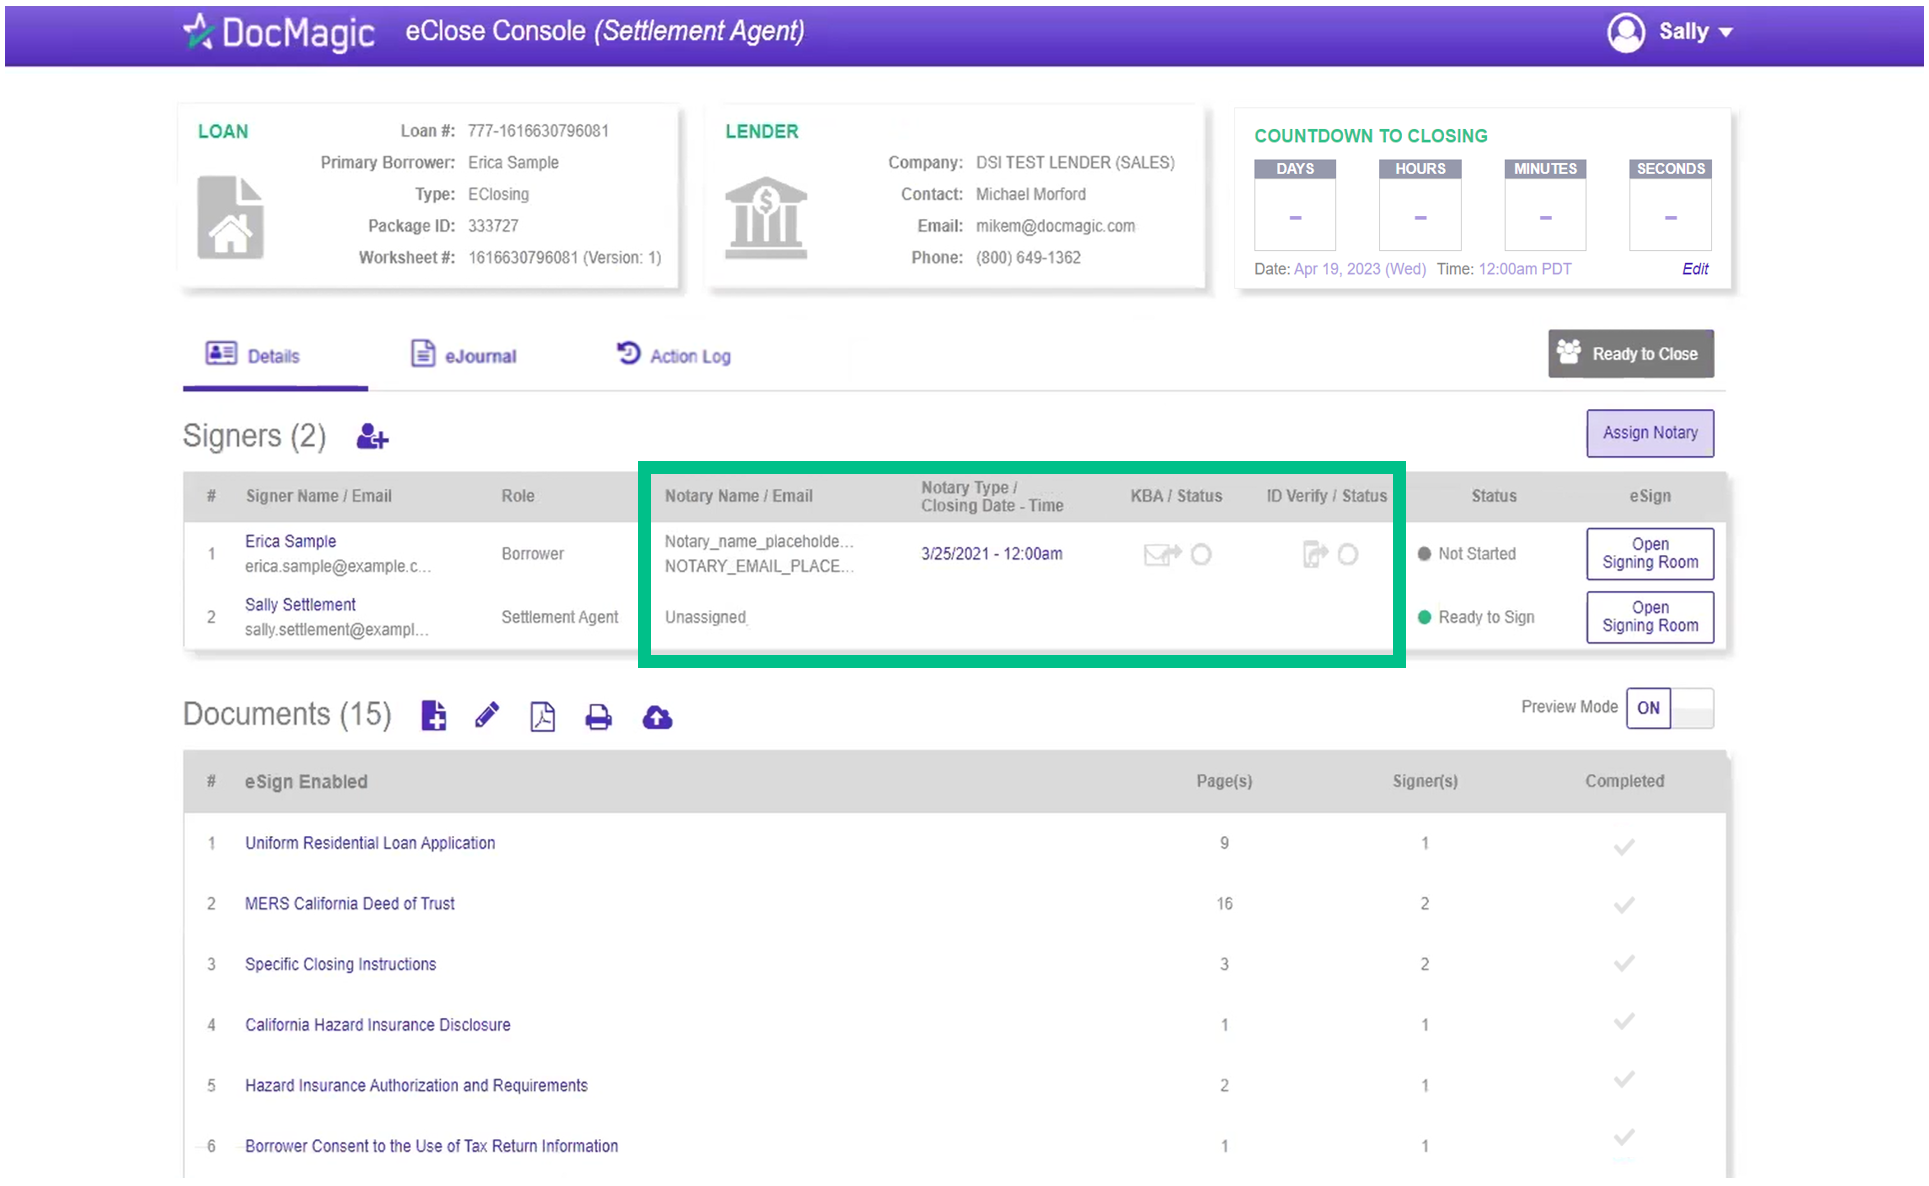
7. The following information in the Signer's Tab is only applicable for closing types with eNotary enabled - Hybrid 3 and Total eClose.
- Notary Name / Email contains the Notary's information. A placeholder (pictured below) will be here until the notary accepts their invitation.
- Notary Type / Closing Date - Time lists the closing date and time. You can edit this by clicking the date and time below or in the Assign Notary pop-up, which is the purple button on the right.
- KBA / Status displays the status of the KBA (Knowledge Based Authentication) identity validation technique that involves the participant answering personal questions about themselves in a timed quiz.
- ID Verify / Status shows the status of ID Verify - a smartphone based identity validation technique that involves the participant uploading pictures of their ID and themselves.
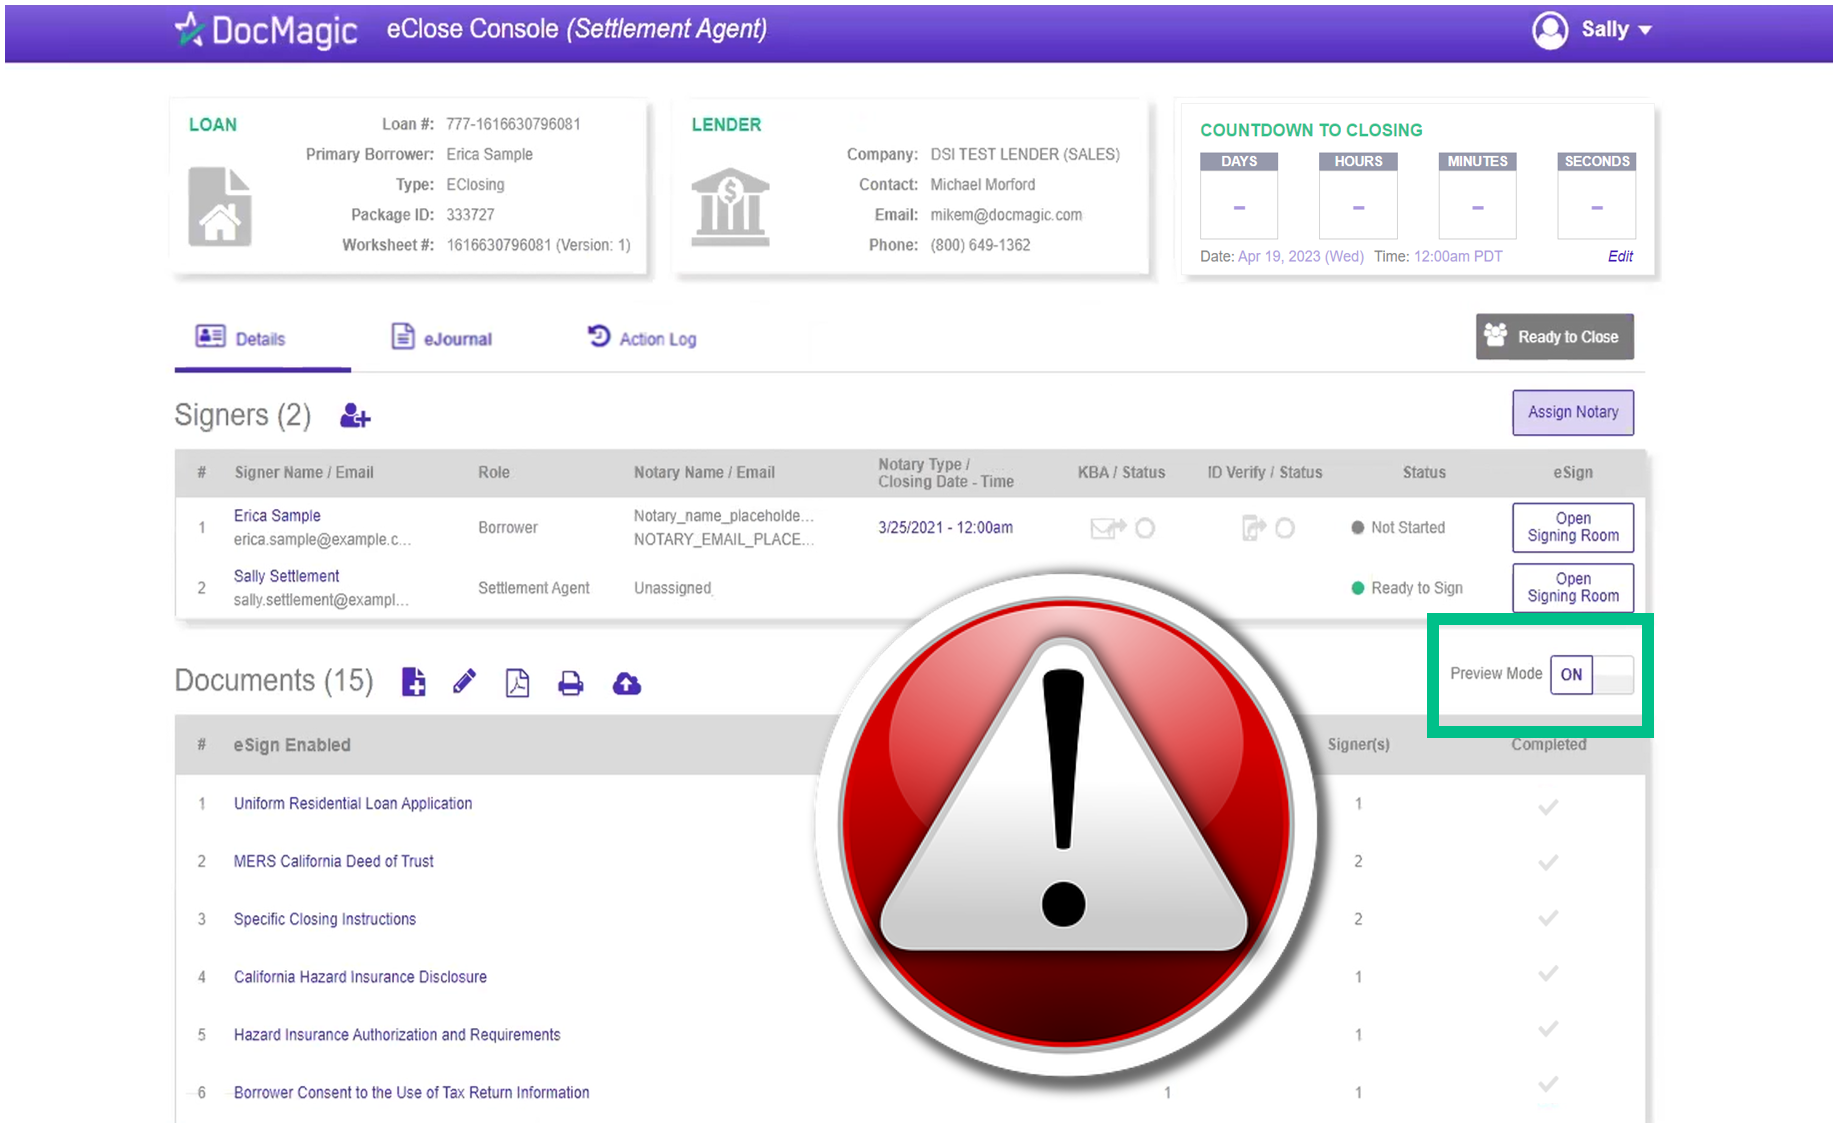
8. NEVER turn off Preview Mode ahead of the closing date. The Lender can disable your ability to toggle Preview Mode in their settings.
- When the countdown to closing clock hits all zeroes, Preview Mode will turn off automatically.
- As a Settlement Agent, you can sign documents without turning off Preview Mode.
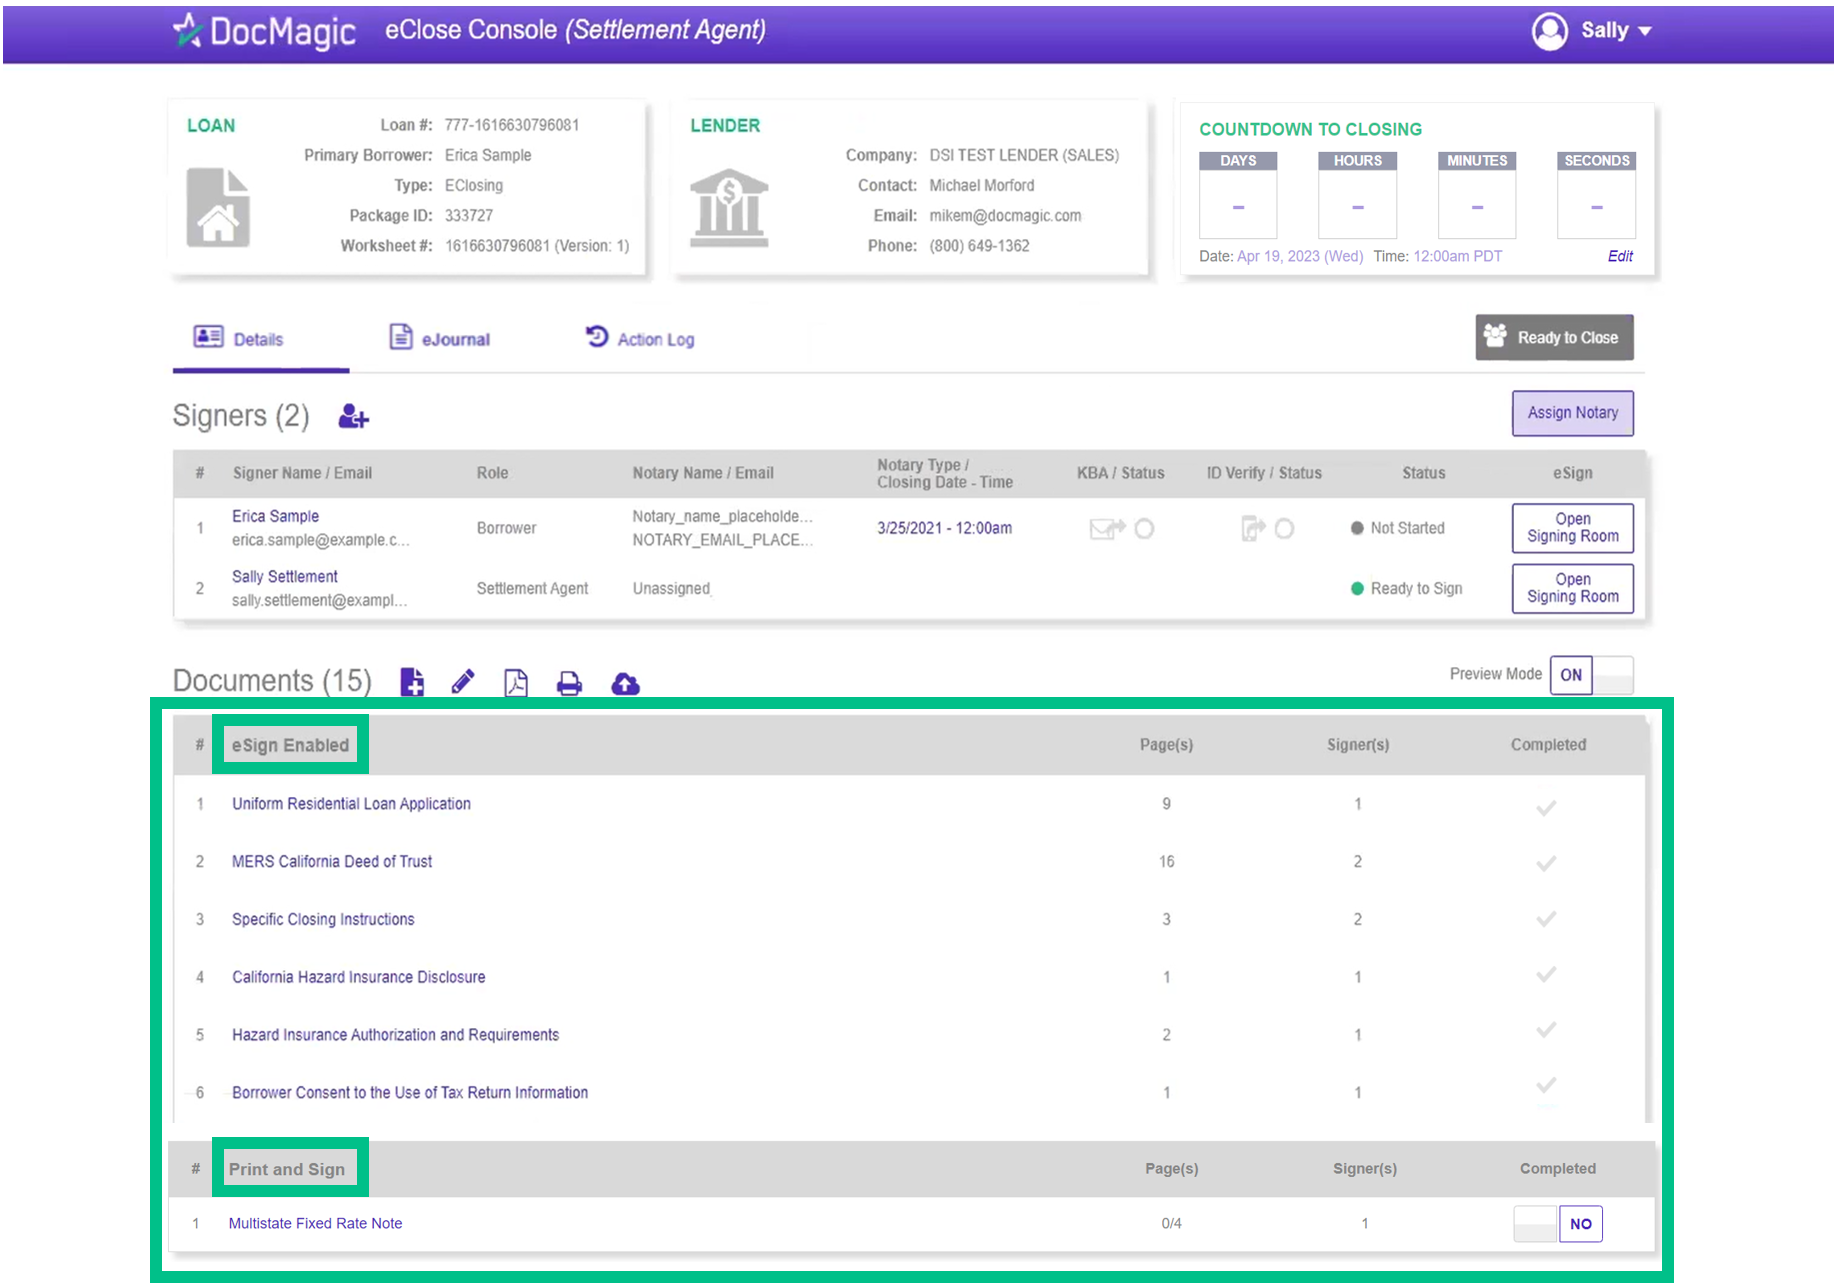
9. The Documents area includes all the documents to be executed. Click on the title of a document to view it.
- eSign Enabled lists all the documents enabled for electronic signature in the package.
- Print and Sign shows all the documents in the package that require wet signatures from the borrowers.
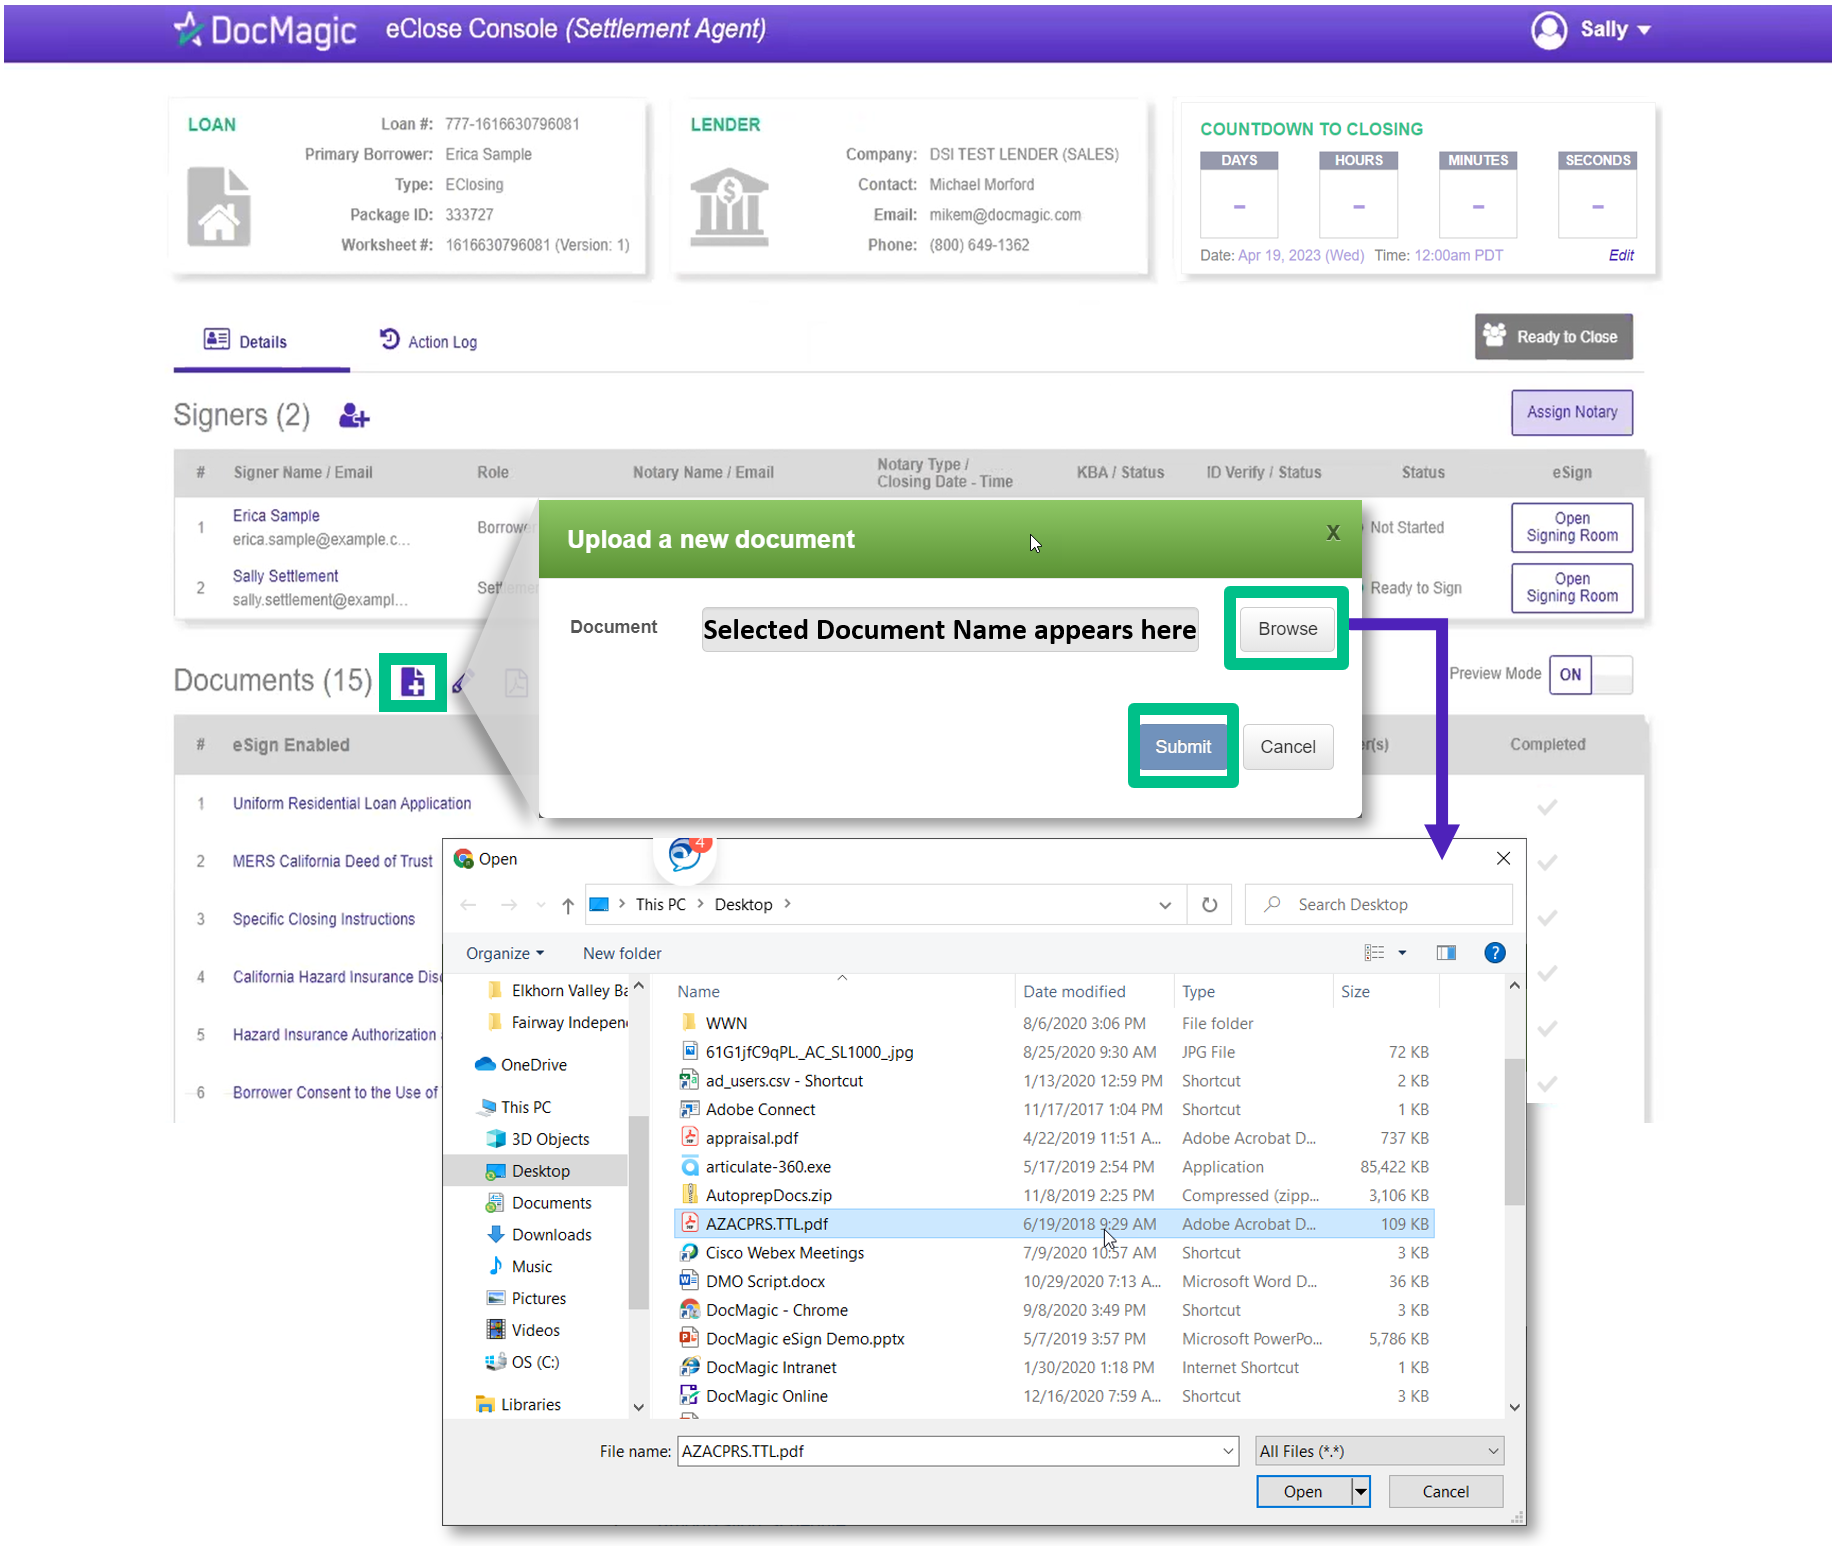
10. To add settlement documents to the package:
- Click on the Add Document icon - the one closest to "Documents."
- In the window that appears, click on the Browse button.
- Navigate to the document on your computer that you want to add to the package.
- Choose the document and press Submit.
It is extremely important that you do not confuse this with the Upload Ink Signed Documents icon, explained in Step 15.
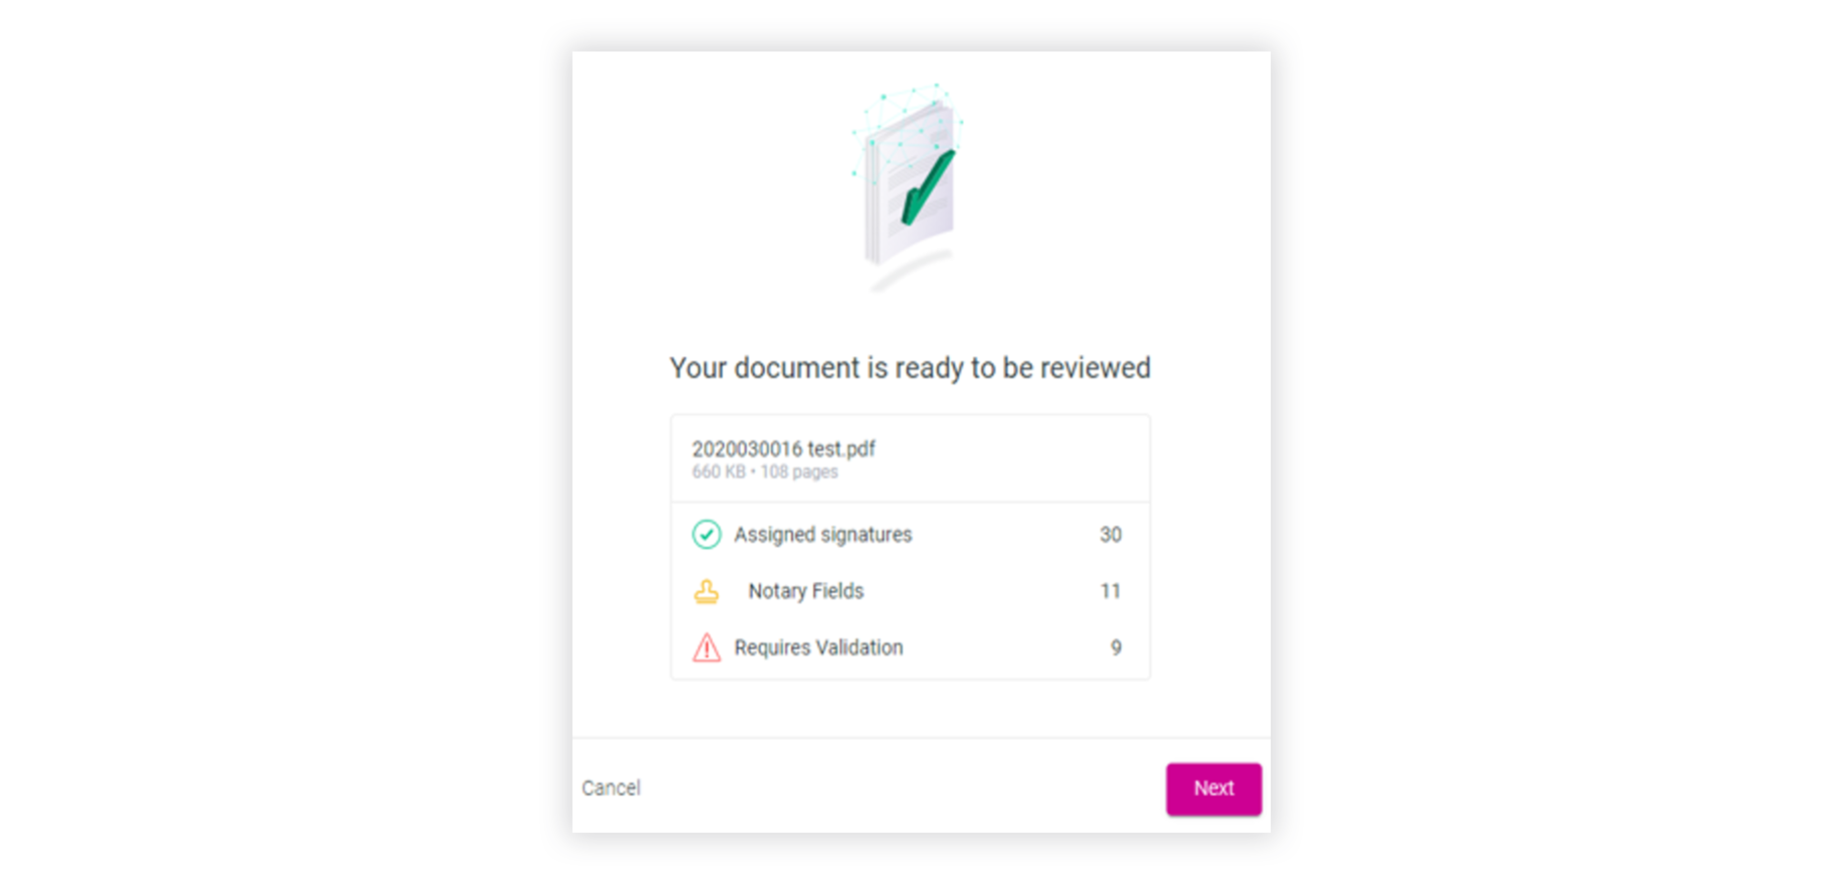
11. When the document is uploaded, it activates AutoPrepTM, which is our proprietary technology that utilizes machine learning to intelligently tag a document in a matter of seconds. To learn more about AutoPrep, click here.
After you complete the AutoPrep process, you will be returned to the Settlement Agent portal. Hit refresh and your AutoPrep document will now be listed in the documents section.
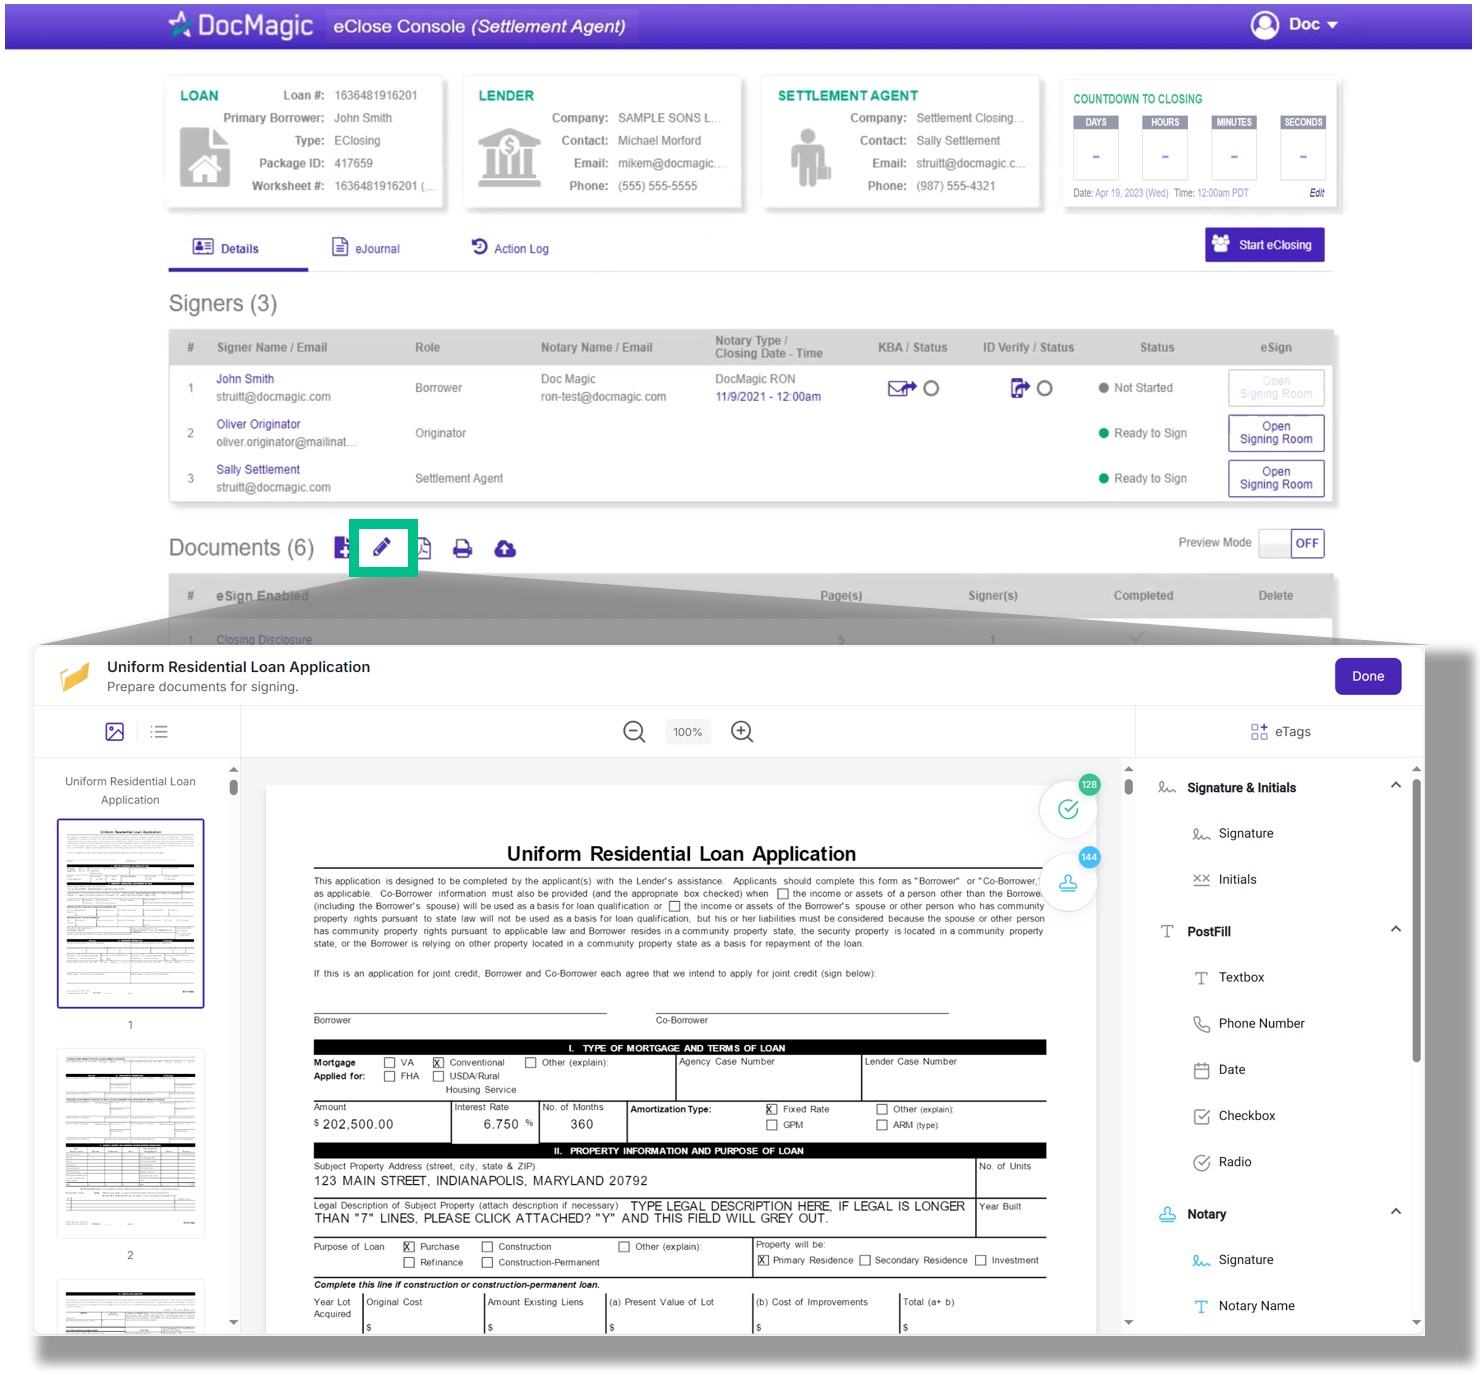
12. Click on the Pencil Icon to open the Document Editor that allows you to tag documents.
We strongly advise you to click here for the Document Editor guide.
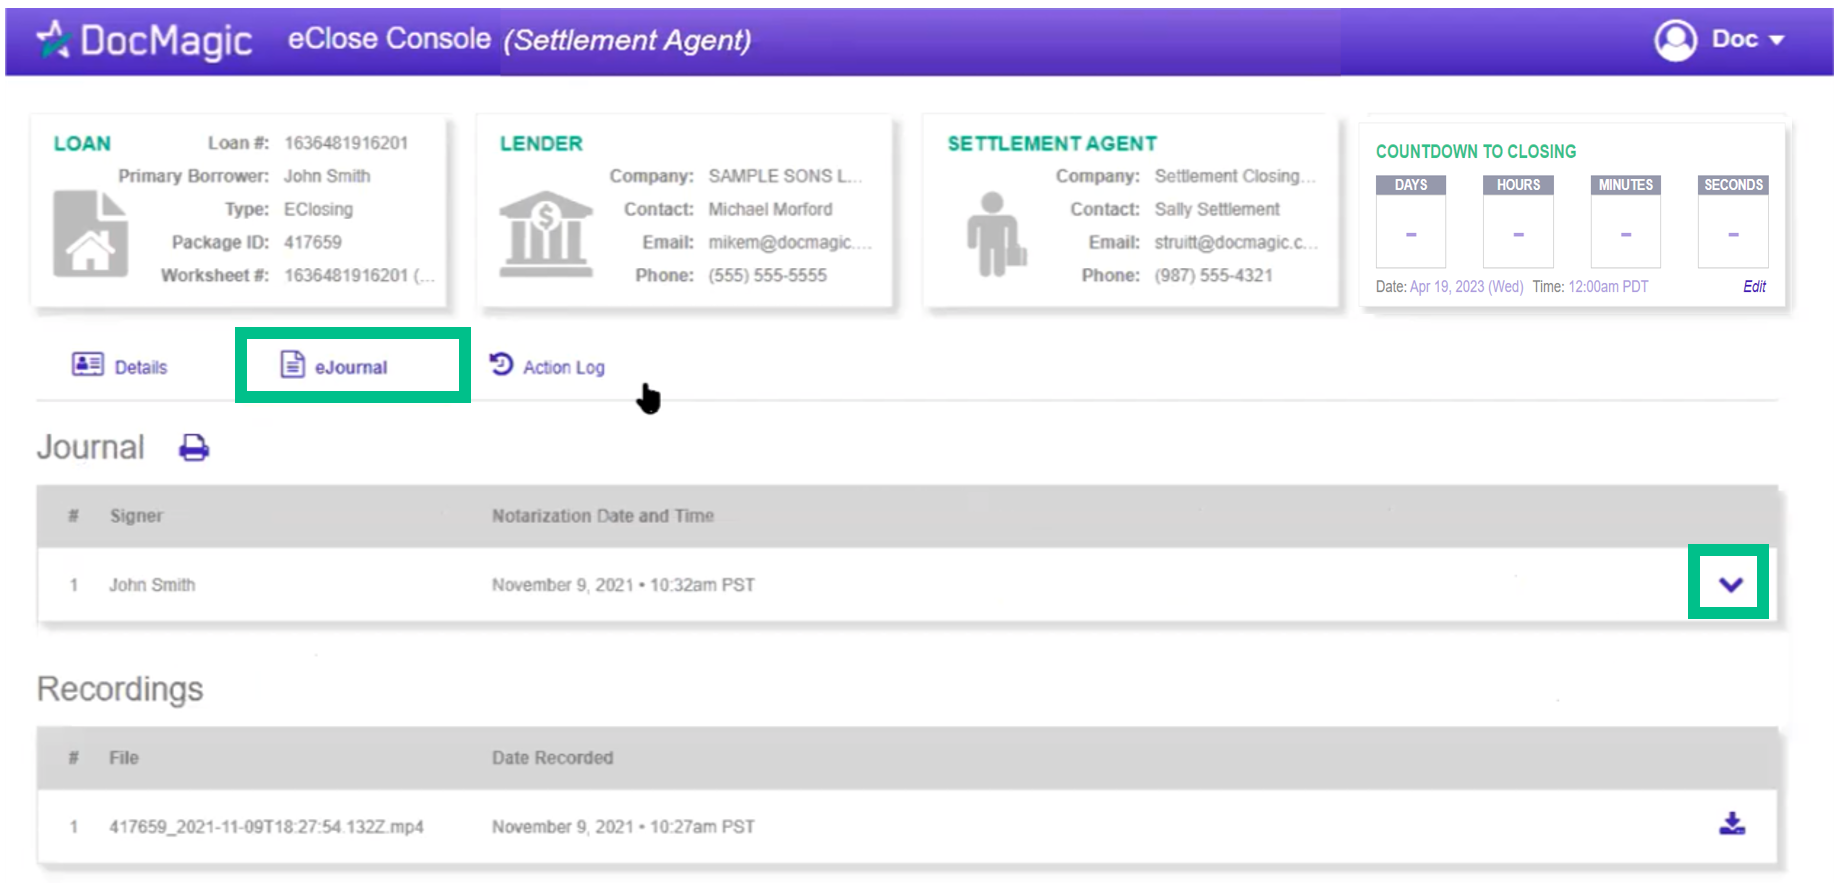
13. So far, we have only looked at the Details Tab. Two additional tabs, the eJournal and Action Log, are sometimes used for Hybrid 3 and Total eClose.
Go to the eJournal tab, and click on the down arrow to look at the borrower's journal.
Please note that for Settlement Agents, the eJournal is read-only.
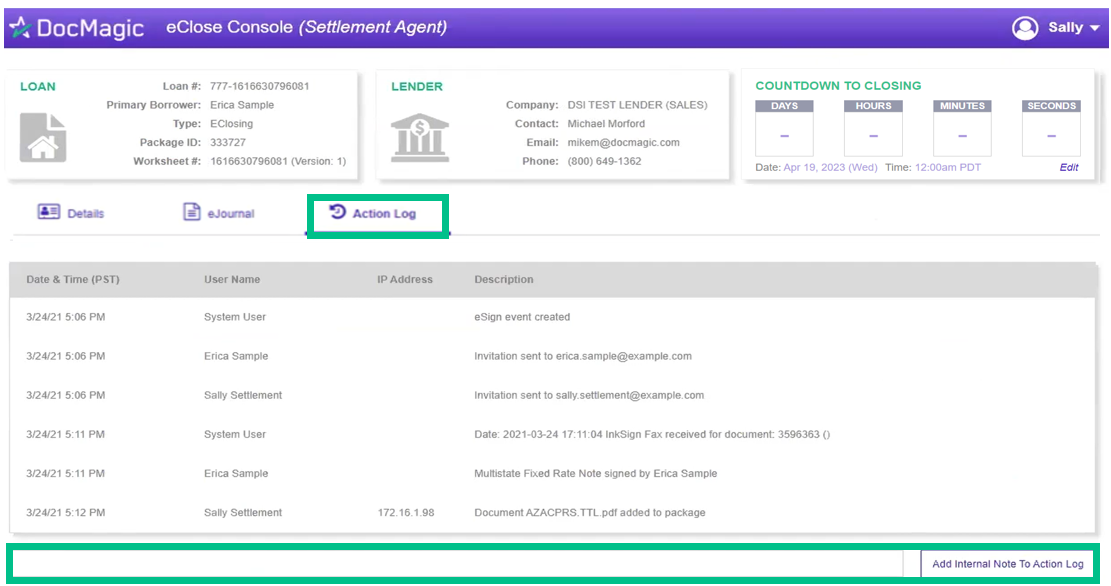
14. The Action Log shows the actions that everyone involved in the process has taken, and when. You may also add notes at the bottom.
15. Now let's go back to the main page (Details Tab).
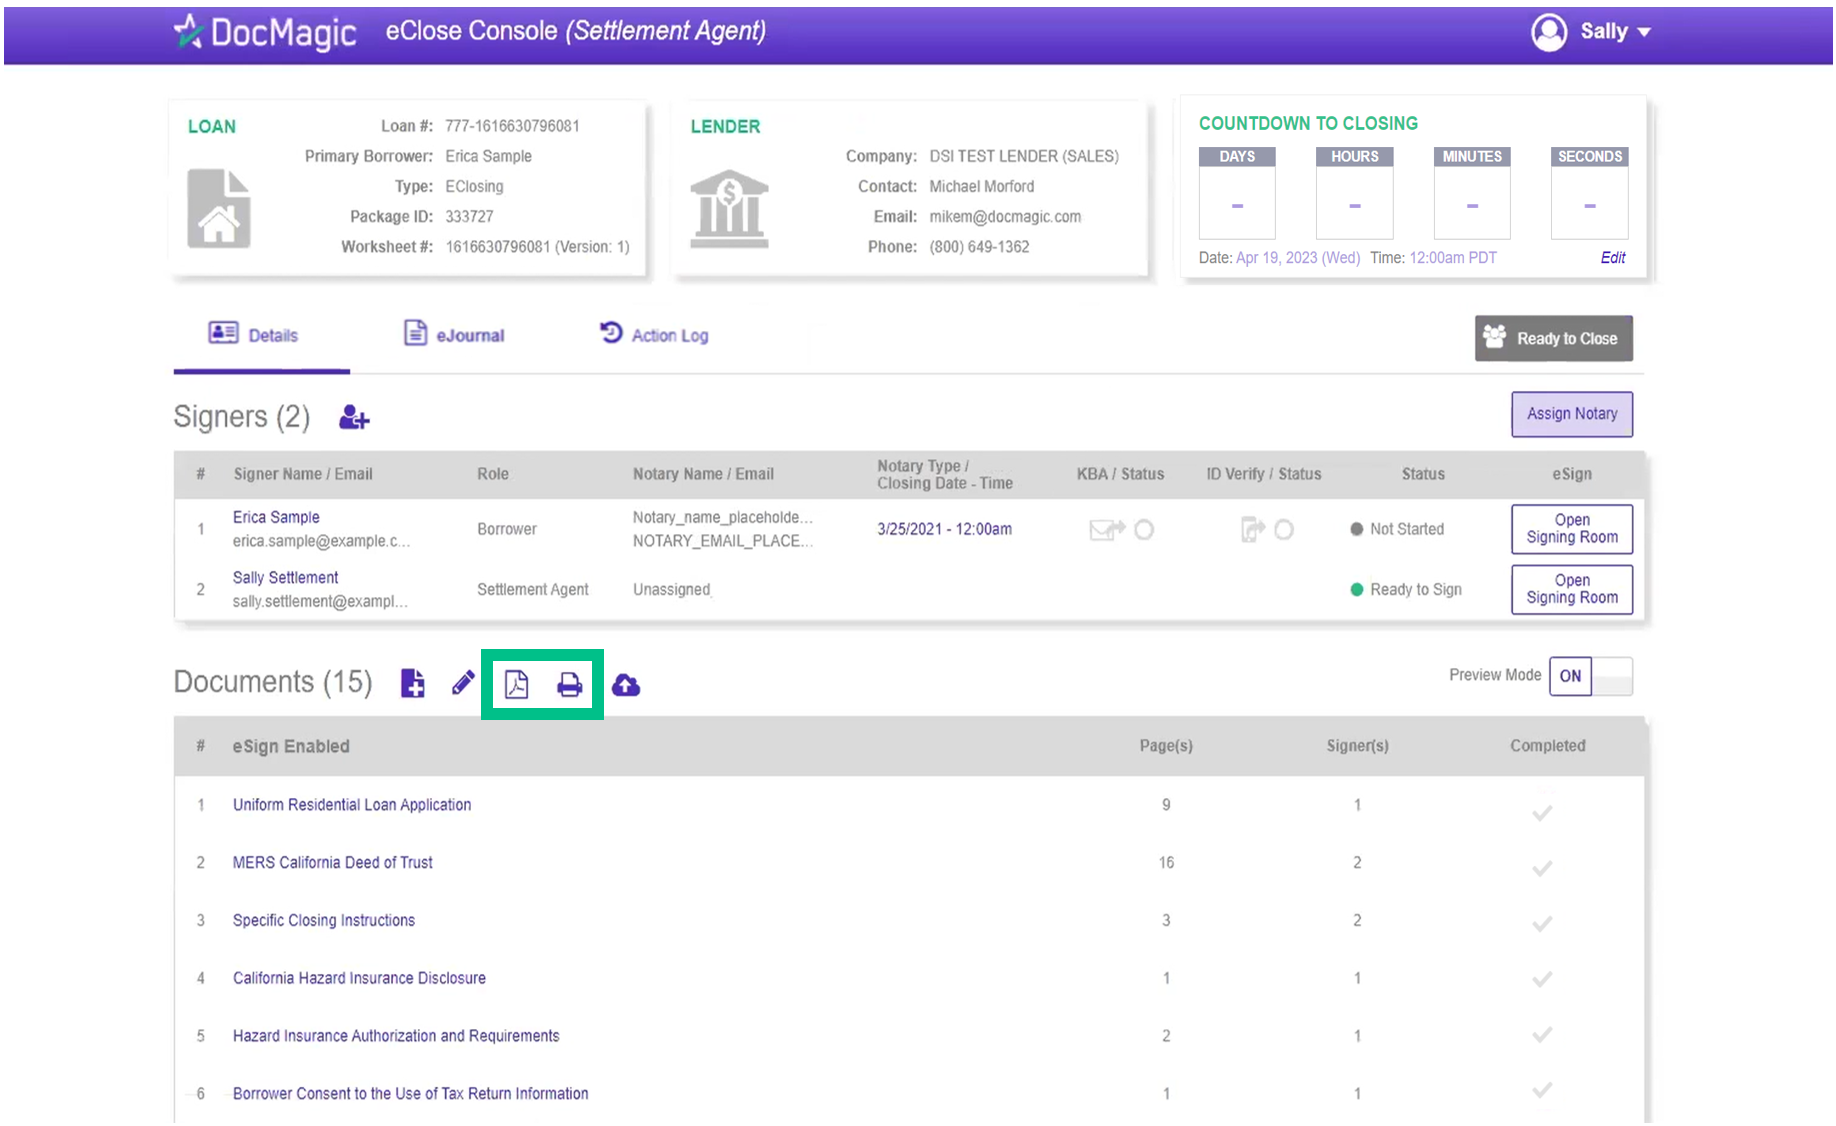
The Printer Icon allows you to download documents that require wet signatures.
The PDF Icon allows you to download and print all the documents. This isn't always necessary, but you have the option.
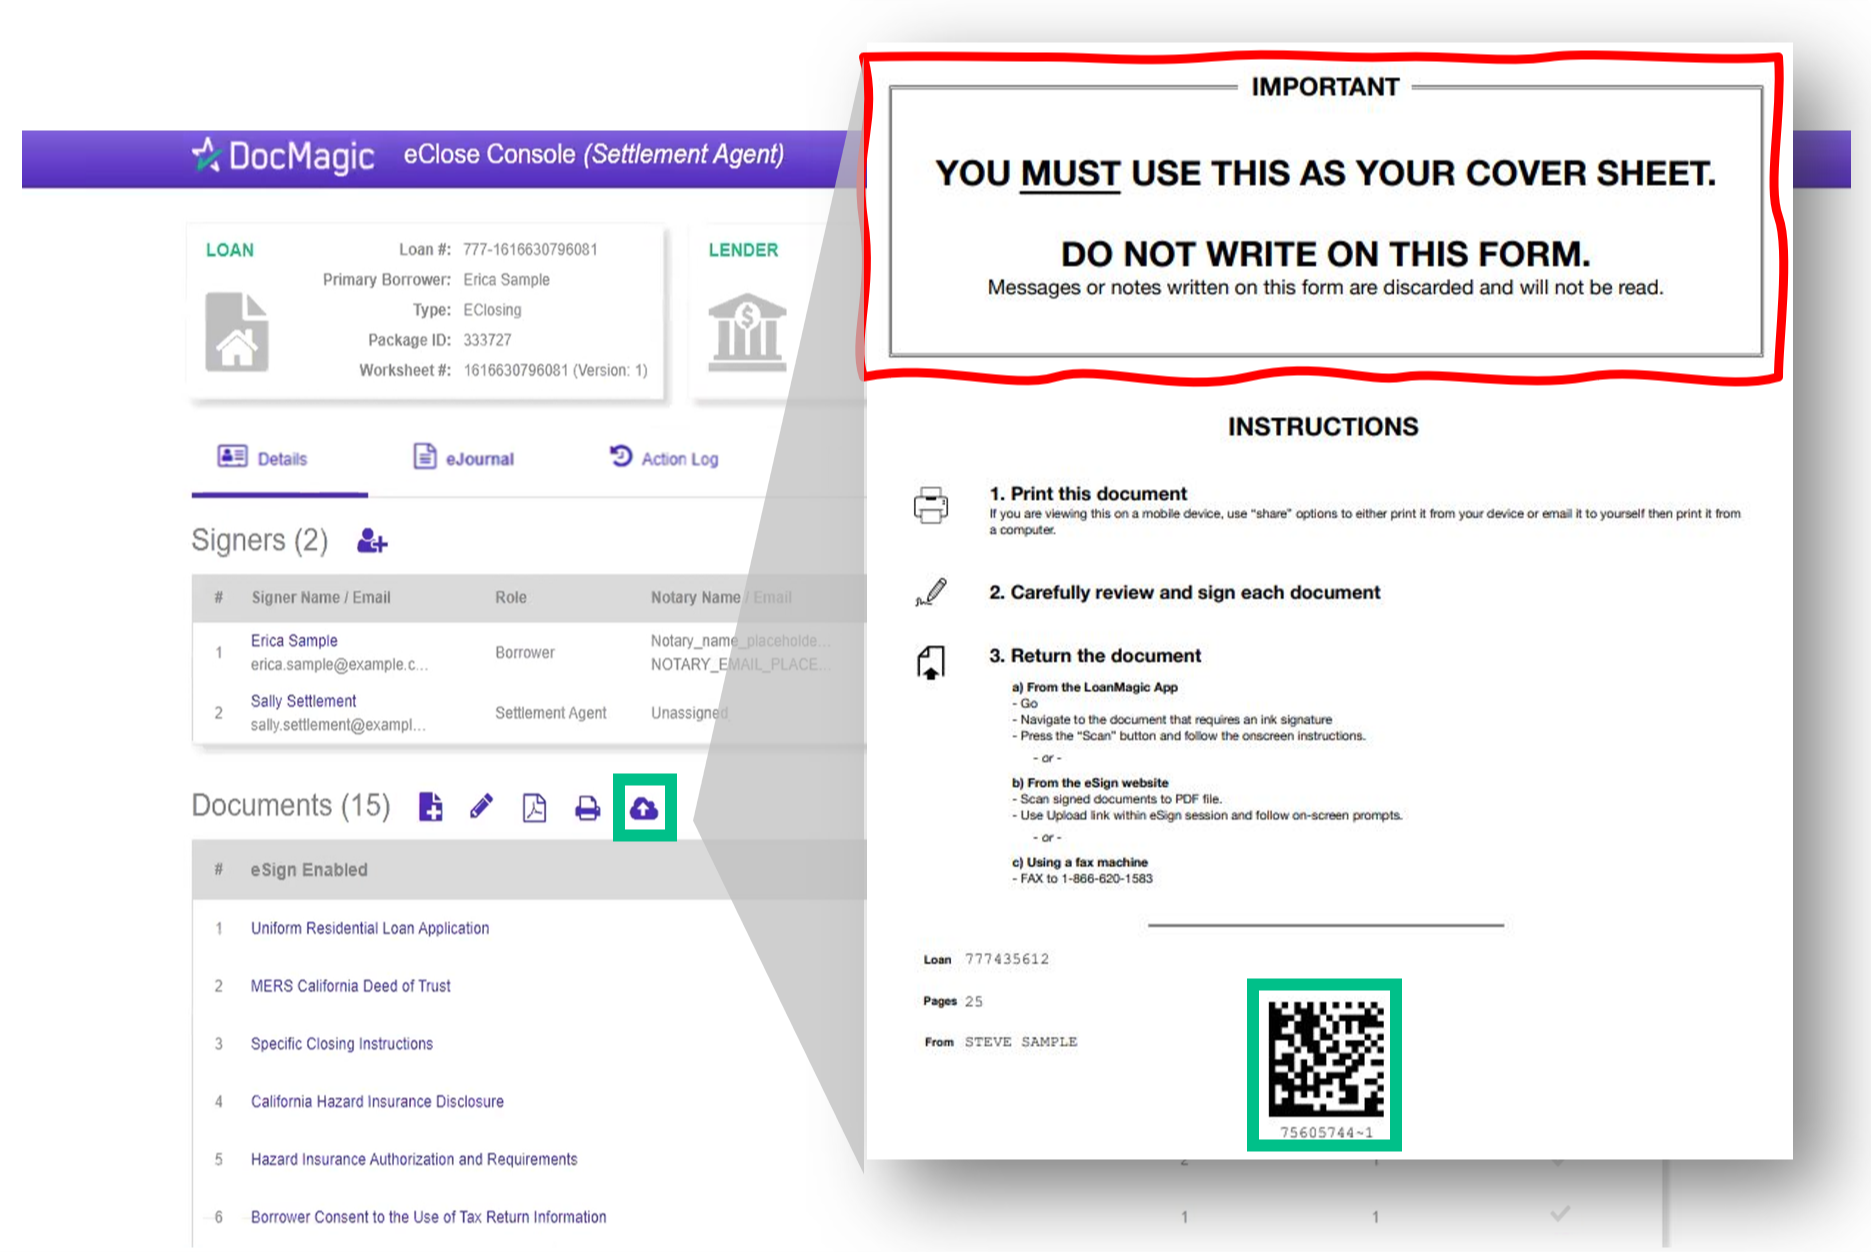
16. Upload signed and scanned documents by clicking on the cloud icon with the arrow pointing up.
The QR Code on each page will place the signed documents into the correct order in the stack.
Completed wet signed documents will show up in the Print and Sign section of the documents area. A green checkmark will indicate that the document has been successfully signed.
It is extremely important that you do not confuse this with the Add New Documents icon, explained in Step 9.
17. Click the Assign Notary button on the right to begin the process of assigning a Notary.
A separate window, shown below, will appear.
Please note that assigning a notary is only applicable for closing types with eNotary enabled - Hybrid 3 and Total eClose.
If you will not be assigning a notary, skip to step 24.
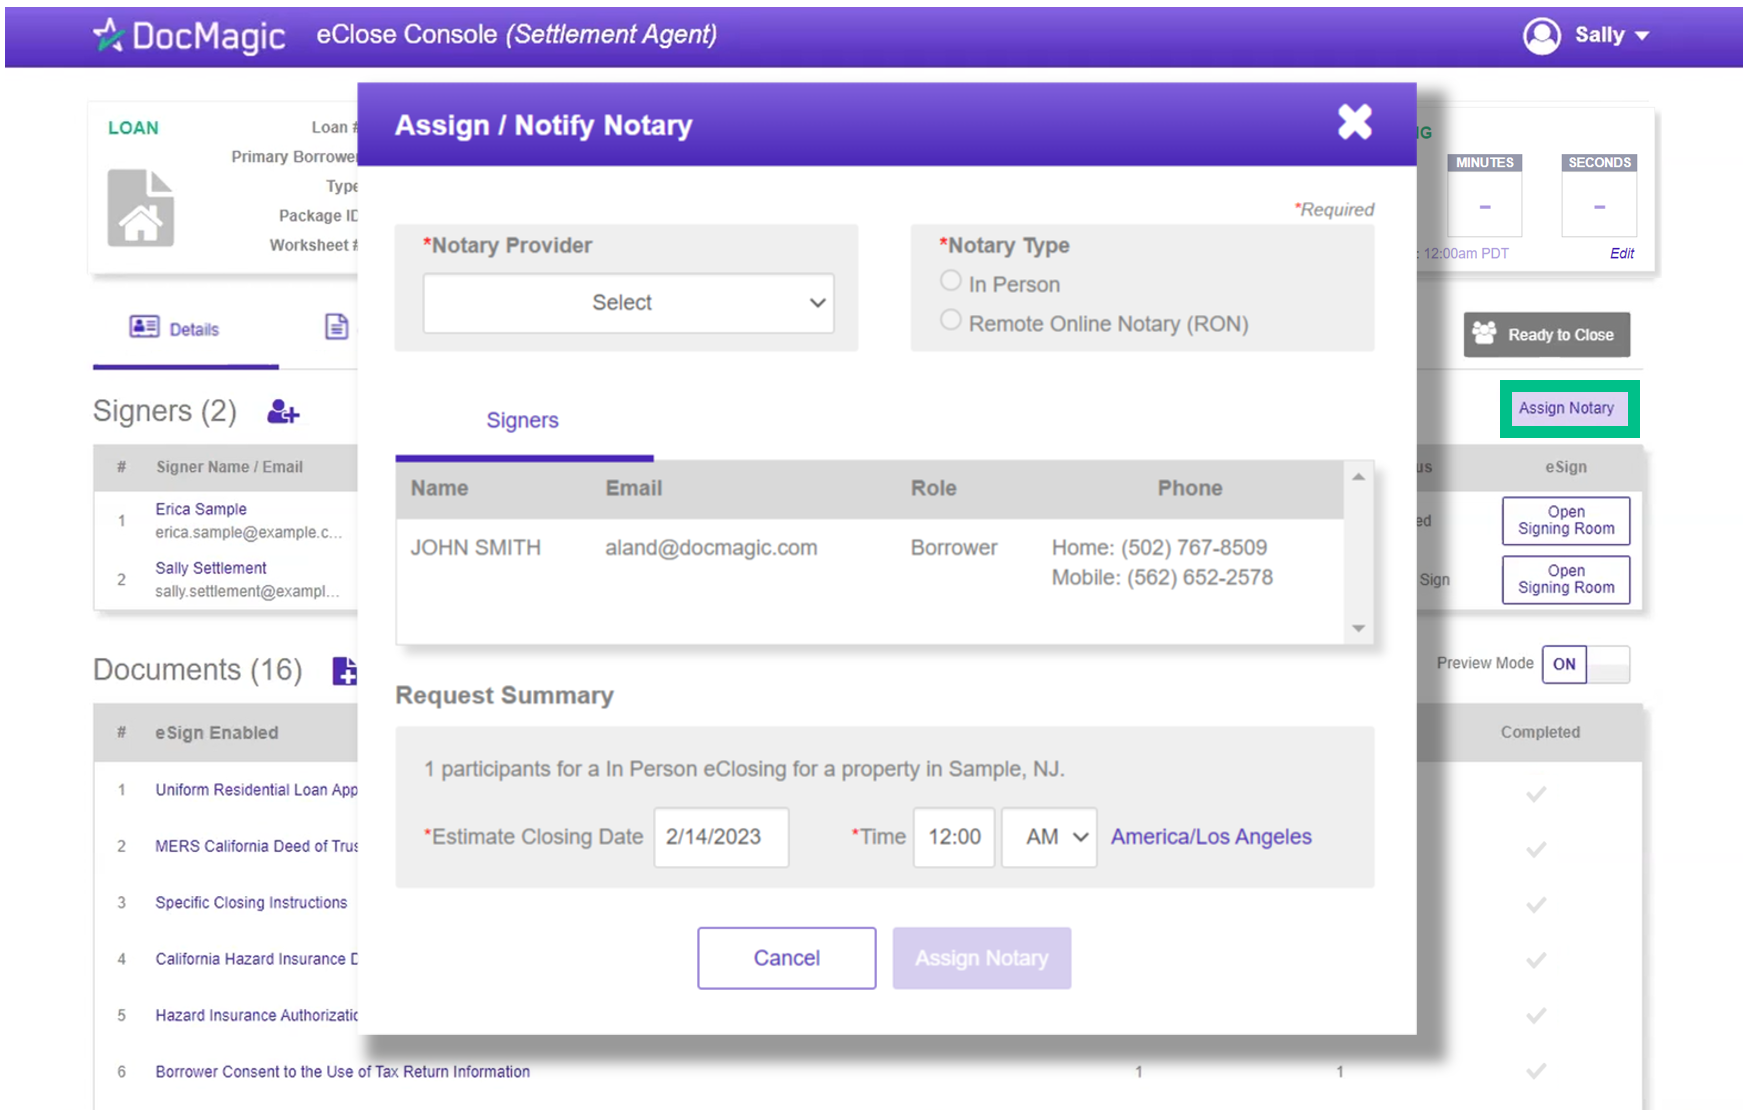
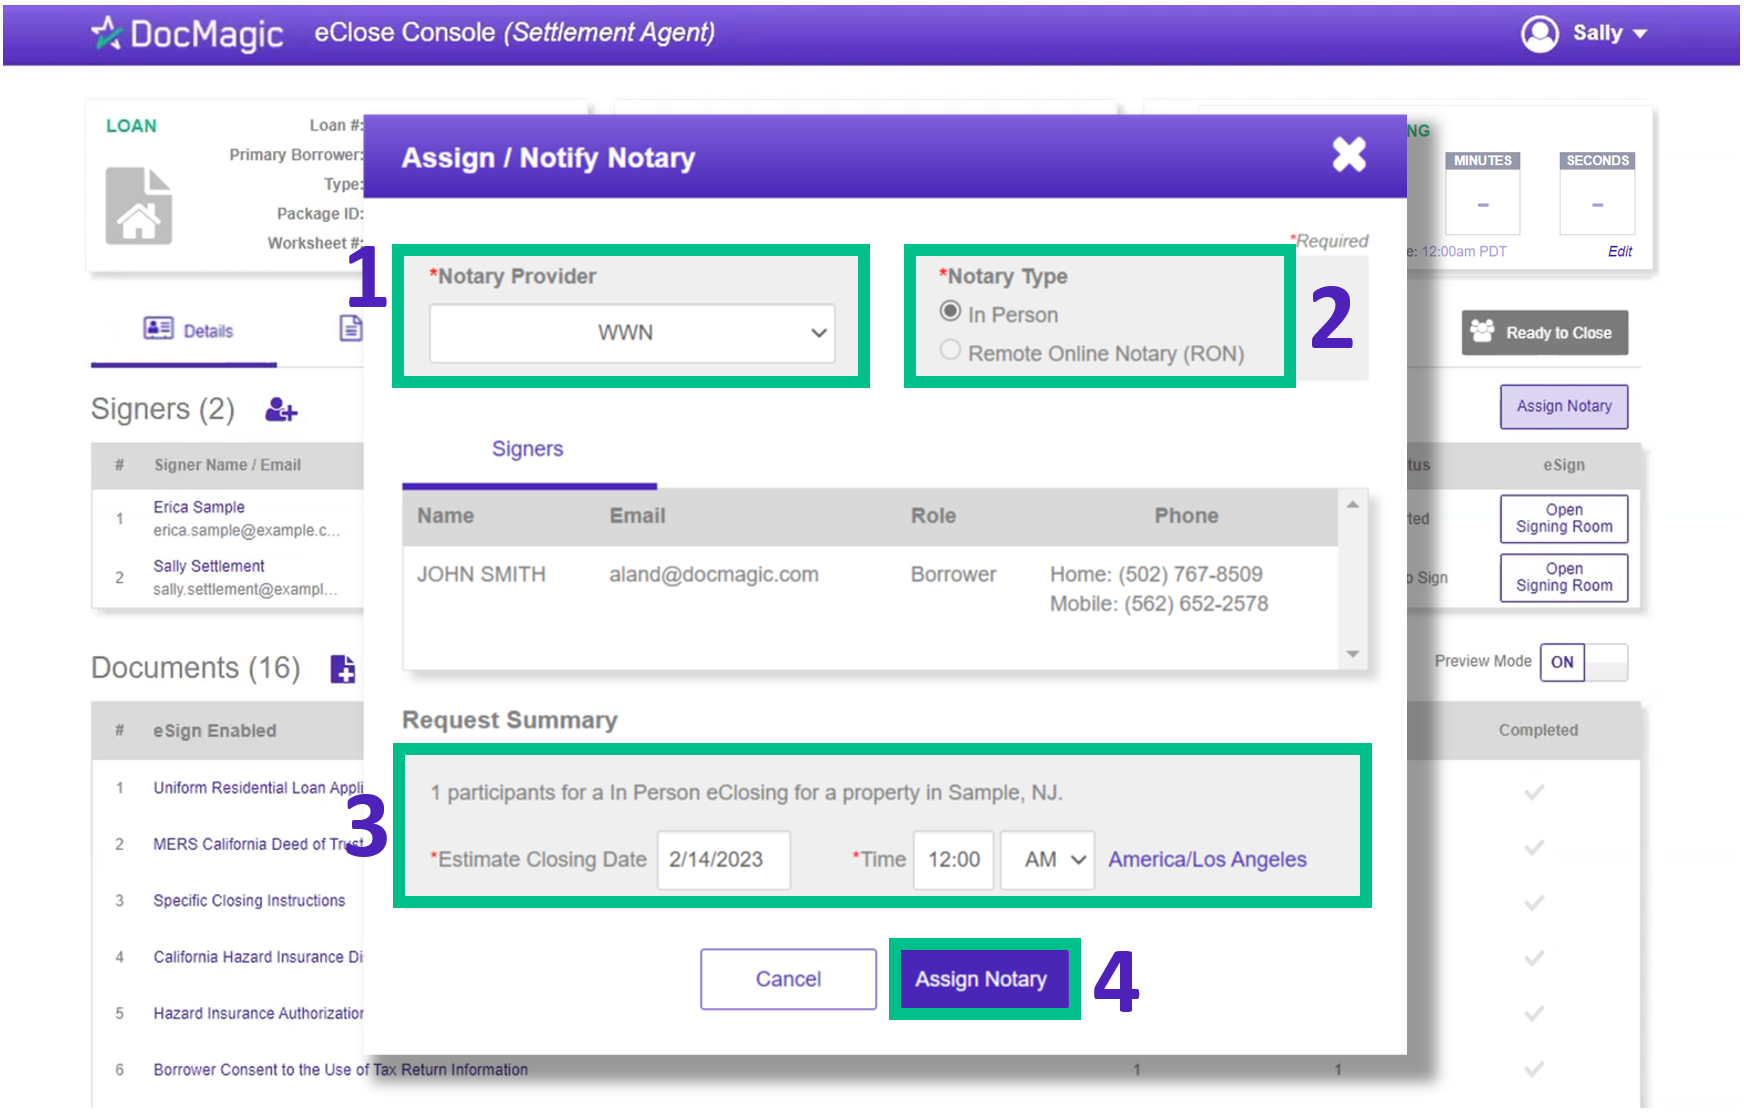
18. If you are using World Wide Notary, you will need to do the following:
- Select WWN as your Notary Provider.
- Select In Person for Notary Type.
- Select your closing date, time, and time zone in the Request Summary section.
- Click "Assign Notary" when done.
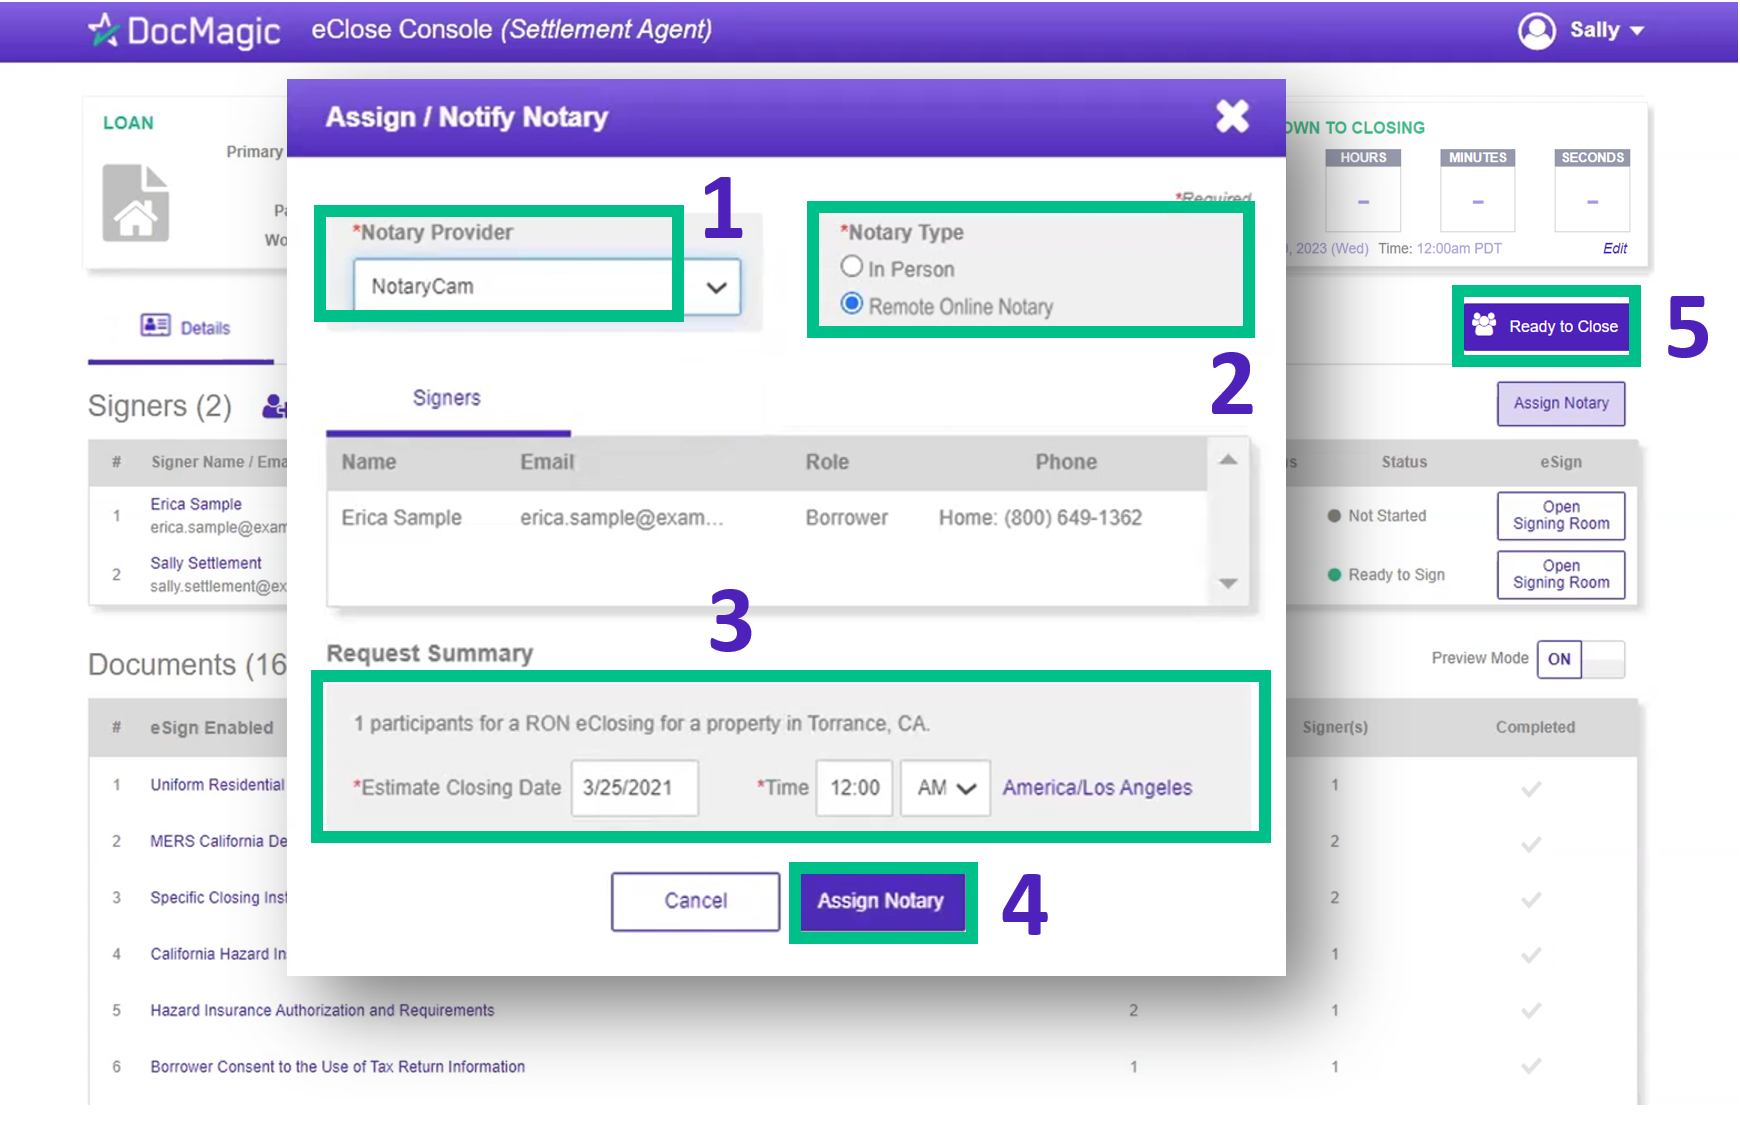
19. If you are using NotaryCam, you will only need to do the following:
- Select NotaryCam as your Notary Provider.
- Select Remote Online Notary as your Notary Type.
- Select the closing date, time, and time zone in the Request Summary section.
- Click "Assign Notary" when done.
- Hit Ready to Close when it's time to alert the NotaryCam Notary. To resend a notification, hit Ready to Close again, and not Notify.
Please Note: NotaryCam is currently only able to process the loan once per package. Please ensure that all documents to be included in the signing ceremony are prepared and uploaded prior to selecting “Ready to Close”.
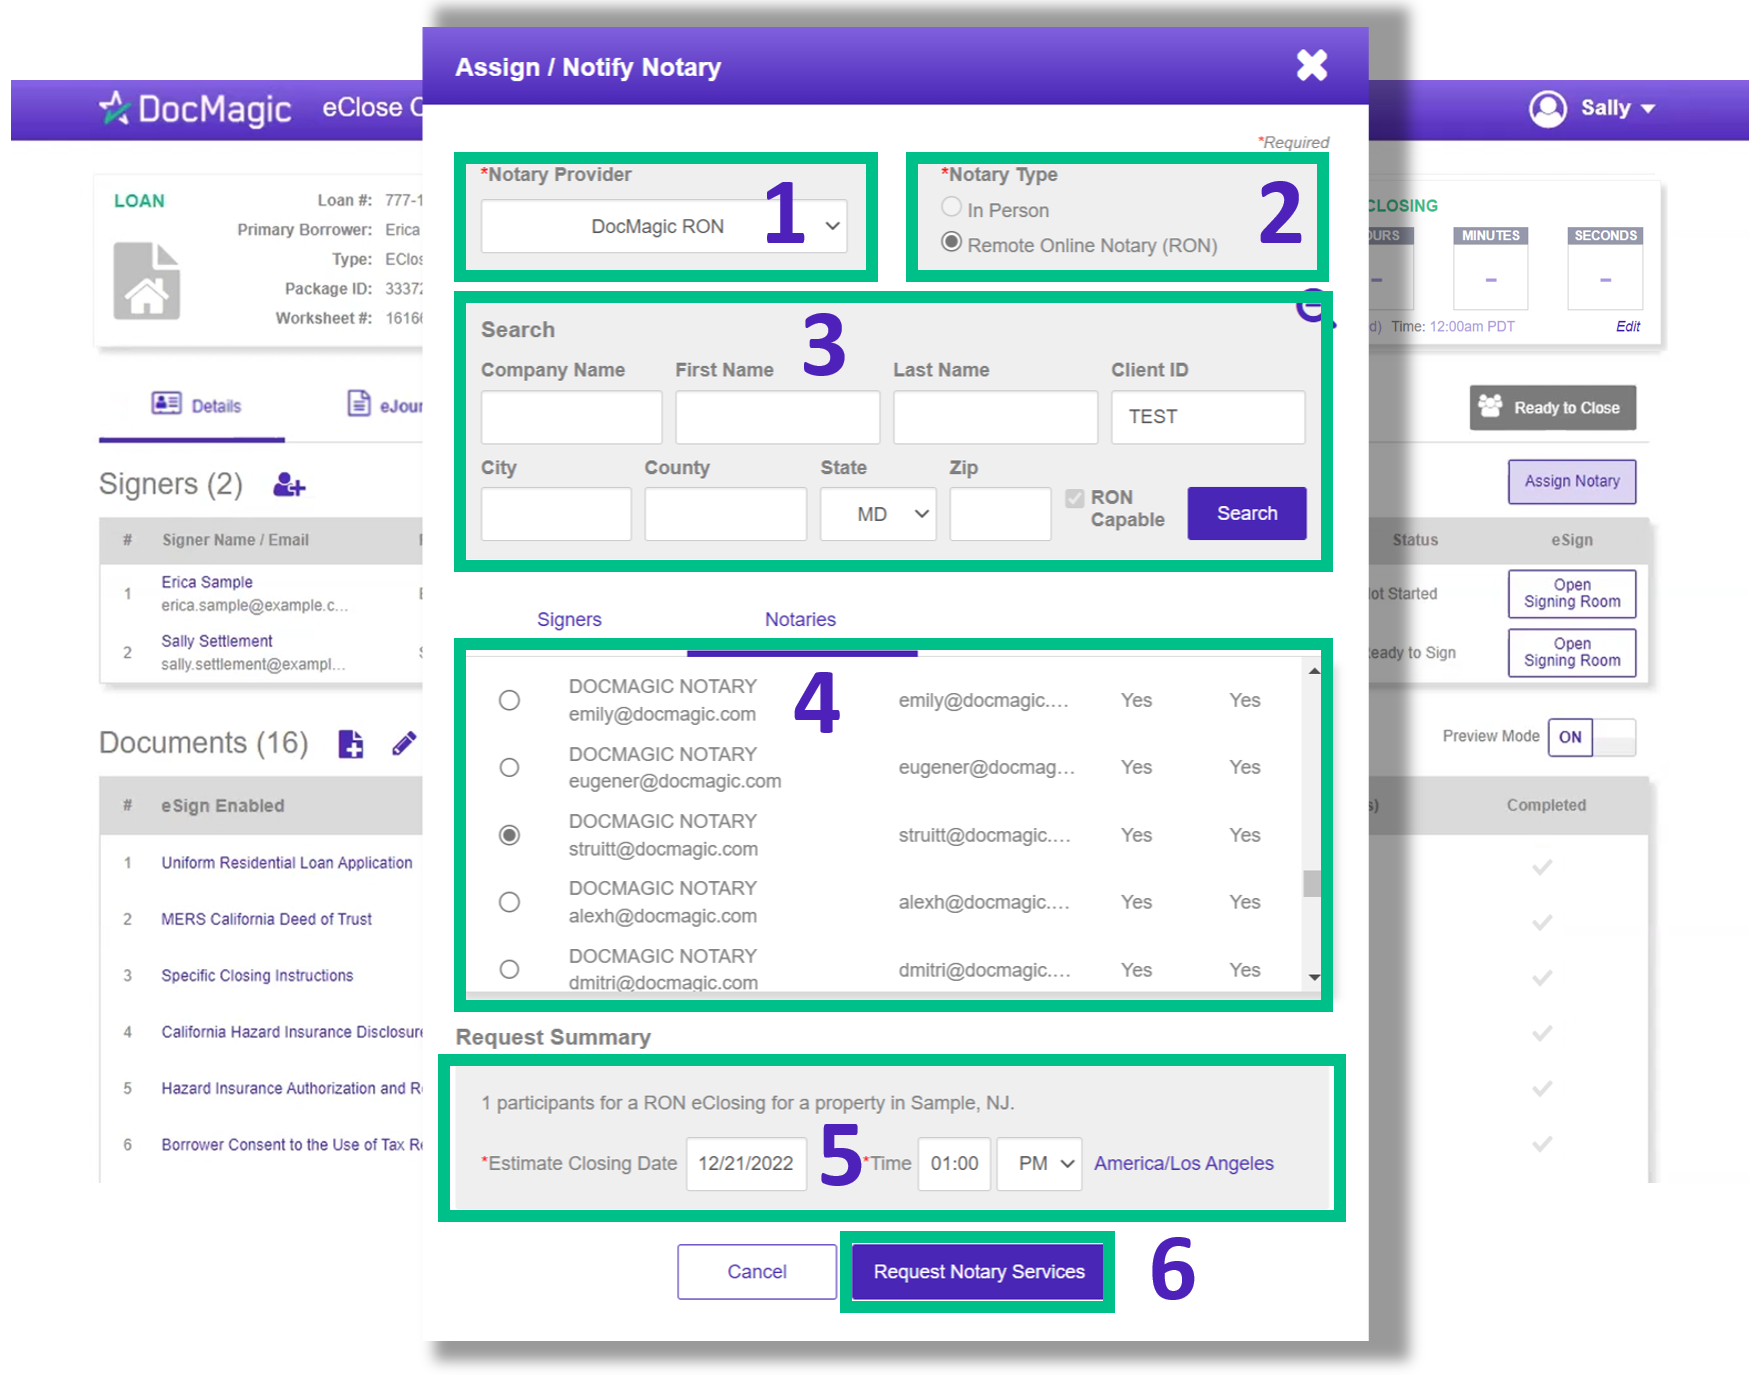
20. If you are using a DocMagic Remote Online Notary, you will need to the following:
- Select DocMagic RON from the Notary Provider.
- Select Remote Online Notary as your Notary Type.
- Enter your search parameters (Client ID, State, etc.) and hit Search. Please note that entering too many parameters will limit the results that appear.
- Select your notary from the results that appear by clicking the bubble next to their name. Scroll down using the bar on the right to see more options.
- Select your closing date, time, and time zone in the Request Summary section.
- Click "Request Notary Services" when done.
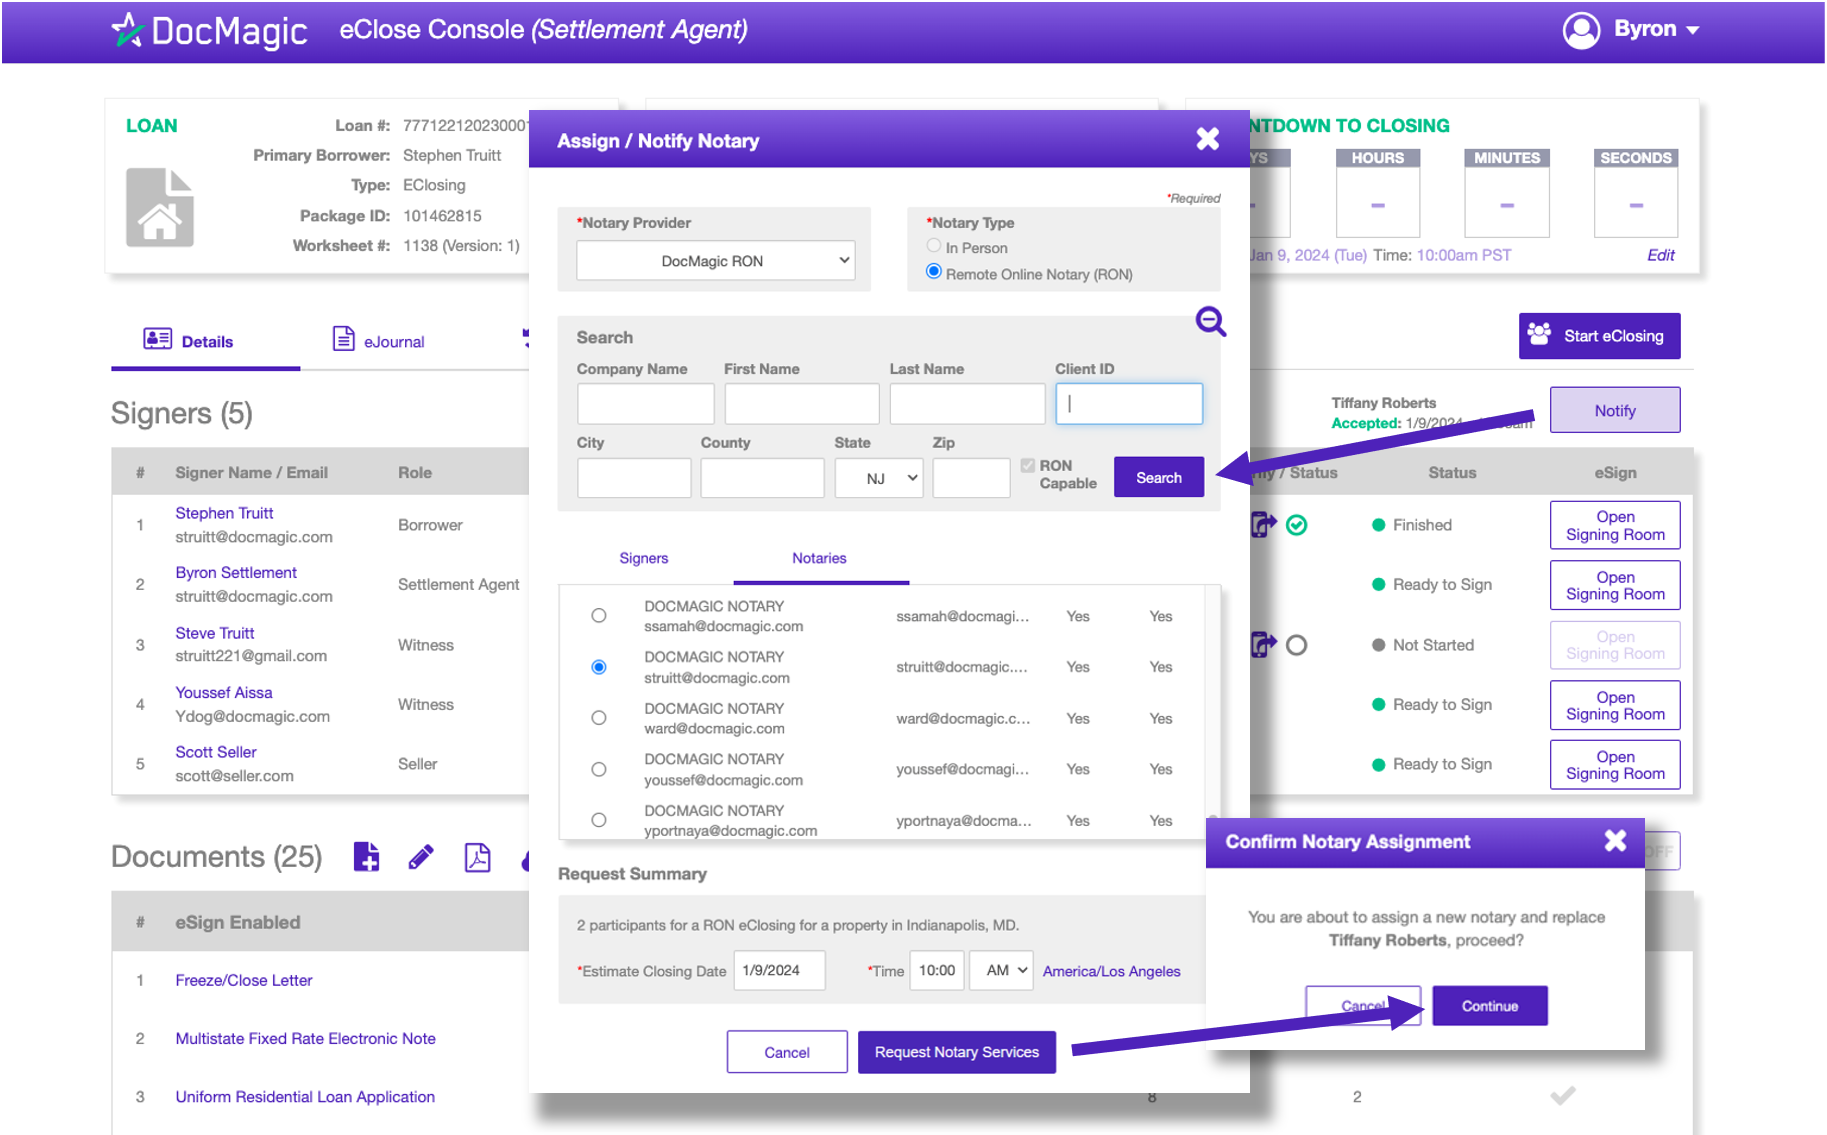
21. If you need to re-assign a notary, do the following:
- Click on the "Notify" button, which will activate the selection window.
- Ensure that "Remote Online Notary" is selected for Notary Type.
- Click on the magnifying glass to activate the search.
- Choose your new notary. Double check the date and time. Then click "Request Notary Services".
- Confirm that you want to switch notaries, and the new notary will be notified by email.
22. Once all the documents have been uploaded and prepared for execution, click "Ready to Close" (towards the top right) to alert the Notary, if a Remote Online Notary is required.
This is only applicable for closing types with eNotary enabled - Hybrid 3 and Total eClose.
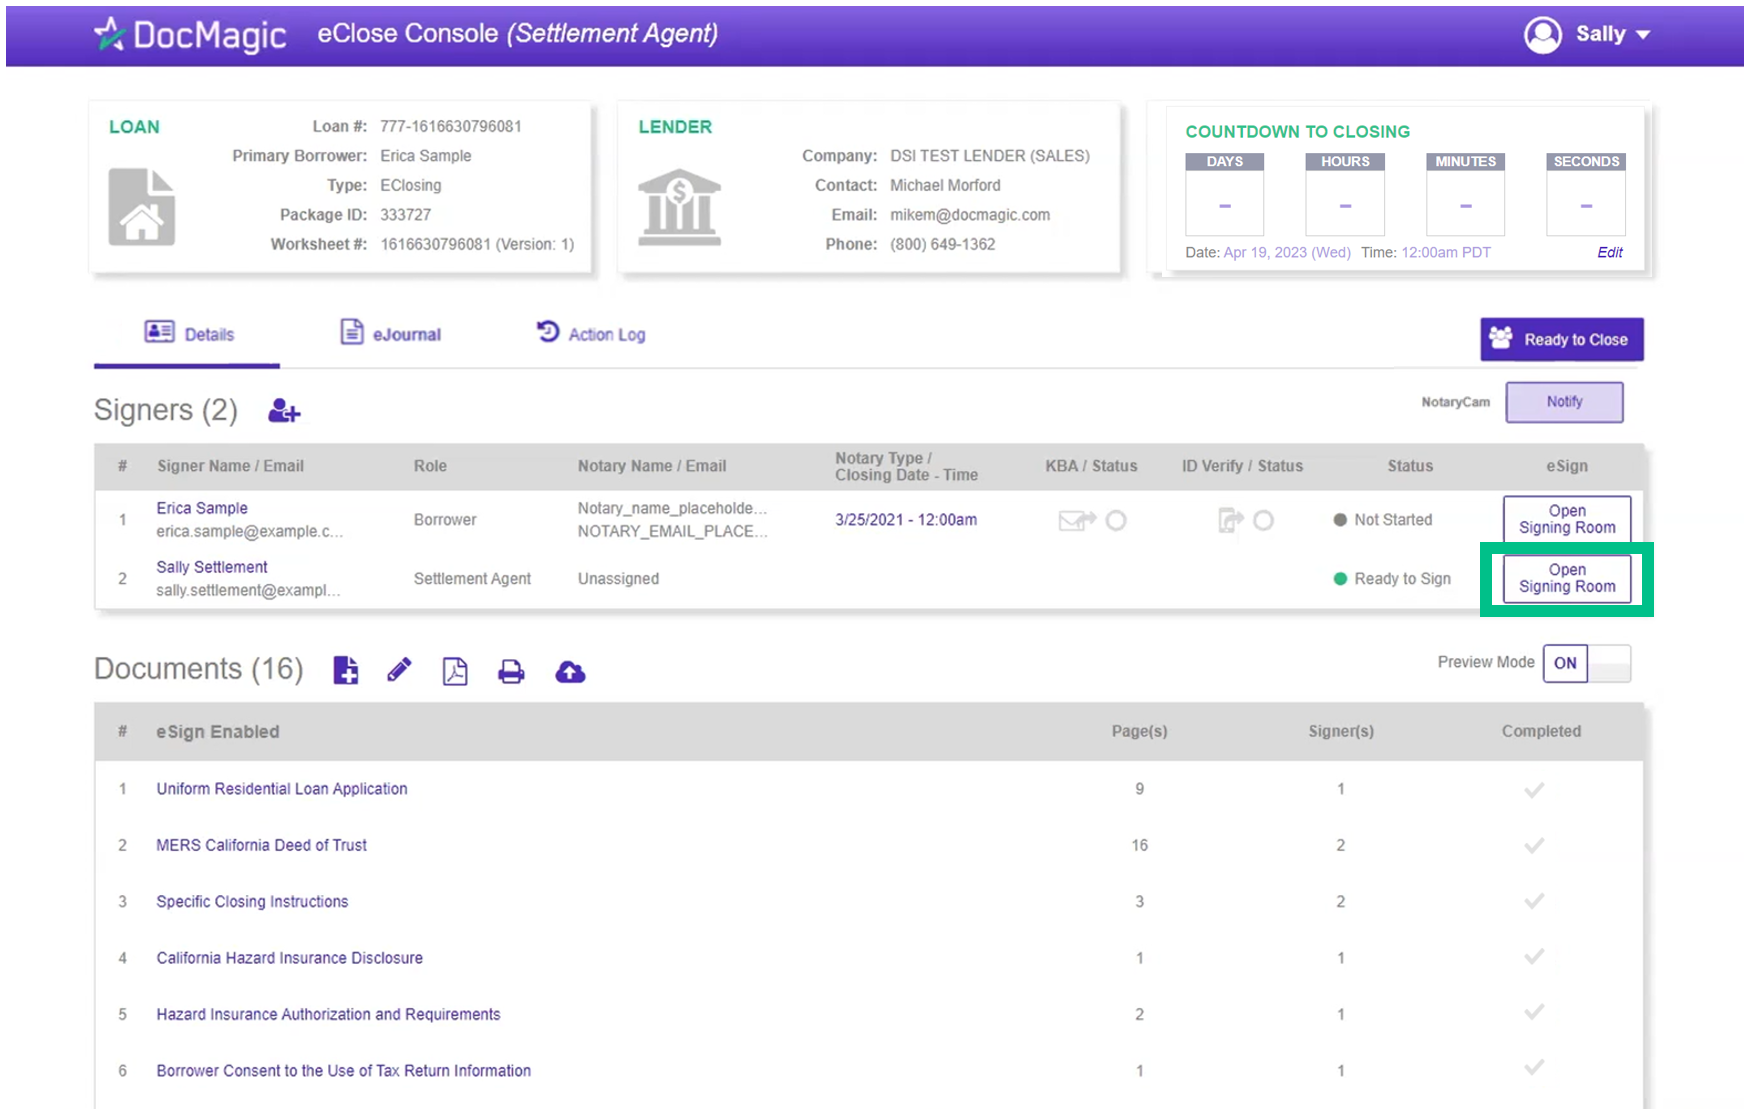
23. The Settlement Agent can eSign by clicking on the Open Signing Room button.
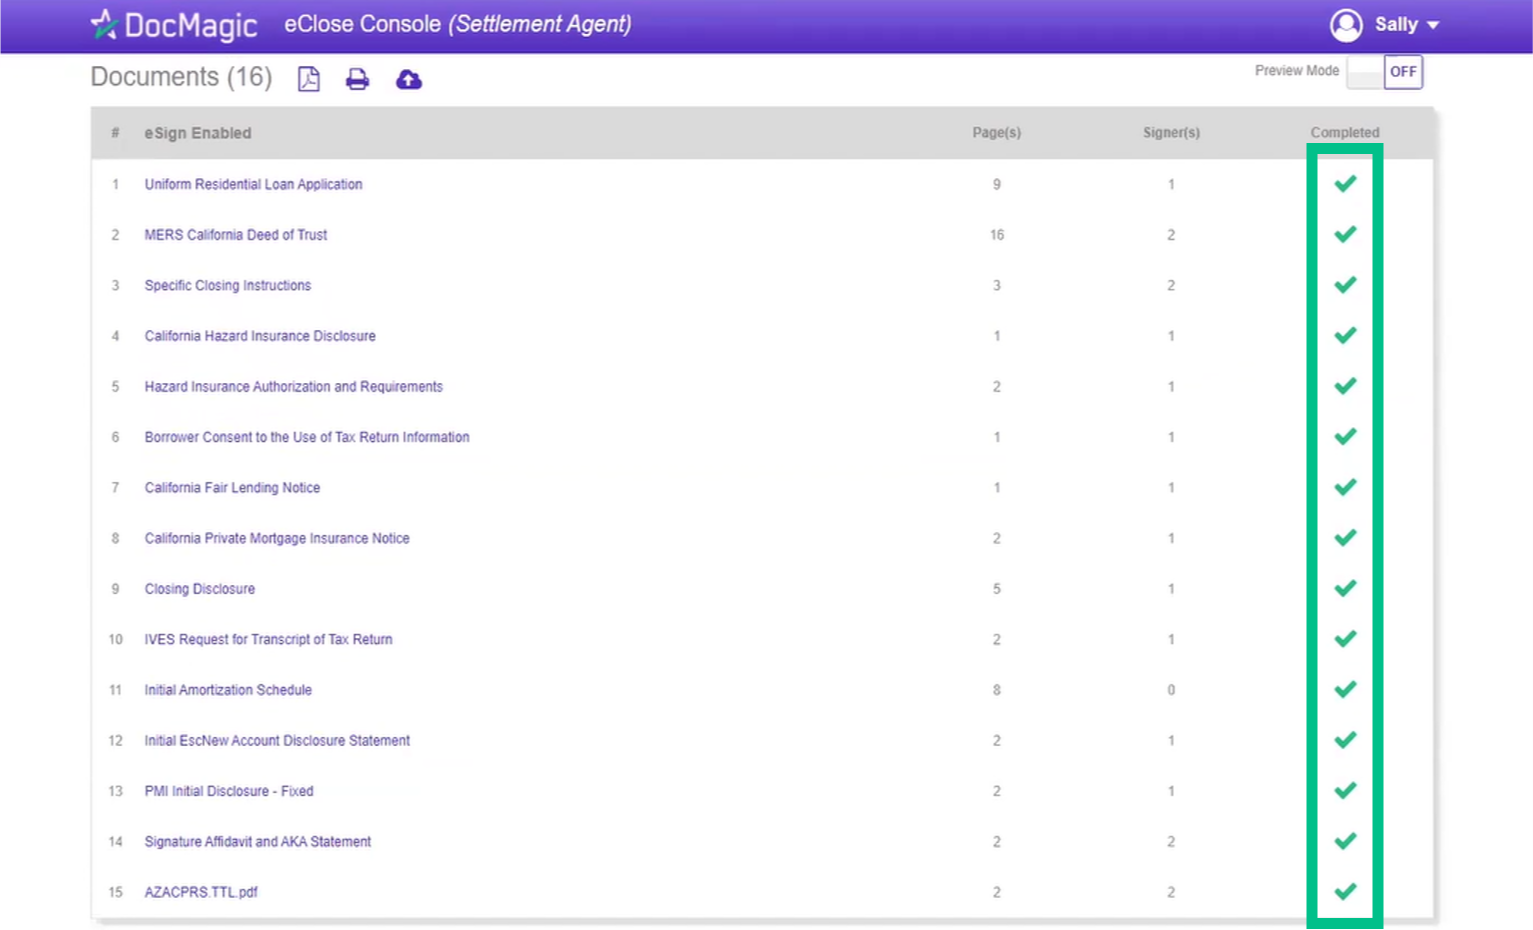
24. When all signed documents have been uploaded and all signatures, fields, and Notary stamps have been collected, the Settlement Agent will see a fully completed column on the right..
FREQUENTLY ASKED QUESTIONS
Q: What happens if I need to re-schedule the eClosing?
A: Contact the lender (and Notary if applicable) ahead of time. Make sure all parties are alerted, then change the date in your eClose Console.
Q: How do I assign another notary?
A: Go back to the "Assign Notary" button, which now might read "Notify". Click on it, then search for and select another Notary. See Step 22 for more details.
Q: What happens if I accidentally turn off Preview Mode ahead of the closing? Can I turn it back on?
A: You can turn it back on but make sure that nobody signs anything! If anyone signs, you can't turn it on anymore.
Q:What happens if I accidentally upload a document to the wrong spot? A settlement document to the ink sign area or vice versa.
A: The guidebook shows you where to upload new documents, versus signed documents.
Q:What do I do if I notice an incorrectly tagged document during the signing?
A: Go back to your Settlement Agent Portal which should be open in another tab. Click on the pencil icon and edit the document. Save your changes and go back to the Signing Room. Click on your name in the top right, then click Restart Meeting. The changes should show.