We make it quick and easy for you to electronically review and signyour documents in one simple and convenient process!
For a downloadable PDF version of this guide, click here.
You can also sign on a mobile device! Click here for instructions.
Certain closing packages will require you to validate your identity. Click here for instructions.
| |
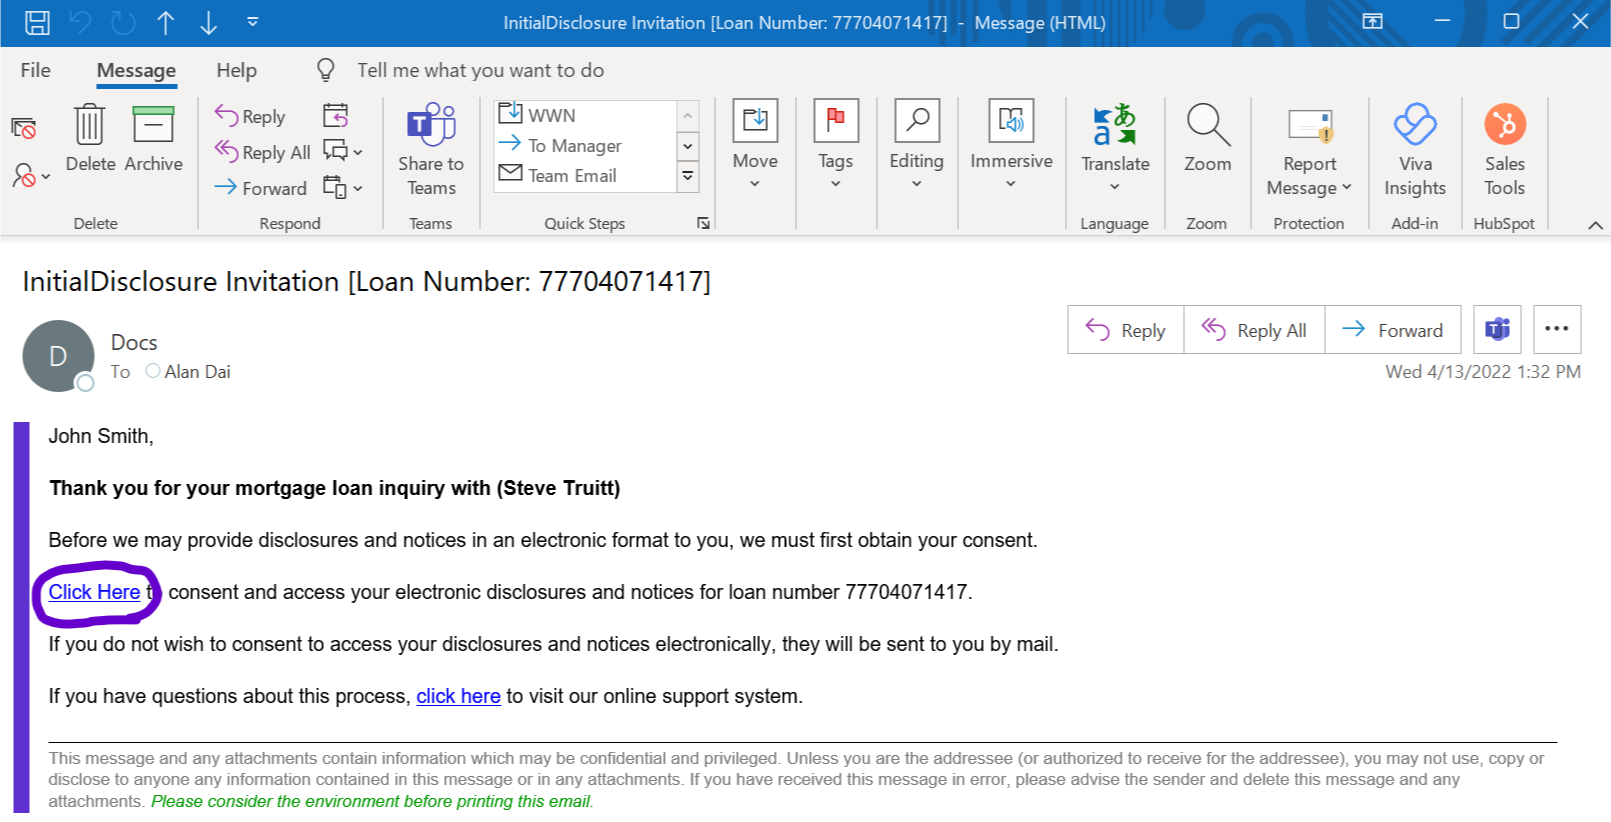
| 1. | You'll receive an e-mail invitation like the one pictured below. Click on the "Click Here" link to get started.
|
| |
2.
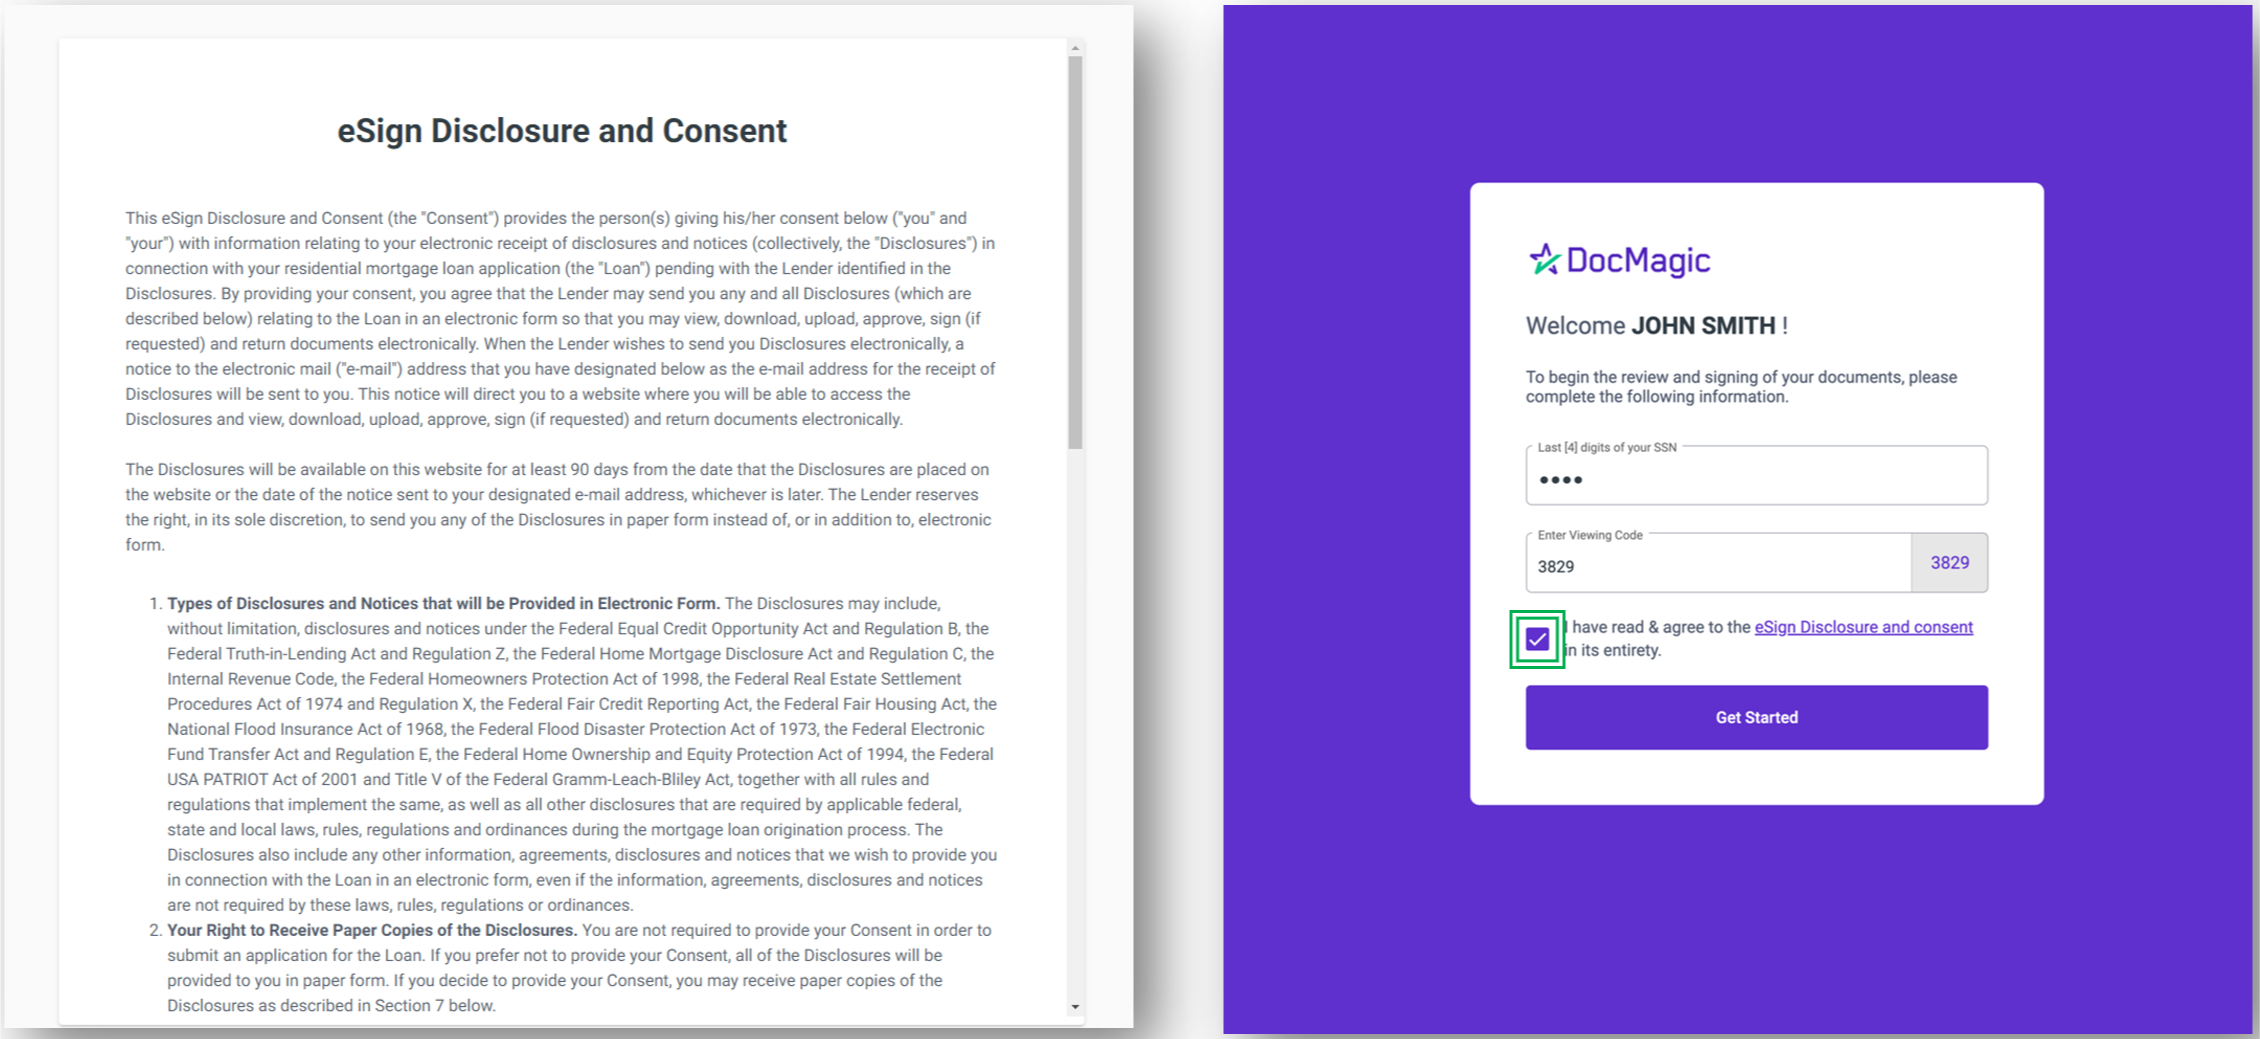
| The link will take you to this welcome page where you must verify your identity.
Before you can access the platform, you must check the box stating that you have read and agree to the terms outlined in the eSign Disclosure and Consent form. You can access it through the link provided on the welcome screen.
If you get a "login error" message, close the browser tab and click on the link in your email again.
Certain closing packages will require you to validate your identity before you can sign. Click here for additional instructions.
|
| |
3.
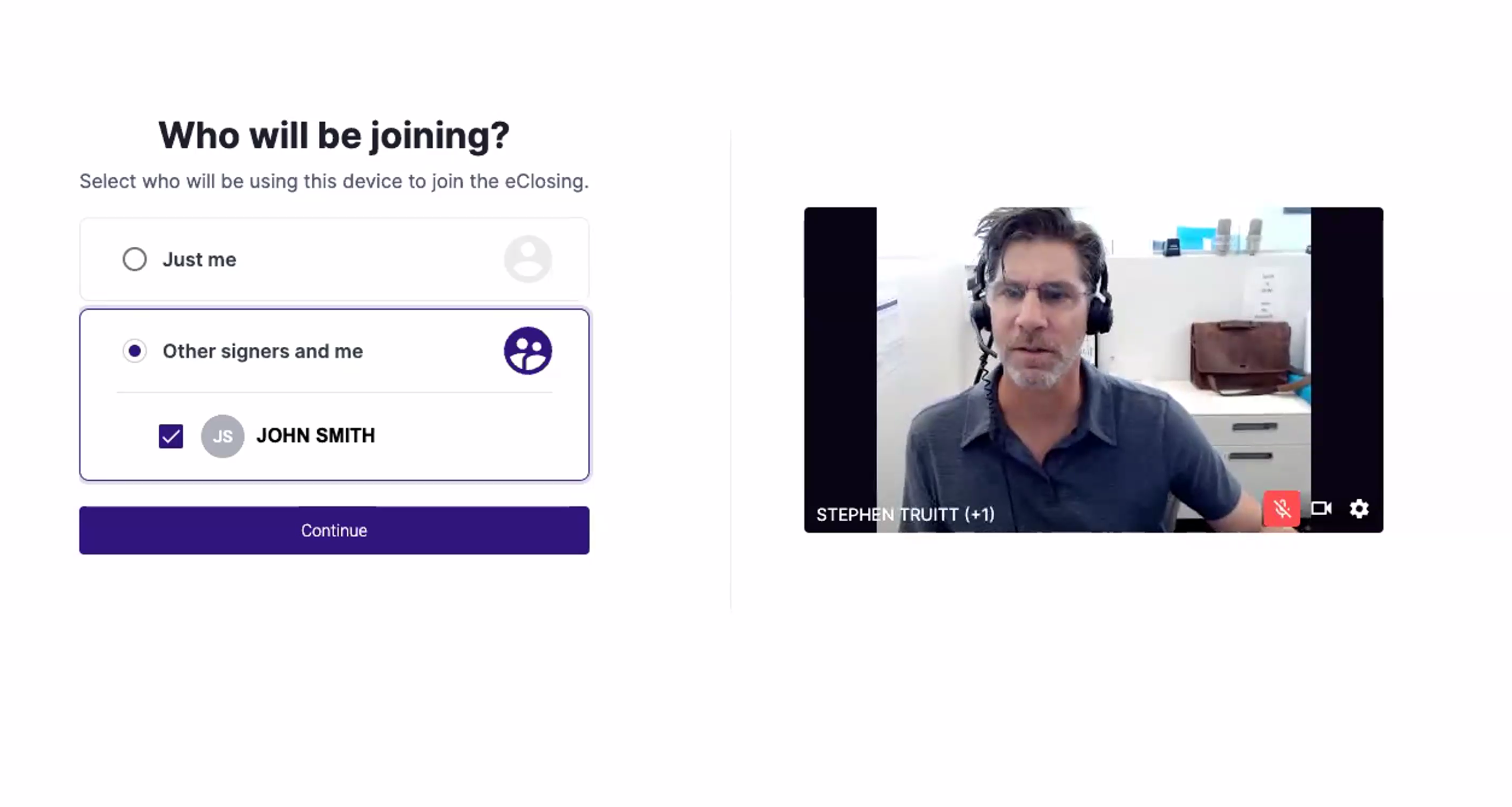
| If there are multiple borrowers in the package, you may be asked to choose if you are the only signer, or if there will be other signers in the session. Make your selection and click Continue.
|
| |
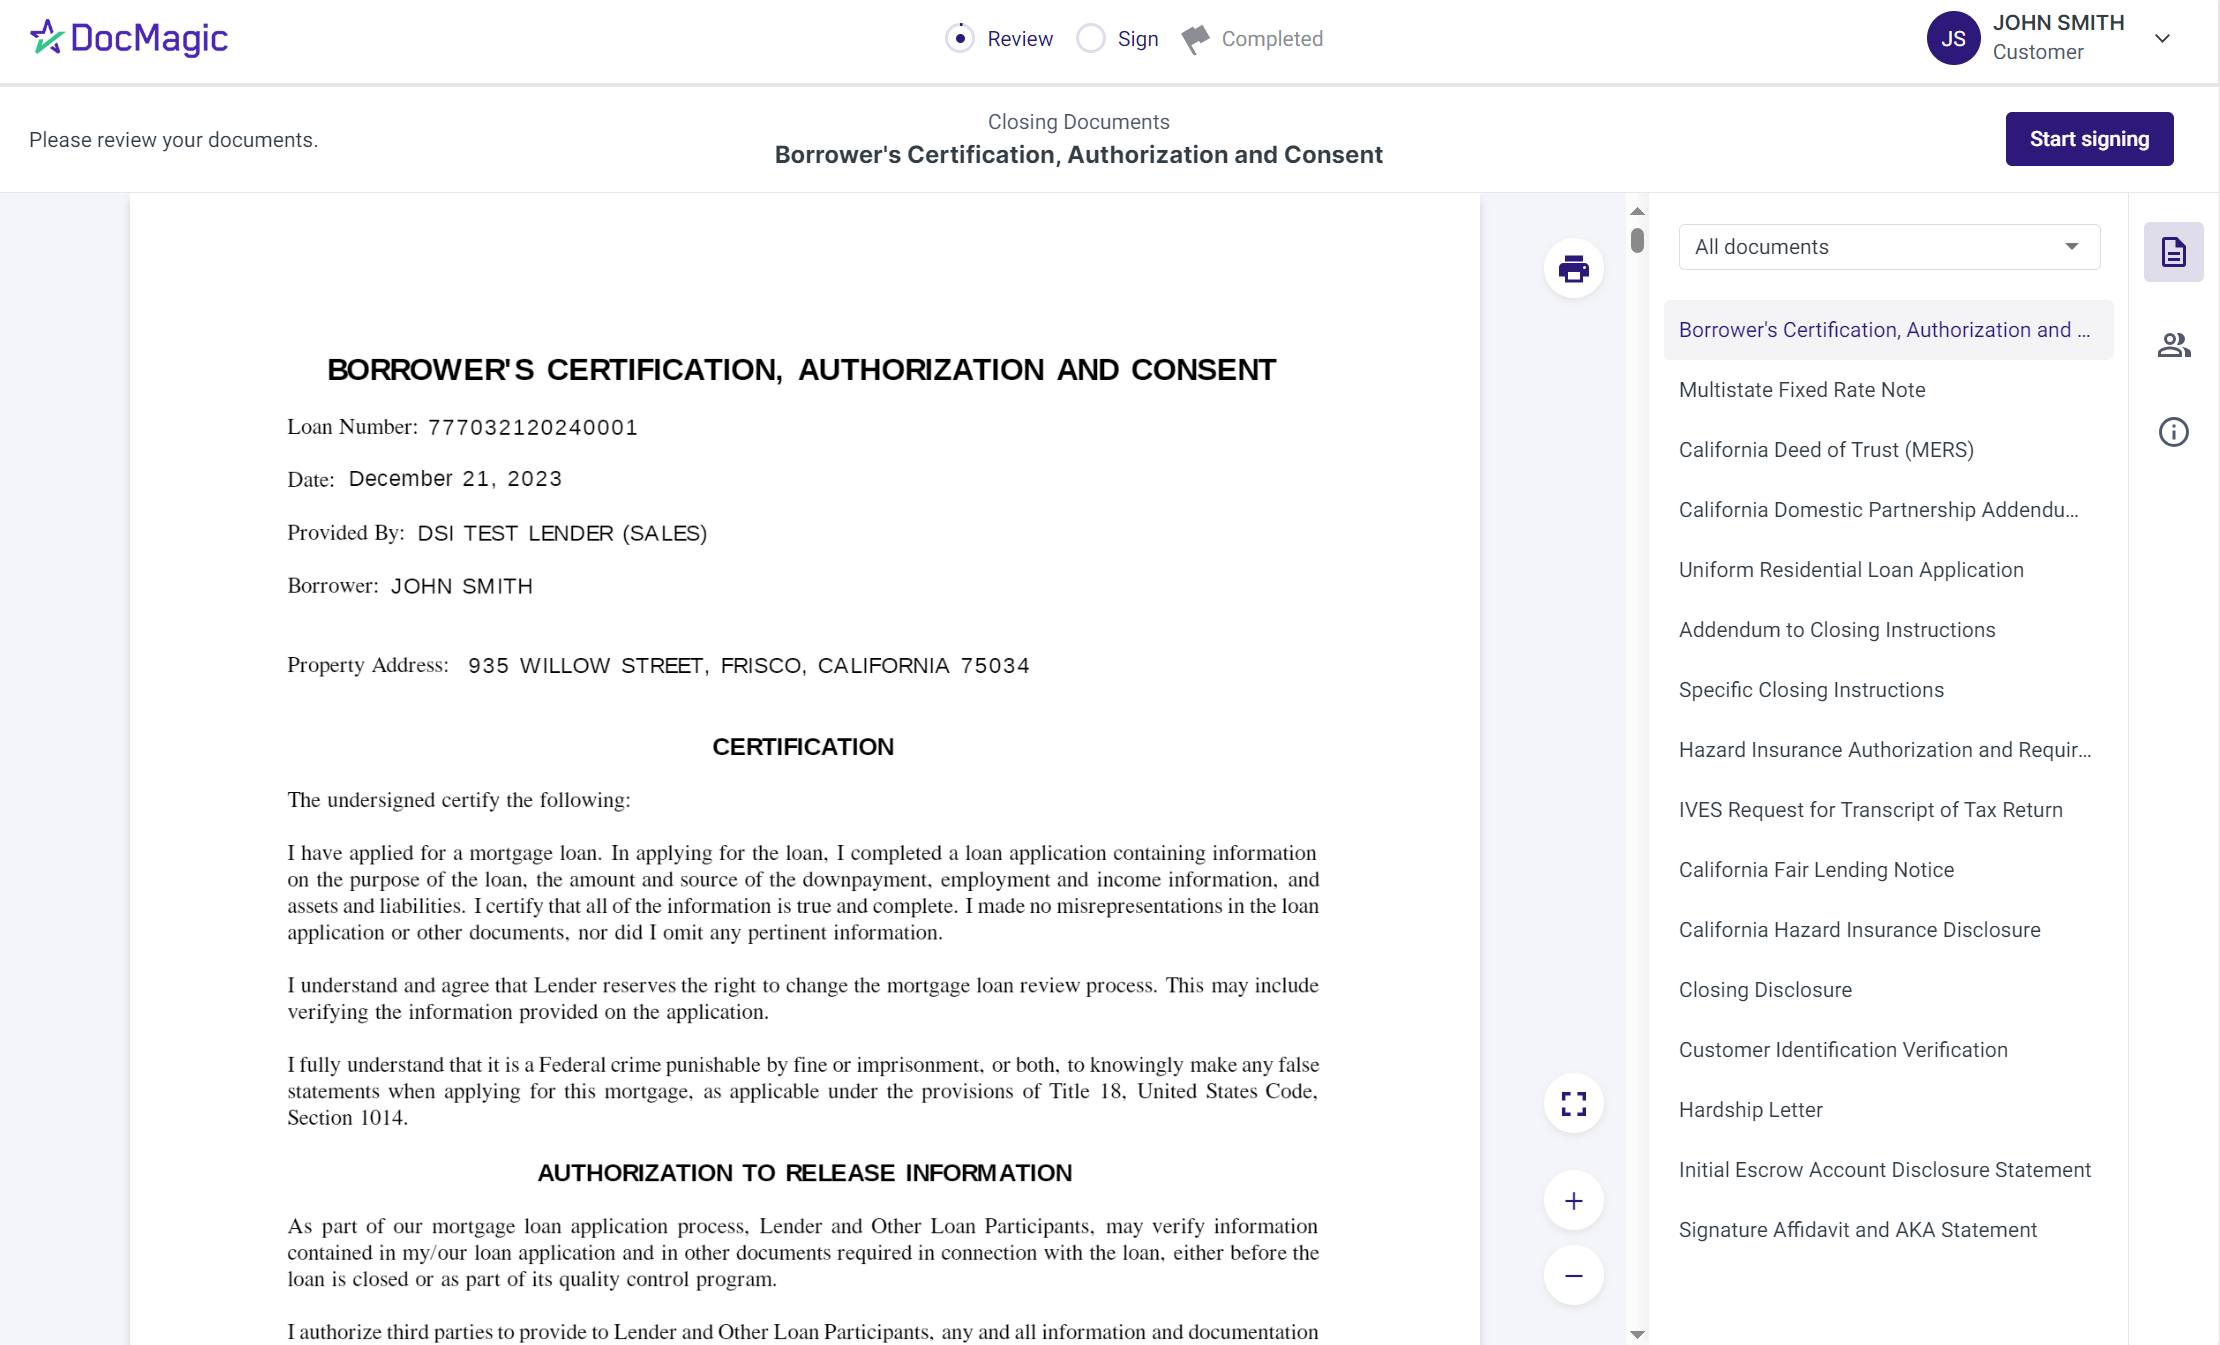
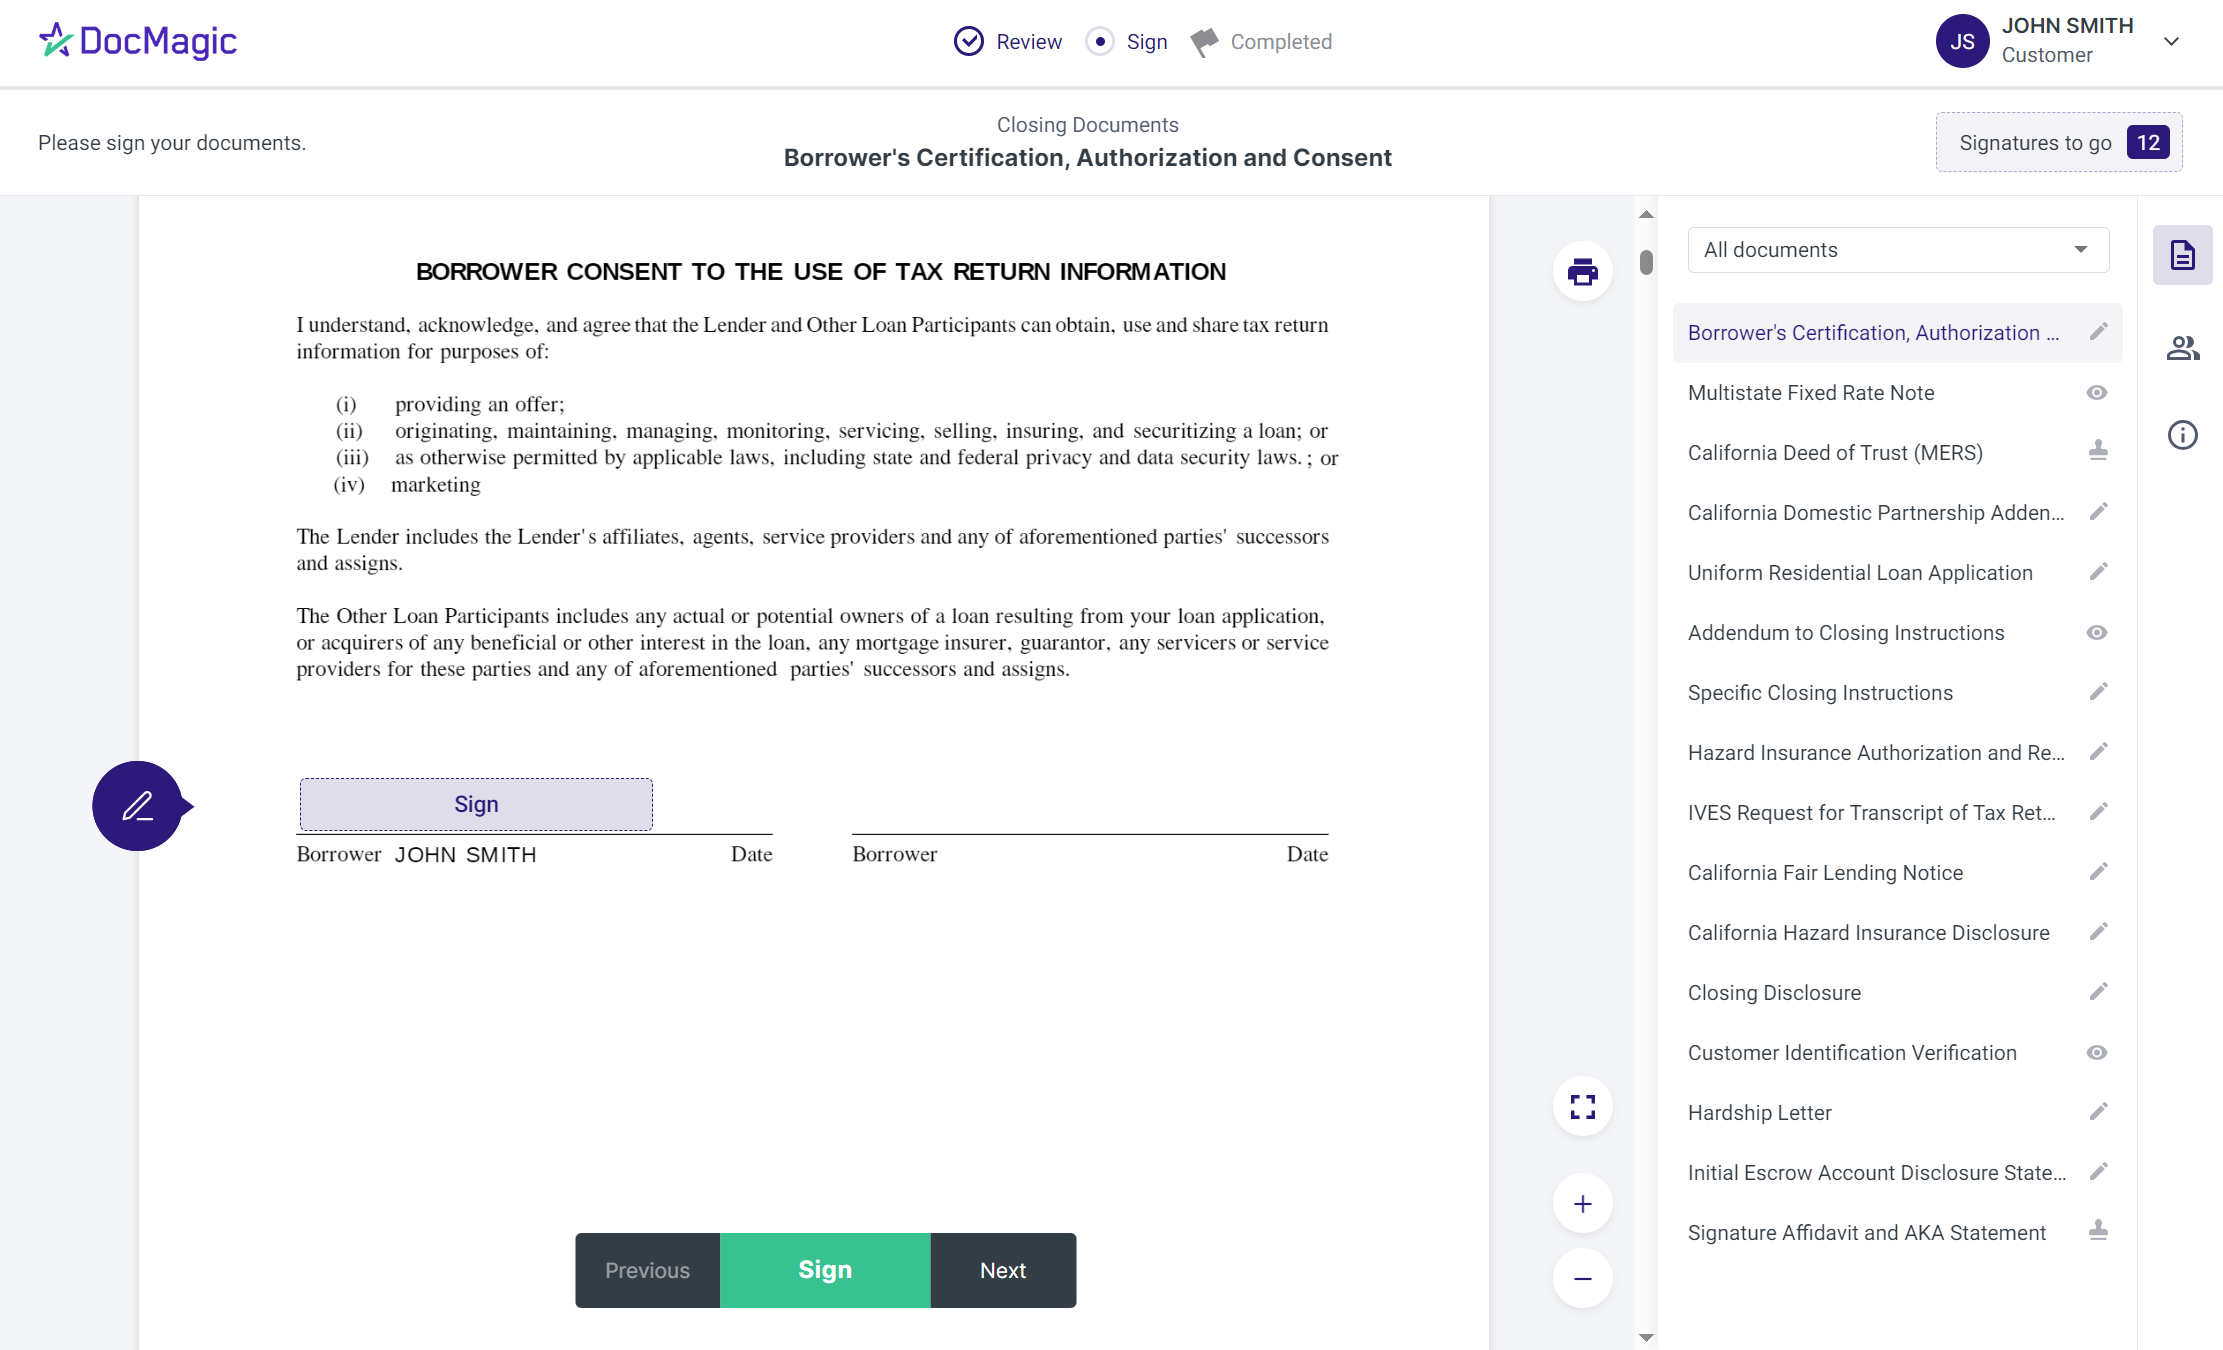
| 4. | You may see a "Preparing your documents" loading screen when you first enter the signing experience. The system will automatically take you to the first document that needs to be signed.
To start the eSign process, click "Start Signing" in the top right. You won't be able to sign anything until you hit that button and signature fields will remain greyed out.
Certain closing packages will require you to validate your identity before you can sign. Click here for additional instructions.
|
| |
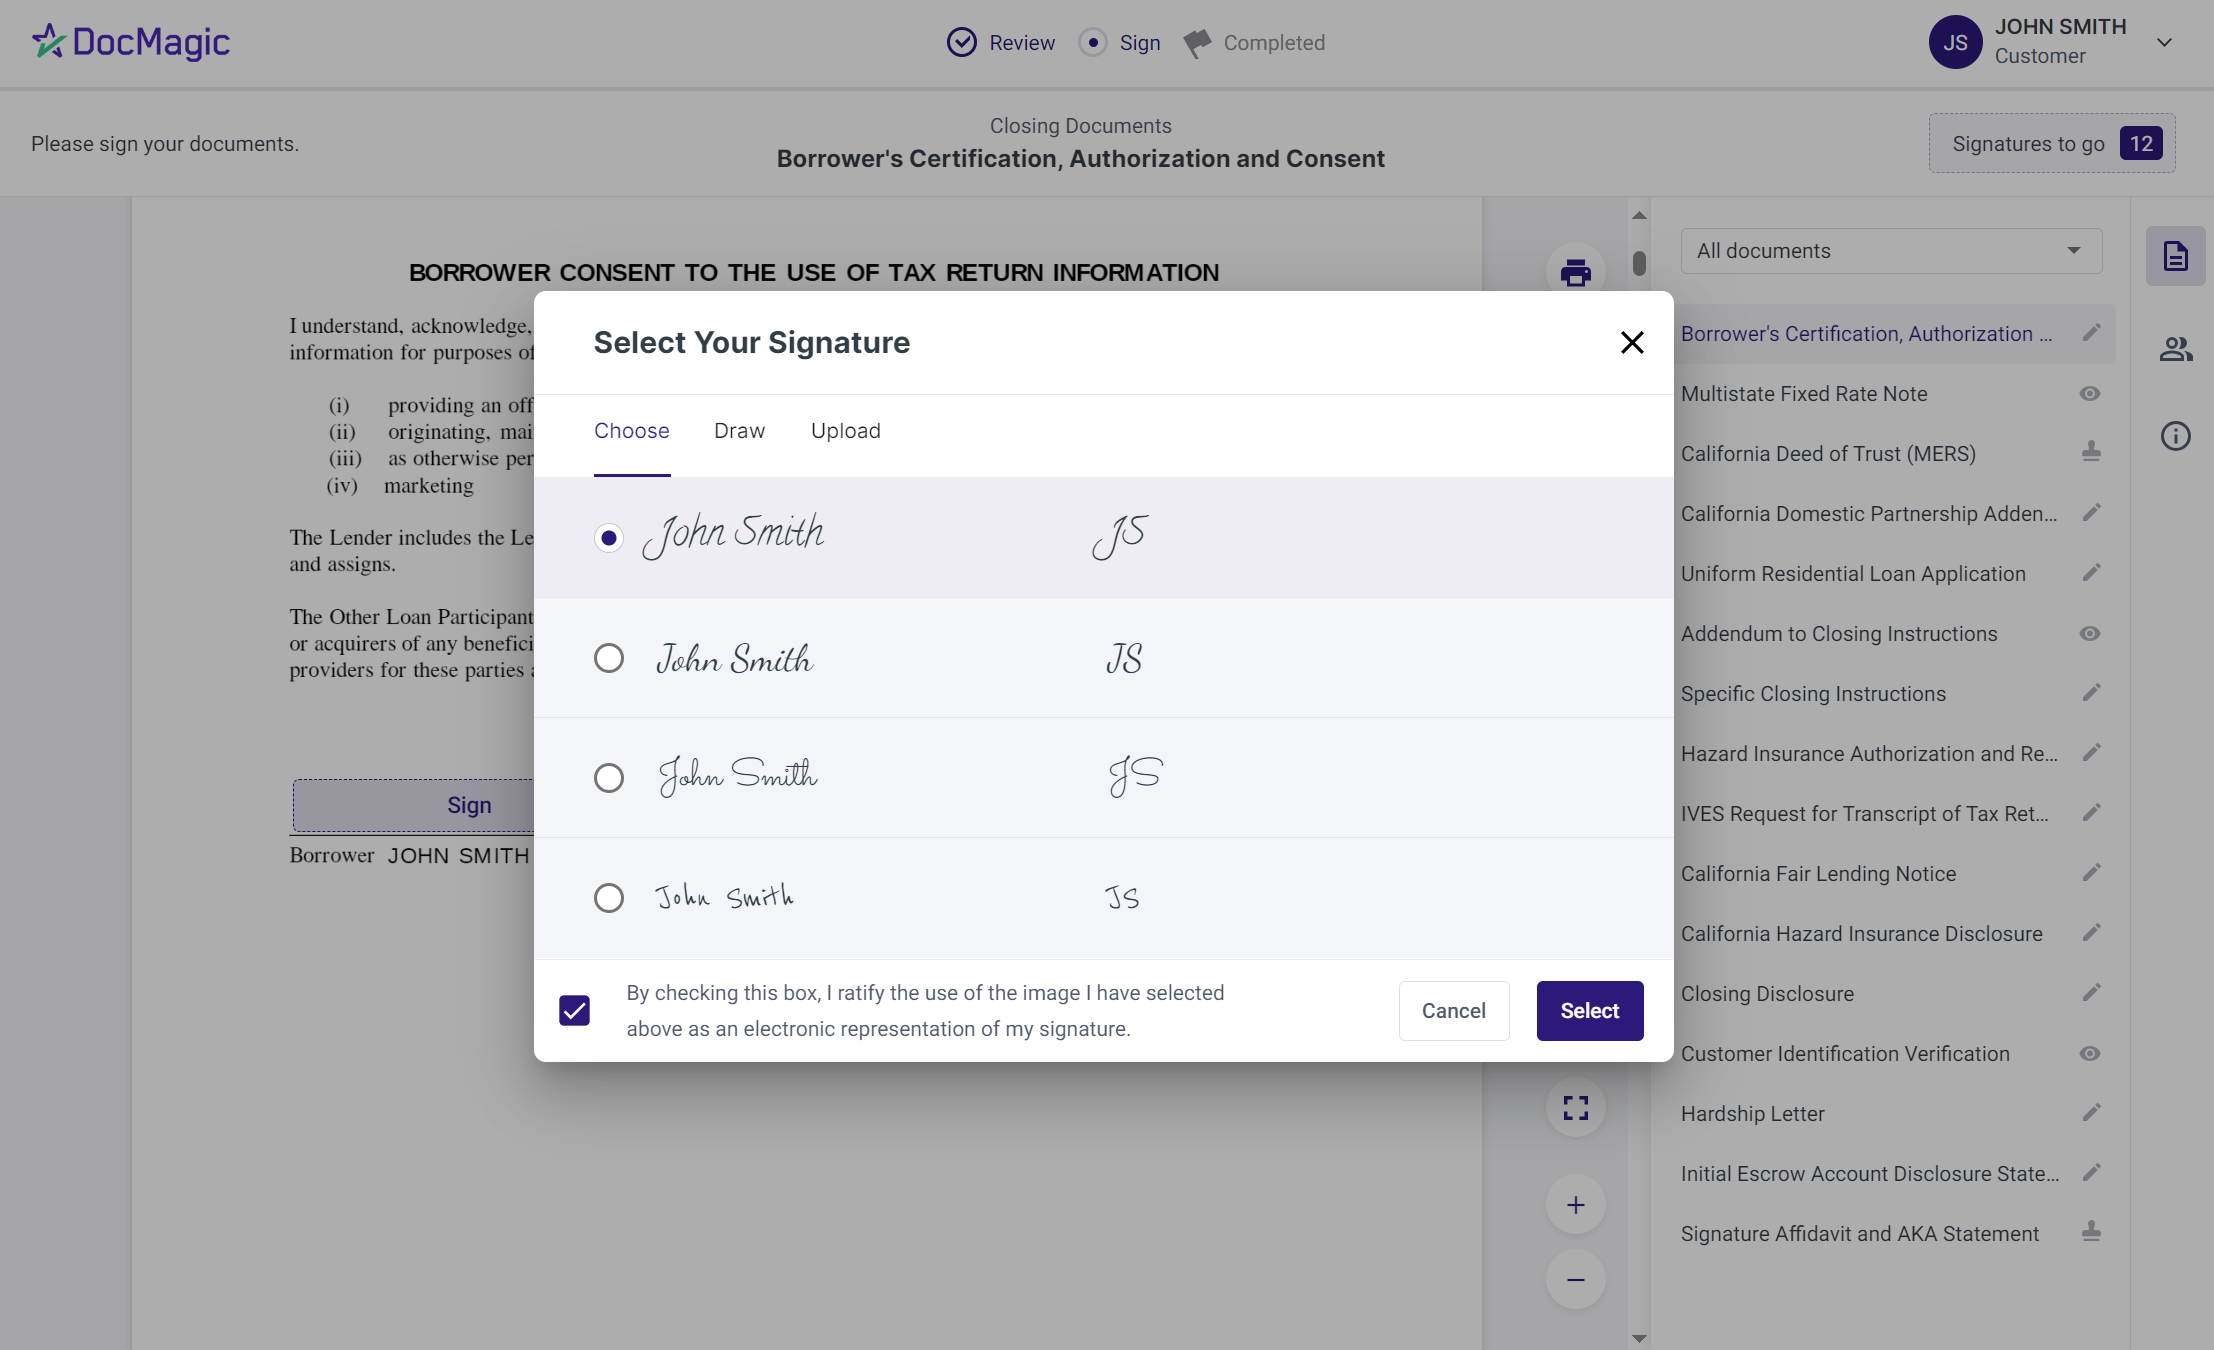
| 5. | Before you start signing, you'll need to choose your signature.
You have the option to choose from one of several pre-formed signatures. You can also draw your signature, or upload an image of it.
Regardless of what option you choose, you must check the box authorizing the use of an electronic signature and then hit Select.
|
| |
| 6. | There are three options for ClickSign®:
|
| |
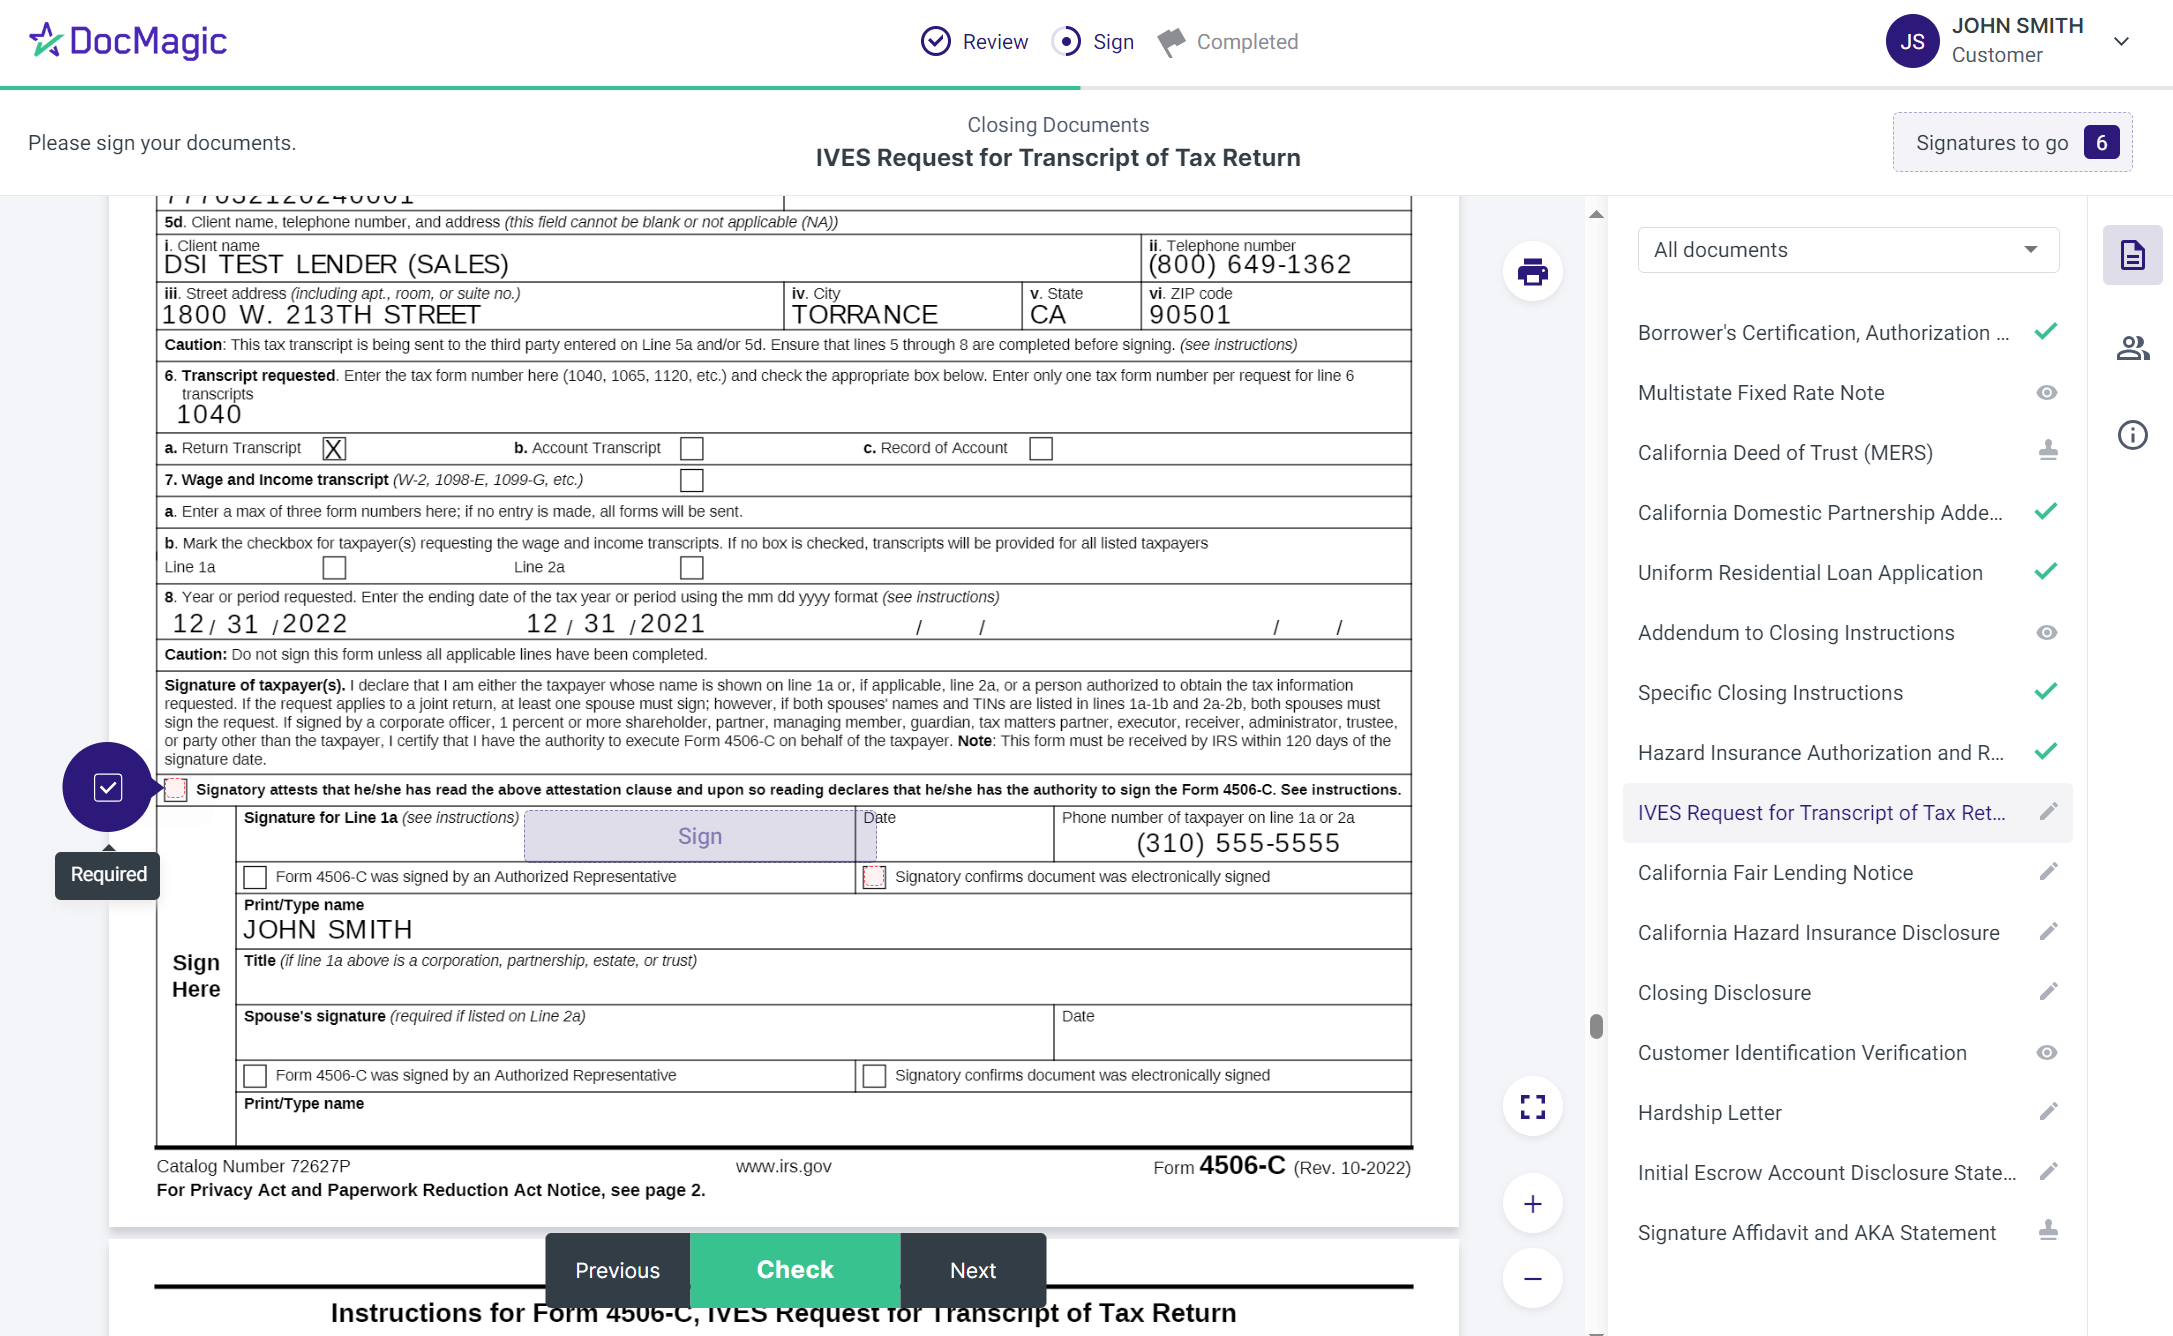
| 7. | You may be required to click a check box before signing certain documents - denoted by a purple checkbox icon. In these circumstances, you cannot proceed unless this box is checked.
|
| |
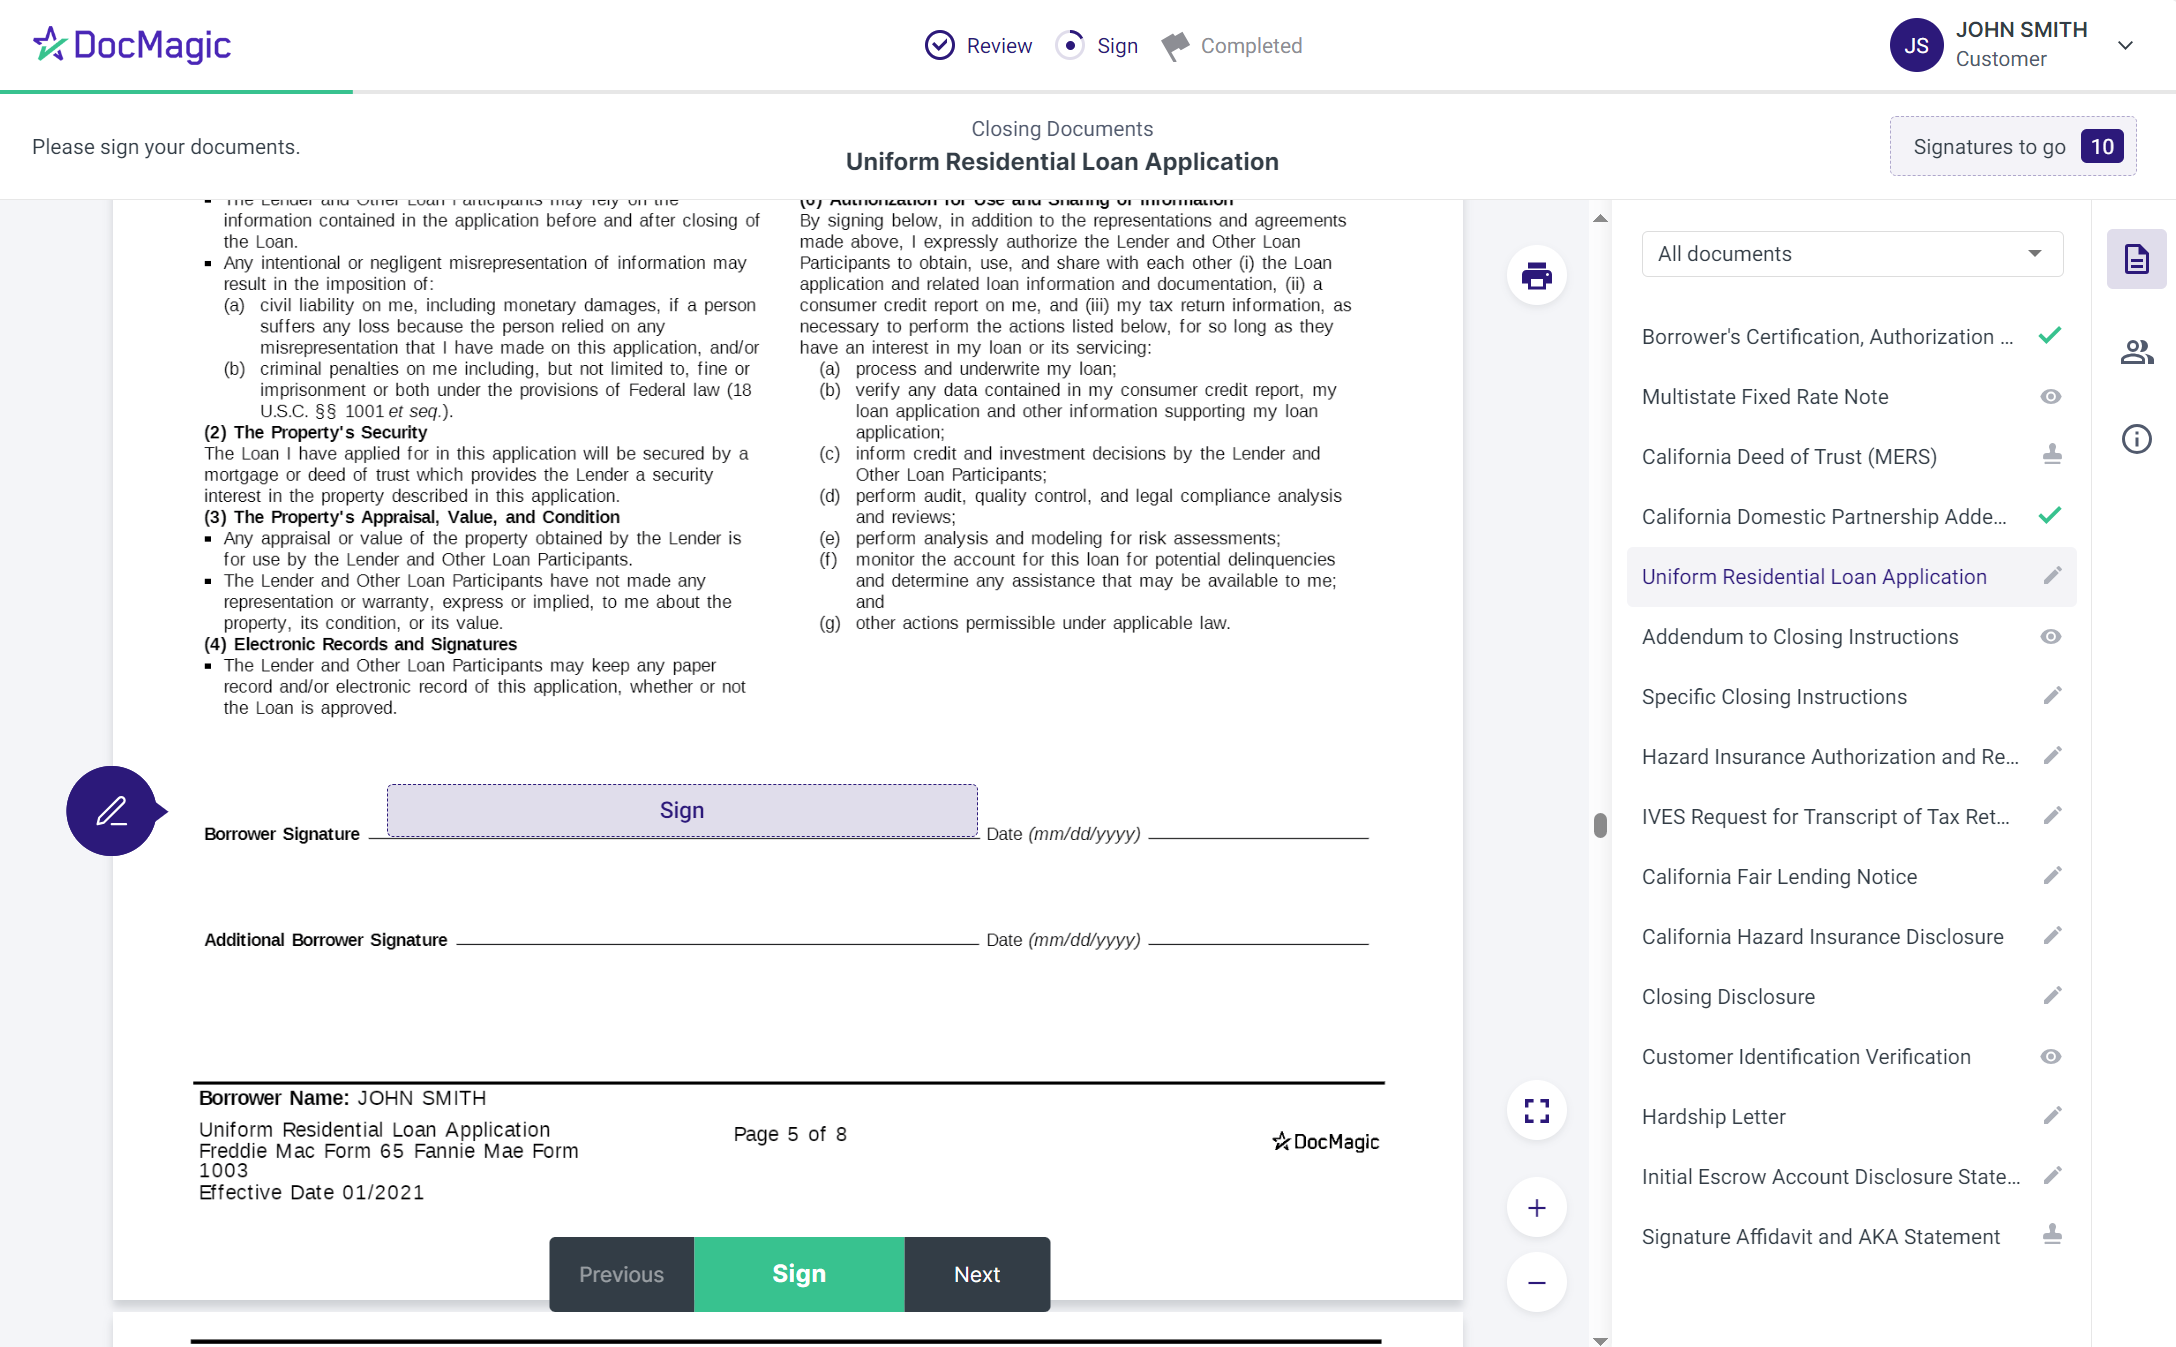
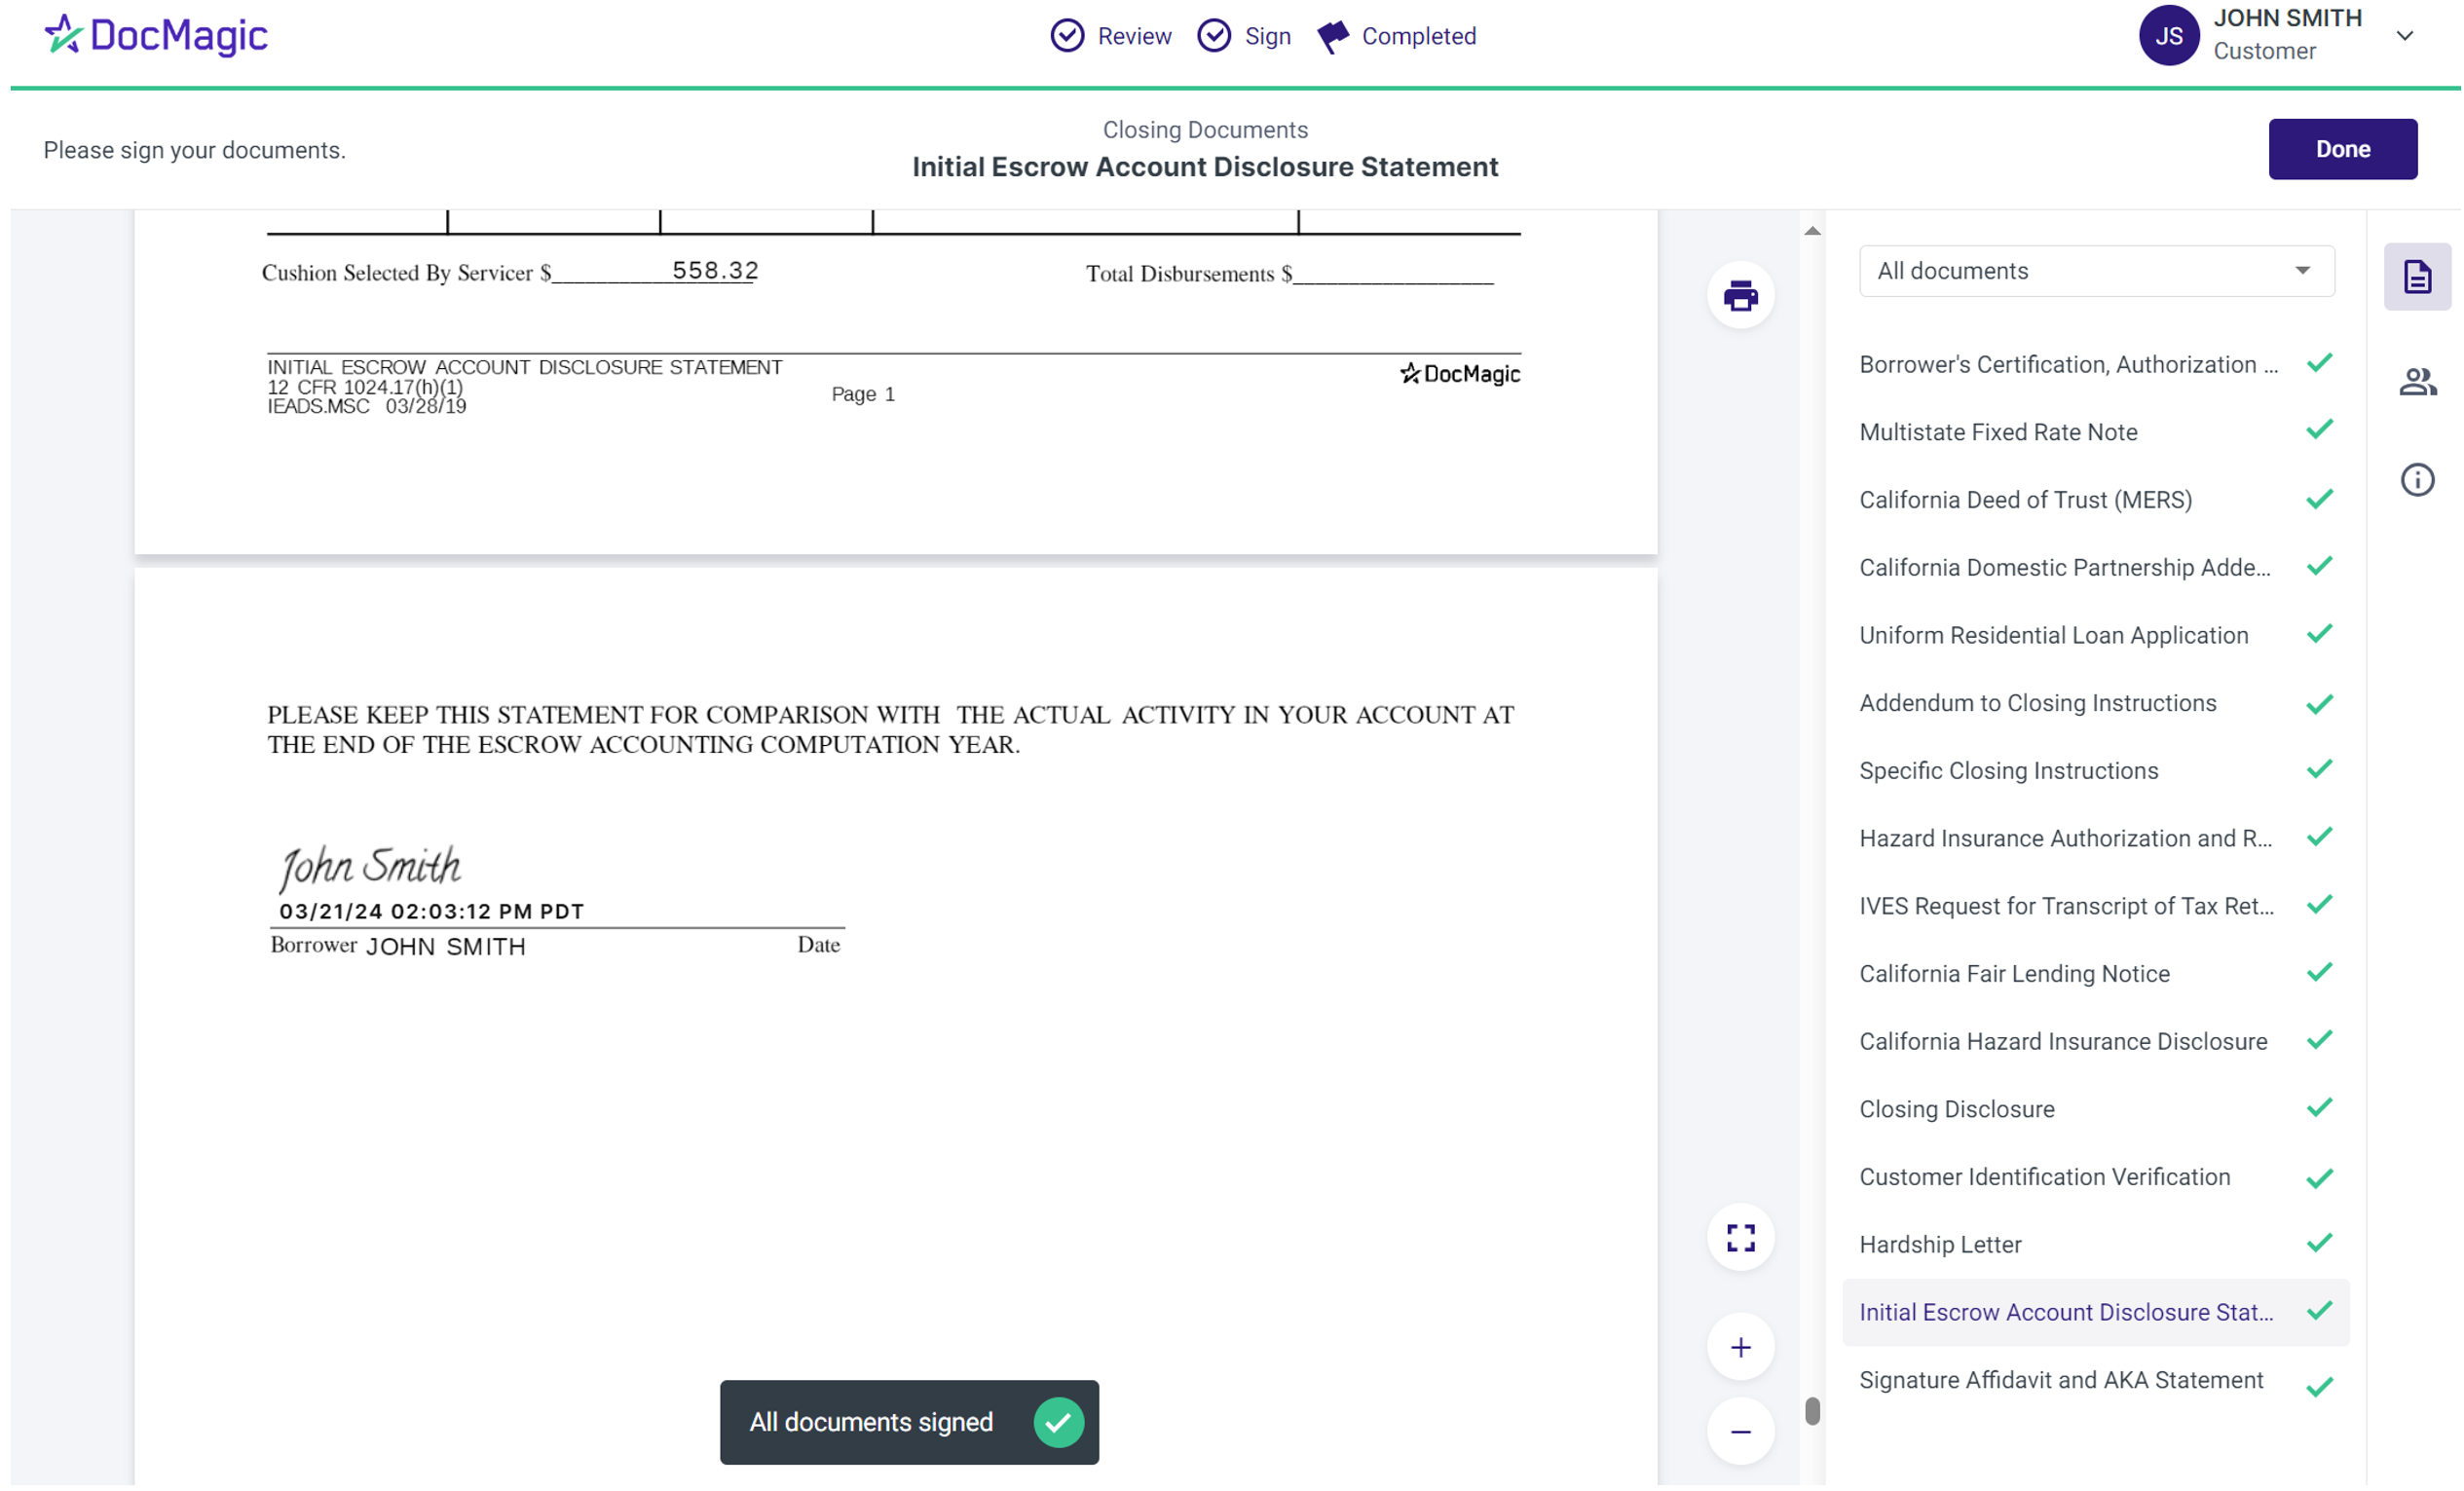
| 8. | The countdown feature, located at the top right of the screen, let's you know how many signatures remain.
You can also check the sign status of each document through the column on the right side.
|
| |
| 9. | Several indicators will tell you when the e-signing process has been completed:
Click Done in the top right.
|
| |
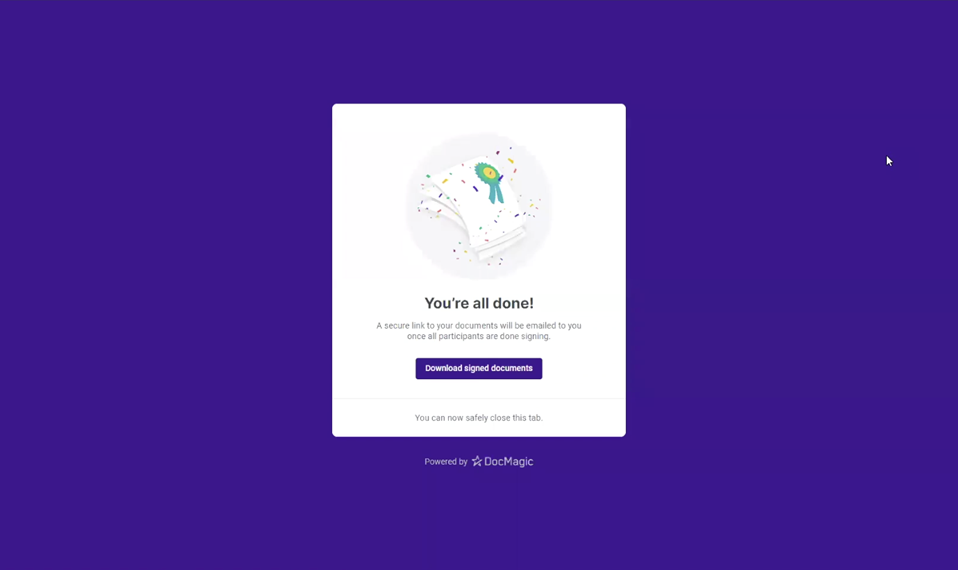
| 10. | You'll get this pop-up that allows you to download the completed documents.
|
| |
FREQUENTLY ASKED QUESTIONS |
QUESTION | ANSWER |
| How do multiple borrowers sign? | Each borrower will go through the signing experience one at a time. You can use the same computer if you like, but you must have a working camera and microphone. |
| Can multiple borrowers use the same email? | Yes, because they are identified by their Social Security number when logging in. |
| What if I see something that I dislike and wish to back out? | Click on your name in the top right of the signing window, then 'Withdraw Consent." You will need to alert your lender if this happens. |
| I keep running into technical issues. What should I do? | Before you submit a ticket, try clearing your browser cache or running the experience in an incognito window. Issues can also be caused by slow or unstable internet, VPN's, antivirus software, or browser extensions. |
| What do I do with documents that must be printed and ink signed? | Contact your title agent, they will guide you through that process. |
| What happens if I fail KBA twice? | You will need to try again after a 24 hour grace period. The Notary will reschedule for that time. |
| What happens if I get the "Application Issue Encountered" Error? | Just click "Okay", most times it will allow you to proceed. |
| How do I know when I'm done signing? | There will be a "Done" button where the "Start Signing" button was. Click there and you'll be done. |
| Can I get a copy of the signed documents? | Yes, after you click "Done", you'll have the opportunity to download them. |